- Lesson 1: Software Downloading / Installing & Interface
- Lesson 2: Basic Code
- Lesson 3: Sensors: Potentiometers
- Lesson 4: Sensor: Infrared Distance
- Lesson 5: Actuator: Servo Motor
- Lesson 6: Sensor: Force, Bend, Stretch
- Lesson 7: Sensor: Accelerometer, Gyro, IMU
- Lesson 8: Shield: Wheatstone Bridge & LCD
- Lesson 9: Programming Arduino Platforms Using a Different IDE
- Computer / Laptop or Netbook
- Arduino Microcontroller
- USB to Serial Adapter (if your microcontroller does not have a USB port)
- Appropriate USB cable (Arduino boards draw power from the USB port - no batteries yet)
The popularity of Arduino is steadily increasing and it is fast becoming the microcontroller of choice for students, hobbyists, and smaller companies. Many different electronics PCB manufacturing companies are jumping on the bandwagon and producing their own variations of the boards, as well as “shields” (additional circuits that fit directly on top of many Arduino boards to increase their functionality) and accessories. The Arduino website offers free resources and tutorials as well as a language reference to help you understand the code and syntax. In order to get started, you will at the very minimum need an Arduino board. Note that all the Arduino (and most of the clone boards) can use the Arduino software. If you are unsure what hardware to get, the Arduino USB is currently the most popular model, and these 5-minute tutorials are based around it.
- Go to www.arduino.cc to download the latest version of the Arduino software (Direct link: http://arduino.cc/en/Main/Software and select your operating system; in this case we are using Windows)
- Save the ZIP file to your desktop (you can move or delete it later)
- It is convenient to create a new folder called “Arduino” under “Program Files”. To do this, go to “My computer” -> “C:” (or the drive where the operating system is installed) -> “Program Files”, then left click once on “program Files” folder, then select “New”->”Folder” from the main Explorer menu.
- Extract the entire ZIP folder to this new “Arduino” folder
- To run the Arduino software, open Windows Explorer by pressing the windows key (usually between the Ctrl and Alt keys on your keyboard) and the ‘E’ character at the same time (there are other ways to access explorer as well).
- Go to “My computer” -> “C:” (or the drive where the operating system is installed) -> “Program Files” -> “Arduino” In this folder you will see an executable file (blue colored icon named "Arduino"), you can left click (once) and then right click and select “send to” -> Desktop (create shortcut) to have Arduino more easily accessible.
- Double click the icon on the desktop to start the software.
The Arduino interface is pretty “bare-bones”. When you load the software, the first screen you will see is a white window with several different shades of blue, or if you choose to change it there is also a dark theme. Arduino projects are called “sketches” and when you start a new sketch, several additional files are also created.
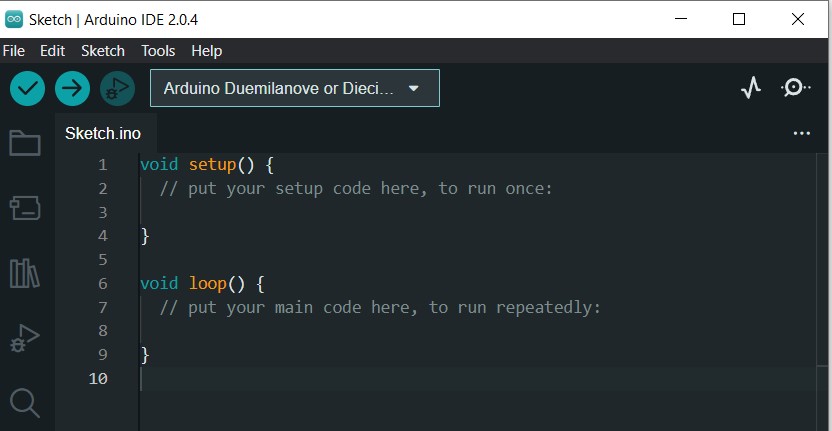
Newest: Arduino Interface (as of Q1 2023)
The main headings are “File” “Edit” “Sketch” “Tools” “Help” and several shortcut icons beneath “Verify”, “Upload”, “Debug”, “Select Other Board and Port”, “Serial Plotter”, and at the far right, the “Serial Monitor”. Note that all these icons are also available from the main menus. There is also a left panel with other shortcut icons "Sketchbook", "Boards Manager", "Library Manager", “Debug" and "Search".

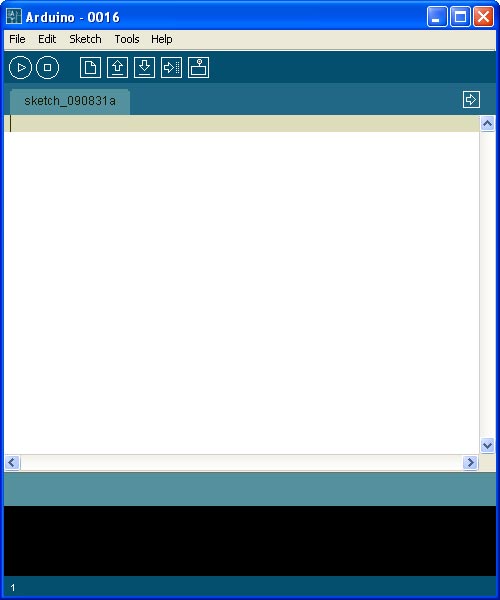
"Older" Arduino Interface
The main headings are “File” “Edit” “Sketch” “Tools” “Help” and several shortcut icons beneath “Verify”, “Stop”, “New”, “Open”, “Save”, “Upload” and “Serial Monitor”. Note that all these icons are also available from the main menus.
To connect to your board,
- Launch the Arduino software by double-clicking the Arduino icon
- Plug one end of the USB into the Arduino and the other end into your computer.
- Your computer should detect the new device and tell you if it has been installed correctly. At this time, two things can happen; if you have an older board using an FTDI chip (ex. Duemilanove-based), Windows should detect it and you're good to go to the next step. If you have a board that uses an ATMega chip to convert USB to serial (for example the UNO), you will need to install the drivers manually.
- Take a look at your board's main processor chip (usually found between the pin headers) to see which you have. It will likely be the ATMega168, ATMega328, or a more powerful ATMEga640. ATMega1280 etc
- In the software, select “Tools” -> “Board” -> You will get a list of possible boards. If you have a different board, select it from the drop-down list; if you have purchased a compatible board, that manufacturer should indicate which board to choose.
- In the software, select “Tools” -> “Serial Port” -> COM # (note that if you have several COM ports, you will need to go to Device Manager to see which COM port is assigned to your board.
You're now ready to start coding!


