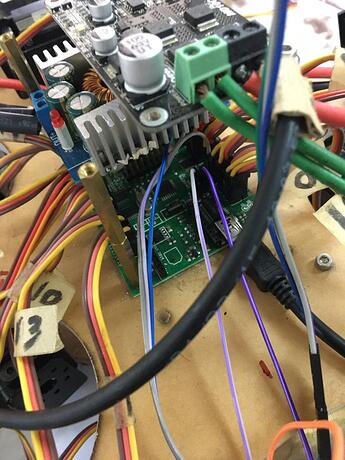
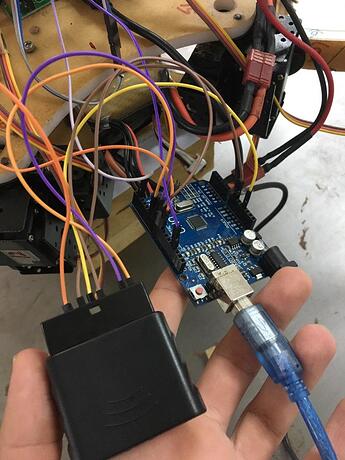
Hi, my project consists of a Hexapod robot. I am using a ssc32u servo controller to control my 18 servos (3 servos per leg, coxa tibia femur) to make the robot move. The problem now is that i am not used to this controller. Usually I use arduino or raspberry pi that have their own softwares where I can write the codes and send the commands to the controller via usb serial com. I have tried the SSC32 Servo sequencer utility and the servos work perfectly, but this software is very limited as it is quasi impossible to have an algorithm with it (is it?). So I have been suggested to develop my own GUI (I have never done this before). I would like to know what are the steps to do this. If there is anything I can refer to.
@mouadh92 Welcome to the RobotShop Community. Given that you’re able to create your own interface for Arduino or Raspberry Pi, you can always use one of these two with the SSC-32U to control the servos. The SSC-32U is a dedicated RC servo controller which accepts a simple serial protocol which can be sent from Arduino (or example). Note that there already exists sample code (“Phoenix”) created by the hexapod gurus here which runs on an Arduino. Note however that the input is intended to be from a Lynxmotion PS2 controller, so you’ll need to modify it as you see fit. Refer to the bottom of this page for a bit more info:
http://www.lynxmotion.com/images/html/build99f.htm
If you want to create your own GUI, you’ll need to determine what you’d like to start with. For example, the SSC-32U sequencer was created using a software called FlowBotics, which can get you started with GUI creation very quickly:
However, you can choose a programming language and start with the basics, which would be a project on its own and be great experience. If you’re interested in UI creation specifically for robotics, the following terms will help jumpstart your research:
- Robotics Suite (MRDS, AnyKode)
- Robotics Middleware (ROS, Urbi, OpenRDK)
- Robotics Simulator (Gazebo, Pickit, Roborealm)
- Programming (Arduino, Python, Simulink).
For example you can use Matlab to create a GUI:
Well, if you have a look at some examples that were made for the Lynxmotion AL5 robotic arm series you may find something useful. You can see them here [GitHub].
More specifically, I think the .NET example has a form and sliders to control the joins of the arm, so that may be a good starting point.
I’m personally really fond of using .NET (especially since the whole open source/.NET Core stuff happen), so let me know if you need pointers on that.
Thank you for your answers. I have one question, if i want to send some code to my ssc32u using a terminal. Is it possible ? Do you have any reference for that
The commands to send are intended to be “human readable”. You can see the protocol here starting on page 24 (PDF).
You can use any serial terminal, but keep in mind that some include the carriage return, while in other software like Arduino you can use the println command.
Thank you, this is helpful, I already started with Lynxterminal. I managed to make my servos move using it. now I need to write a proper algorithm in order to make the robot move in the position desired. I am planning to attach a pen to my robot and write something on a paper. I just need to find the inverse kinematics, thus the right servo angles in order to move the robot (without moving the feet) to x and y directions and finally be able to draw a triangle for example.
Very interesting project! Keep us posted as to your progress.
Well, quite a bit of discussion has already happen around this before on this forum.
You can see a basic 2D IK algorithm in Python here.
You may want to read these:
-
Topic on AL5D and XYZ positioning. 2D IK explanation (with diagrams!
 ) starts here.
 - More info in this topic.
Good luck with your project! 
As you may already know, the further your end effector (by default a gripper) from the base, the hard it is to keep a precise position. So, I recommend that you setup your drawing as close to the base as possible.
From previous testing I’ve done, the AL5D can hold relatively well ~125g at full reach (extended horizontally; worst-case). That being said, precision is obviously not great when near maximum load (similarly to when far from base).
Also, if using some kind of rigid writing implement (pencil, pen, etc.) you may want to add a spring or something else to help steady it against the writing surface without overexerting (or even stalling!  ) the RC servomotors in your robotic arm. This is where a marker with a long, soft tip is pretty good to act as a buffer between hard components (robot arm, marker’s plastic, the writing surface) to prevent heating up the motors too much.
"the further your end effector (by default a gripper) from the base, the hard it is to keep a precise position. " I’ve noticed that so what I did is attaching a spindle that is connected to a motor and can move in the z direction thanks to its scotch yoke mechanism.
"you may want to add a spring or something else to help steady it against the writing surface without overexerting (or even stalling! " Didnt think about this. Thats great. thanks for all the information
Neat!
No problem! Glad to be of help.
If you feel like it, I recommend that you document your project here. The sooner you start the easier it is…  And if you ever get stuck or have more questions it’ll be easier for others to check out what you’ve done and help! And I’m sure the RobotShop community would be interested to see more about it, too.
Lovely, I will do that.
Hi mouadh92,
I read the suggested guidelines for you, but did not find a link to the Beeptoolkit platform, which is nominated by RobotShop among the other platforms listed above.
Our instrumental platform allows not only to organize the simulation of your algorithms, but also provides the possibility of external I/O control with 4 classifications of robotics, including an individual graphical interface.
In addition, the platform allows further modification.
Some details and examples of GUI design are available here.
Good point. Though the original post mentioned Arduino and Raspberry Pi, so the following recommendations:
Made a lot of sense as they wouldn’t require extra hardware. Also, even the non-open source recommendations above are at most 50-100$. From what I can see here the Beeptoolkit seems to be over 700$ which for a DIY/hobbyist project is probably too much (the same cost or more than the robot itself!).
Hi @scharette and @cbenson, maybe you guys can help me here.
So I have made some progress for my project. I had managed to send some commands from arduino uno to ssc32u. My plan is to use a PS2 controller to control my robot. I have passed through some projects such as Phoenix but I am confused in something: How can my arduino software detects the pin servos of ssc32u? For example: i have a servo connected to pin 4 on ssc32u, if i want to send some code to this pin using the arduino software, how can i do it ? previously i was sending the terminal commands, for example:
Serial.println("#20 P1500 T3000");
But now I need to build some functions to control the robot using the ps2 controller
Since you’re using an Arduino Uno, and you need the normal Tx and Rx (digital pins 0 and 1), you’ll need to use software serial
You need to include it within your program. Take a look at the example:
If you have a servo connected to the SSC-32U’s pin 4, the command would be:
#4P1500T3000
Where 1500 is centered and the move time is 3 seconds.


