

Build your first FPGA based robot


FPGA is a buzz word in the electronics industry. It is used in a range of applications. What is FPGA? Xilinx Inc, a renown FPGA manufacturer, defines Field Programmable Gate Arrays (FPGAs) as semiconductor devices that are based around a matrix of configurable logic blocks (CLBs) connected via programmable interconnects. FPGAs can be reprogrammed to desired application or functionality requirements after manufacturing. According to Renee's article (Advantages of FPGAs), increasingly sophisticated tools are enabling embedded control system designers to more quickly create and more easily adapt FPGA-based applications. In manufacturing and automation contexts, FPGAs are well-suited for use in robotics and machine tool applications, as well as for fan, pump, compressor and conveyor control. FPGAs are often used to reconfigure I/O module functionality.
FPGA wasn't accessible to learners. The FPGA development boards were expensive. It was also hard for beginners to learn the hardware description language (HDL) or understand how to use the computer aided tool (CAD) to load the design on FPGA. However, things have been changed. There are many cost-optimized FPGA boards in the market. Some come with free software libraries. Therefore, you can program FPGAs from the high level software language including C, C++ and Python.
For example, you can control the robot with FPGAs and learn the FPGA design flow and architecture. A student intern from Digilent Inc builds a robot powered by Xilinx Artix 7 device. ArtyBot, is built on Digilent Arty A7-35T FPGA board and Sparkfun Shadow Chassis. He loads Microblaze, Xilinx free soft processor, on Arty A7-35T and writes C based software applications to control the robot.
Hardware Specification
Artybot contains the following parts
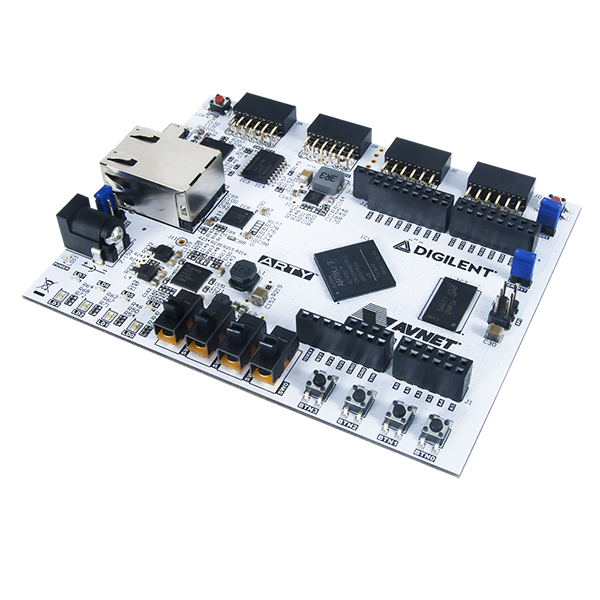
- Digilent Arty A7-35T (see below image)
- Digilent Pmod DHB1 Dual H-Bridge Motor Controller
- Digilent Pmod MaxSonar Ultrasonic Range Finder
- Digilent Pmod JSTK 2 Two axis joystick
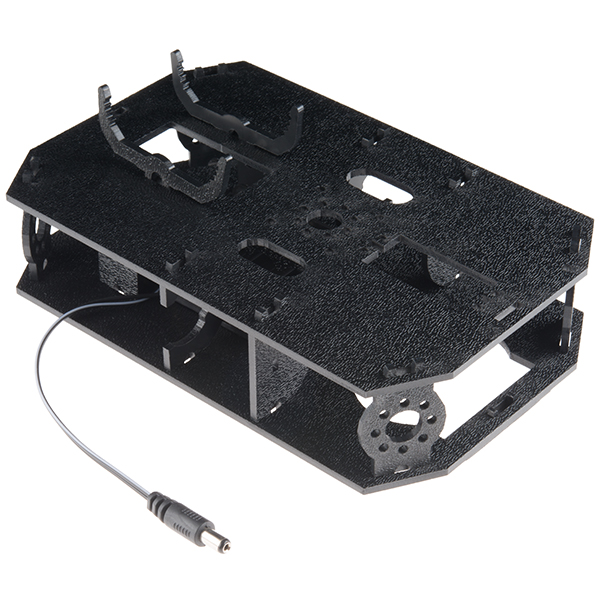
- Sparkfun Shadow Chassis
- Motors, wheel encoders, wheel from Sparkfun
- 5V power bank from SparkFun to supply power to Arty A7-35T
- Four rechargeable AA batteries to supply power to motors
The assembly instruction is available at the ArtyBot project page

Software Library
The library for the ArtyBot provides driving and steering functions. Here is a brief overview of the library functions:
- artyBotInit() and artyBotEnd() are to be called at the beginning and end of an ArtyBot application, respectively.
- driveForward(double distance) and driveBackward(double distance) drive the ArtyBot in the direction indicated by the given distance in centimeters (cm). Then, the robot will come to a complete stop before the next command.
- turnLeft(int degrees) and turnRight(int degrees) turn the ArtyBot by the angle given in degrees in the direction indicated. The way the robot turns is by driving one wheel forward while driving the other wheel backward. This way, the center of the robot stays in approximately the same place. At the end of the turn, the robot will come to a complete stop before the next command.
- swingTurnLeft(int degrees) and swingTurnRight(int degrees) turn the ArtyBot by the angle given in degrees in the direction indicated. The difference with these functions is that they drive one wheel forward while leaving the other stationary. This turn makes the center of the robot moves forward and to the left or right. The robot will come to a complete stop before the next command.
- delayUntilStop() will block execution until the robot comes to a complete stop.
Project files are available at Digilent GitHub
Programming ArtyBot (Xilinx Artix 7 Device)
You can download free Xilinx Vivado Webpack CAD tool and install that in the computer. Then, you can follow the steps below to program the FPGA device on the ArtyBot.
- Be sure that ArtyBot.elf (located in ArtyBot/Debug/) has been updated with the most current form of your program. If ArtyBot.elf is out of date, update it by right-clicking the ArtyBot directory in the Project Explorer and clicking Build Project. The project can also be set to build automatically when changes are made to the software. This setting can be enabled by clicking Project in the upper toolbar and clicking Build Automatically if there is not already a checkmark next to it.
- Click the Program FPGA button in the toolbar. In the right half of the Software Configuration section, there is a cell that says 'bootloop.' Click the right side of this cell to reveal a drop-down menu. Select ArtyBot.elf from the list, then click Program. This will generate a bit file with the MicroBlaze's memory initialized with the program that you have written.
- When this process is done, click the Program Flash button in the toolbar. Next to Image File, click Browse and navigate to the SDK workspace, then into artyBot_wrapper_hw_platform_0. Select download.bit and click open. Next to Flash Type, select n25q128-3.3v-spi-x1_x2_x4. Click Program.
- The Arty A7-35T's non-volatile memory is now programed with your application and will run on the FPGA on startup.
You can check out the project details at ArtyBot Project Page
Thanks for helping to keep our community civil!
This post is an advertisement, or vandalism. It is not useful or relevant to the current topic.
You flagged this as spam. Undo flag.Flag Post
Your post is currently under review by our moderation team. The review process usually takes up to 48 business hours.
You can track your post's status in the "My Content" section of your profile. Once approved, it will be published and visible to others.

Thank you for contributing to our community!