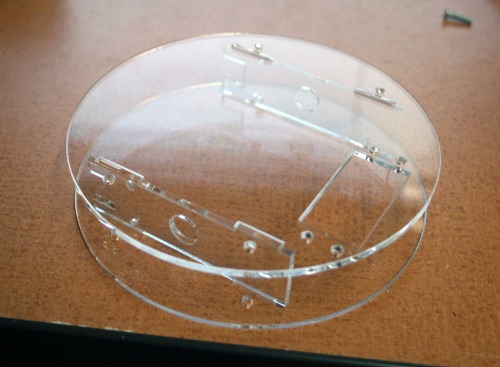
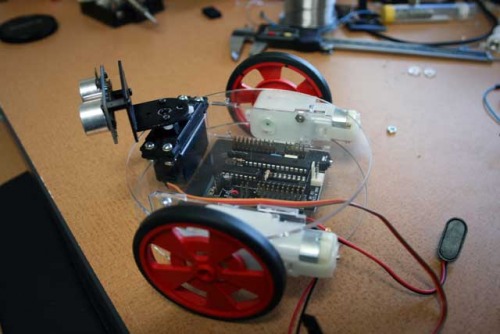
Well, I got busy tonight and designed a chassis for the GM series of motors. The GM motors are really tops with price/performance... at $5.50 each, they are VERY hard to beat.
I thought you might like to see a video of the chassis being cut out, so it's included. The material is plexi .093 thick - it's clear, but has a blue protective plastic coating designed to protect it durring cutting and handeling - plexi scratches easily.
I designed this because there are absolutely no good chassis for the GM series motors, and that's a shame because they are so nice.
I've got to mount a few more parts, but it should be done over the weekend. Thanx to Fritz for sending me some code to build on :-)
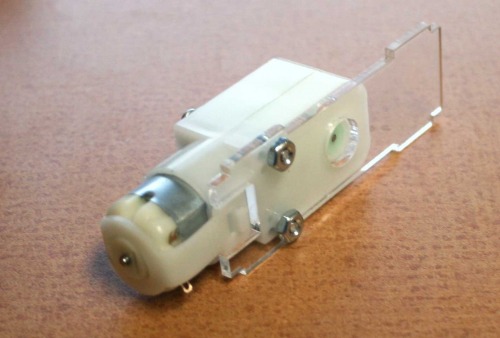
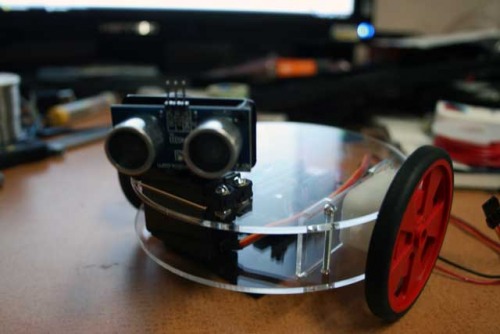
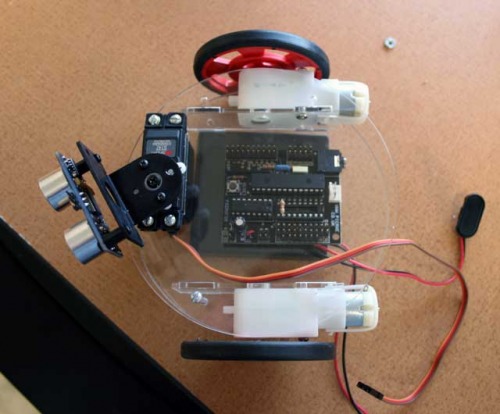
Everything has a solid mounting point on the chassis (screws) and the servo is a fuill size JR ST47, mounted off center so the shaft is centerline preventing cone errors durring scanning.
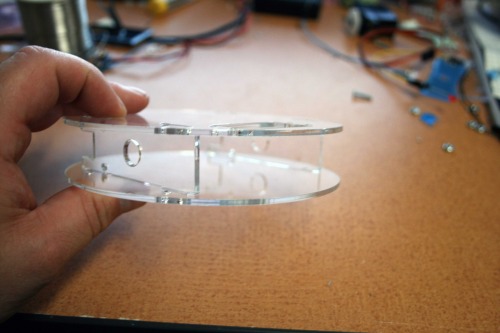
I started out as a machinist so I try to make everything with extremely close fitting tolerances and built to last - the deck is screwed together, but the interlocking tabs would hold it together by friction alone. Motors are hard point mounted with screws and add to the rigidity of the chassis.
Just a few more tweaks and I gotta figure out the battery configuration...
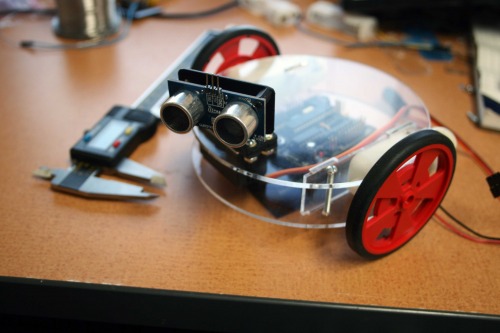
test bed for GM motors - currently sonar / avoidance
Actuators / output devices: GM9 motors (pair) JR ST47 servo
Laser cutters sure look like useful things to have access to. What kinds of places tend to have those? I don’t even know what to look up in the phone book. Provided I found one, what would a chassis like yours tend to cost, if I brought something like a CorelDraw file? Just curious whether this is something I should be looking into more seriously.
Might try sign shops - they tend to use laser cutters to cut out plexi letters.
I use my cutter/engraver to engrave marble and granite mostly - www.dragongraphicscorp.com my sight gives good examples of the type of work I usually do. I’m going to expand the site and offer cutting services for hobbyists then it’ll be a lot less like work to me!
The rest of the industry is high as a cats back - roughly $120 per hour, $60 minimum, but I say this chassis is about a $15 dollar item (materials included).
Thanks for the info. Huh. Yeah, $60 minimum is not worth it to build a simple robot for fun, but if you do start offering your services at rates closer to that $15 figure for work of this size and complexity, hell, I think just from this site alone you’d get a good bit of business I know I’d like something more permanent than plywood for my robots, and I’d probably make good use of something like this if I could spend $15-20 and end up with a chassis that fits exactly the way I want.
Or just for building brackets and other such structures, to mount servos and motors exactly where I need them.
Of course, I don’t generally do too much planning before I start cutting. Maybe in my workflow, this king of thing would be better for a second step, after building the “first draft” in plywood. Either way, it’s an interesting prospect.
I think you can get the navigation smoother. Instead of just driving until you hit something and then look left and right and pick the best way, you can constantly turn his head and measure. This gives way better results. Look into this for more info.
Nice work, and I’d like to use your laser cutting services too, if you are going to offer it for hobbyists.
First drafts are always good - saves money down the road. I’m personaly fond of card stock templates - nice cheap way to make sure everything fits. Also, the hobbyist’s best friend is an inexpensive set of digital calipers - they’re invaluable for layout. I took all of the measurements off the servos (including center points for screw holes) and ALL of the trick mounting points for the GM9 motors with calipers. Each individual component you wish to fit takes less than 5 minutes to fit properly the first time with proper measurements and the calipers are the right tool for the job.
Also, the chassis you make needs only the basics - don’t worry about every little screw hole that you may ever need - plexi is easy to drill if you need to add a few more mount points.
I started working with that code last night - the Ping has turned out to be really quirky. all of the > < logic is reversed from what’s written for the SRF05! The code from th second example drives the servo and pulses the Ping and produces good measurement results - now I just need to fix it for the Ping… or abandon ship entirely and order a SRF05.
I’m happy to offer the cutting services at hobbysts prices - let me see if I can come up with some basic “good practice” design rules and tips for layout.
Regarding the cutting-shop: That would be cool. If you want, we can give you a permanent link and your own page / paypal low tech "shop" here on LMR. PM me if you would like it