My first robot : a quadruped with 3 DOF by leg

Update 2 : new video of the "spider style" walk

Hi everybody my name is MoX First i want to say sorry for my english : I'm French ...(and sorry for my president too...lol)

So this is my first robot, a quadruped with 12 standard servomotors and 3 dof by leg.

I make all the part myself with aluminum plate.

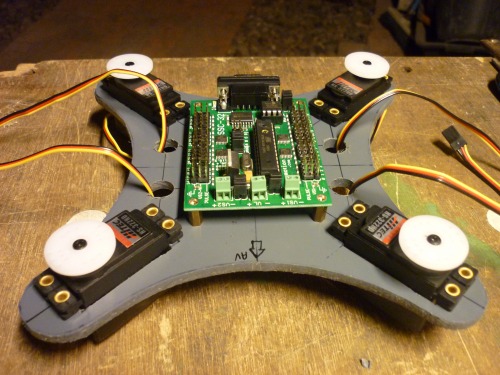
For now, it's just control by my computer link to it with a RS232 connection, and a SSC32 controlling servomotor card by Lynxmotion (a real good card i think :)

Today I'm trying to control it with an Arduino car but the com with UART between the two cards is not operational for the moment :( I'm also trying to include a URM37 ultrasound sensor :)

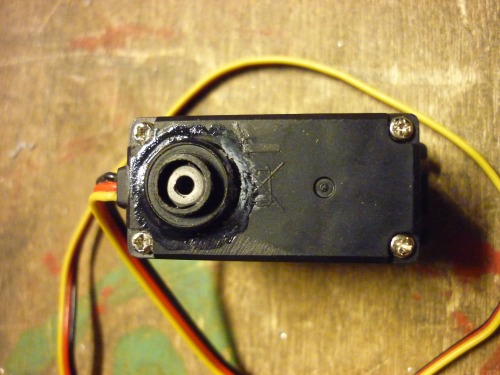
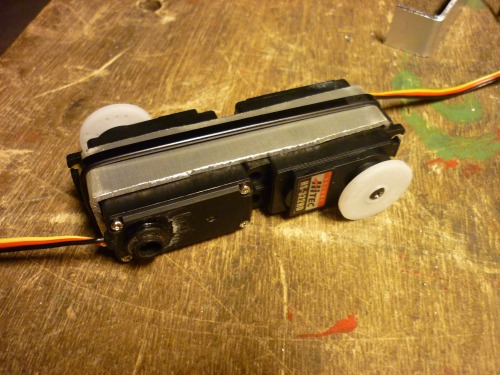
The first step was to create a second axis for all servos.

I used some support of roller-blade ball-bearing, and I stuck it to the servo with cyanoacrylate adhesive :

Now , let's use my best enemies (which offer me a lot of blister ! ) :  Saw, file, and tech vice (lol not the same signification in French MDR)

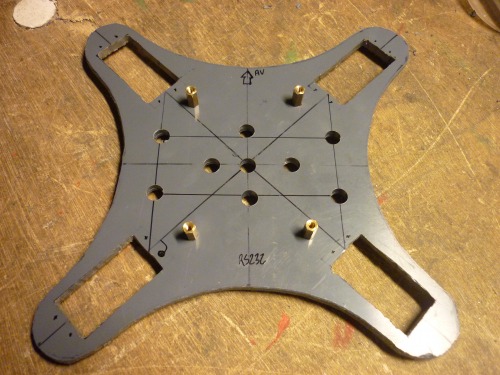
The body :  PVC plate (dimensions 180x180mm,5mm of thickness) :

Now the legs : I am going to use the terms of "shoulder", "leg" and "scratch" for the 3 parts of the legs... (sorry I know that my english vocabulary have to increase .....)

All the aluminum parts are from an old 19" computers rack ( 2mm of thickness )

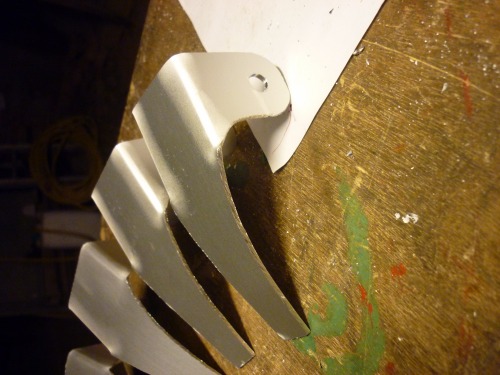
First type of servos support : for the 2 servos of the "shoulder"
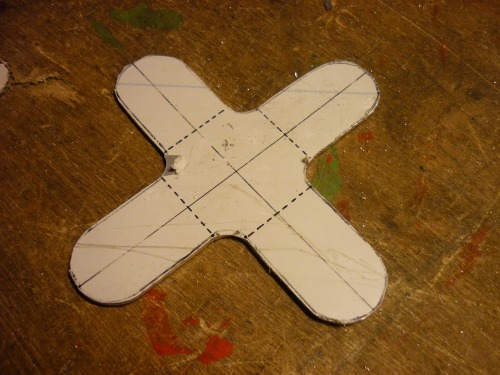
I have fold the plate following the dotted line, using a tech vice :
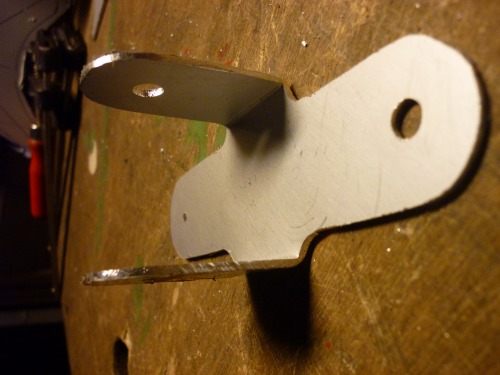
It's very important to align correctly the axis of the servo with it's new axis (the bearing part)  and to follow this alignment with the aluminum support of servomotor. Personally it's not perfect (i wish i had a numeric CNC :) future project ?!

when you love, you don't count (French proverb)...so 3 more to make ... or you could count your blisters LOL : 600W blister by hand !! thank you Miss metal file ! ........ heuuuu if you don't understand the blister thing....just French technical joke LOL

And the result with servos , but not yet fix to them ( one of them is on the "leg")
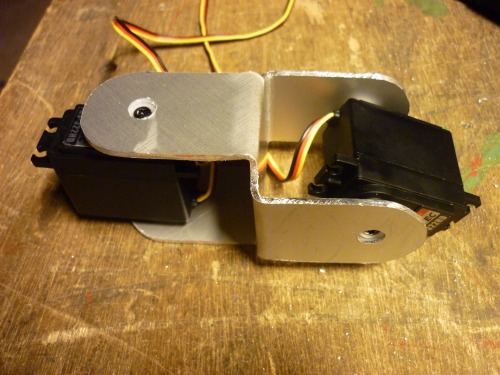
The result with the 4 supports of "shoulders":


Now the support for the "leg" : more simple than the other LOL ...... but... but ...it's just a poor piece of aluminum ?? ... YES o_O
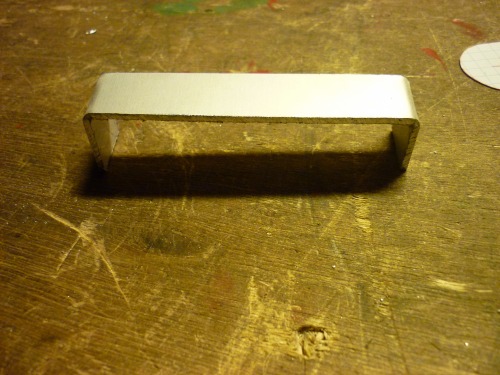
The leg:
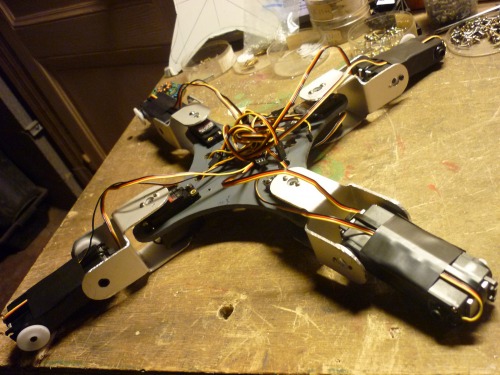
The result with 4 legs :
Now my favorite part : the scratch:

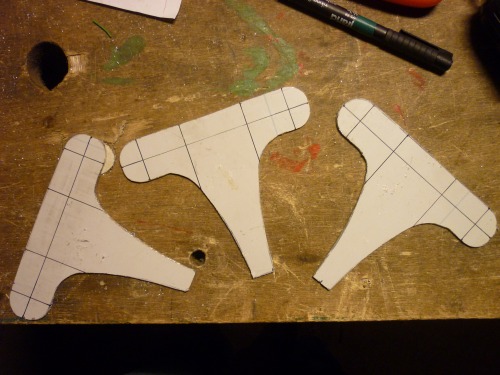
Same idea : Saw, file, and tech vice ...and blisters !

Result :

ET VOILA !


It just trying to walk correctly for the moment :)

  • Actuators / output devices: 12 servomotor HITEC HS322HD
  • Control method: SSC32 card and PC with RS232 communication / free soft by Lynxmotion
  • CPU: Atmega168 on SSC32 and PC for com
  • Power source: external lab alim
  • Sensors / input devices: URM37 ultrasonic (in devellopement ..... )
  • Target environment: indoor flat surfaces

This is a companion discussion topic for the original entry at https://community.robotshop.com/robots/show/my-first-robot-a-quadruped-with-3-dof-by-leg

amazing

that is awsome and I am trying to do this for my first bot http://www.pololu.com/docs/0J42 man where dide you get the code and did you have software or mechanic background.

**reply to my first comment :slight_smile: **

Hi robomaster18

Thank for that comment ! And sorry for my english : I’m French :slight_smile:

To answer your question, i get the code from nowhere :slight_smile: but i make some macros with the free software of Lynxmotion (you can download it freely at http://www.lynxmotion.com/p-567-free-download-lynxterm.aspx#downloads).

I bought a Lynxmotion SSC32 card that could control 32 servomotors with 1 micro second of resolution !! And for the moment i send to it commands with my pc and a RS232 communication.

So my code is follow-up of positions.

For my background, i have the luck to have a bachelors degree in computers programming and network, and an associate degree in industrial maintenance.

But the most important is not the background but the curiosity :slight_smile:

If you want photos of the evolution of the mechanic part, say it to me and give me your mail i could send to you photos of all the construction steps :slight_smile:

Good luck with your robot :slight_smile:

Bravo! Nice robot, I like

Bravo! Nice robot, I like its moves. I’m french too :slight_smile:  Will keep watching your progress (mon ami). Thanks for sharing.

Cool design, well done.But

Cool design, well done.

But please do not send emails with pictures to the guys, just post them here so we all can see the step-by-step development.

Great design…

… and very smooth motion !

Did you use a kit to build the chassis or is it 100% homemade ?

Congrats

An other frenchy :wink:

chasis

Salut LordGG

Le chassis est 100% homemade, réalisé avec des plaques d’alu de 2mm d’épaisseur (récup de rack info de 19") (bon en fait quand on regarde bien les axes pas vraiment en face … :frowning: on sens bien les coups de scie à métaux et la lime à s’en faire de ampoules :slight_smile:

Si ça te botte j’ai plein de photos des différentes étapes …

bon délirs robotique l’ami

MoX

reply

thanks man !

You are totally right …So  I’m going to post pictures of the different steps of the mechanic part …


merci Korel :)je suis en

merci Korel :slight_smile:

je suis en train de faire un dossier des différentes étapes de réalisation :slight_smile: sachant que j’utilise des servos standards et du matos 100% récup ça pourais intérésser du monde :slight_smile: (woua en toute modestie bien sur MDR)


I think you can modified it

I think you can modified it into this:

|x

Sounds great my friend. BTW

Sounds great my friend. BTW be careful not to write in french because they stick to international english language on this site making it easier for everyone. Keep up the good work :slight_smile:

yes but I’m busy the weekend

yes but I’m busy the weekend … too bad …MDR

Ah oui…

… carrément, ça m’intéresse de voir tout le processus de fabrication ! En tout cas bravo, le résultat fait vraiment très pro ! :slight_smile:

I look forward to see the pictures, I hope you will post them as lumi suggested you, I think many of us will be interrested.

Et j’ai hâte de voir la bestiole devenir autonome :wink:

Have fun !

Very impressive. Merci pour

Very impressive.


Merci pour les étapes de fabrication, le rendu est excellent au vue des moyens!


Je te suis avec attention, car la partie software a l’air bien finie elle aussi :slight_smile:


Keep the good work.

thanks dude :)I’m still

thanks dude :slight_smile:

I’m still working on the software, improving the way to walk (more smooth…)

But I’m working on a biped now , so my poor quadruped is a little jealous :slight_smile: lol 

A take a lot of photos of my biped and i will post them soon :slight_smile:

++

**english version **

Hi LordGG

The frame is 100% homemade, I build it with aluminum plates of 2mm of thickness.

It’s a salvaged materials of a 19" computers rack.

Good luck with your robot :slight_smile:


perfect… is very good

perfect… is very good robot…

Thank you my friend :)I saw

Thank you my friend :slight_smile:

I saw your job : impressive :slight_smile: and amazing skills in 3DSMax !!

Good luck with your biped !

smooth

love the smooth motion … looks creepy in a cool kind of way.

nice


Thanks jgc146My goal is

Thanks jgc146

My goal is exactly what you say :a smooth walk !

The creepy thing is funny : a girl i know who don’t like at all spiders, turn her head when she saw my poor and gentle quadrimox :wink: MDR !

Have fun !