


- Lesson 1: Terminology
- Lesson 2: The Platform
- Lesson 3: Propulsion
- Lesson 4: Choose a flight controller
- Lesson 5: Assembly
- Lesson 6: Get it all working together
- Lesson 7: FPV & Long-range
- Lesson 8: Aircraft
In lesson 5 you should have finished assembling the drone (but not installed the propellers). The wires may not be very tidy, but seeing it all come together now has you excited for your first flight. Don't rush though, since even small mistakes can lead to a crash. You still have a few steps to go before your first flight, so be patient and follow the guidelines below. As with lesson 6, we will continue this lesson assuming you are using RC control (the most widely used method at this time for controlling a UAV).
Not all flight controllers are the same, so the setup procedure is really dependent on which model you chose. If you have not already done so, take the time to read through your flight controller's user guide in detail from start to finish. Missing a small detail might make the difference between a successful first flight and a total write-off. A well-written user guide should include everything you will find on this page and more, so we encourage you to use this lesson as a checklist and not as a replacement or substitute for reading through the flight controller's guide. Most flight controllers give you a step-by-step procedure on what settings to select for your specific UAV configuration, including full control over the PID values. The values for each (P, I, and D) can be adjusted for your specific frame and flight style; from something more stable for use as an aerial camera platform to something more like sports flying (doing flips, etc). Normally there are suggested starting / default values for each field and unless you are comfortable modifying them, should consider leaving them as is for your first flight. The flight controller's manual should also cover how to adjust the minimum throttle setting, which is the speed at which the motors rotate when they are armed. You can initially set this value quite low - enough to see that the motors are rotating, but low enough that the UAV won't move under the thrust they generate. The maximum thrust, if you can set the value, should correspond to the maximum value which your transmitter can provide for the throttle stick.
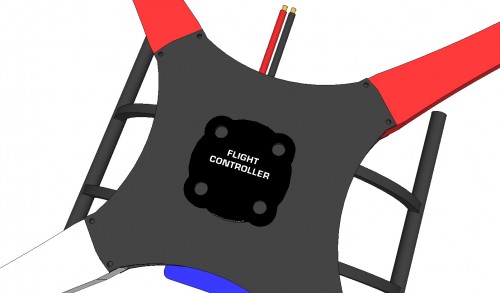
One aspect that the flight controller's user guide might discuss but not make any suggestions for is the flight mode. Referring back to lesson 4, a "flight mode" dictates which sensors are used to stabilize the drone, as well as its function/purpose. The most common sensors found on a flight controller include a gyroscope, accelerometer, barometer, compass, and perhaps a GPS. If this is your first drone, we strongly suggest the most stable flight mode available for your flight controller which uses the most sensors available in order to stabilize the drone. This can be an issue of the PID settings being far off for your frame/setup, which is why it's best to choose the "default" PID values. If you have flown before, ACRO mode (which uses only the gyroscope) may be best. Many flight controllers also allow you to change the flight mode "on the fly" via a spare channel. For example, if your remote control has six channels, you might consider assigning channels 5 or 6 (which are often associated with switches) to have the ability to change the flight mode in-flight. Be sure you know which position is associated with which flight mode before flying. We strongly suggest you do not use GPS waypoints or any more complex functionality or sensors (such as an ultrasonic distance sensor to detect the distance to the ground) before you have ensured that the UAV is well-tuned. Some guides suggest using only ACRO (acrobatic) mode, though if you do not have much flight experience, it is one of the hardest to control since there is no stabilization.
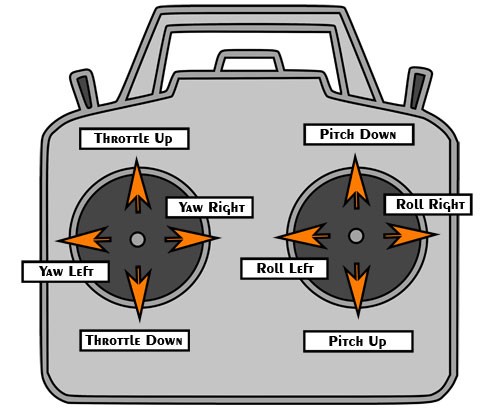
Certain transmitters have different modes such as airplanes, helicopters, cars, etc. In lesson 6 we discussed "throttle", "yaw", "pitch" and "roll", which are normal values associated with airplanes or helicopters. If the manual for the flight controller does not specify a particular mode for the transmitter, we suggest using airplane mode. Transmitter modes often add a layer of "mixing" of the channels/signals to make the motion more appropriate for a specific setup, though most flight controllers take care of any mixing and as such prefer the "raw" values. If your transmitter does not have any modes, then simply check which channel/joystick does what. There are two types of remotes: "Mode 1" and "Mode 2". For "mode 2" remotes (which are most common), the throttle and yaw are often linked with the left joystick, and pitch and roll with the right joystick. You may also want to double-check to see that the values are not inverted, for example moving the joystick left causes the drone to roll right.
A general-purpose RC transmitter may only be able to provide a limited range of signals on each channel, and as such in lesson 6 we advise that you should know what range of values the RC transmitter can provide, and if the minimum and maximum values can be adjusted (either as values or as a percentage of the default range). MultiWii-based flight controllers for example need transmitters that can provide the full 500 to 2500 pulse range, whereas the default setting may only be 1000ms to 2000ms as it is a common configuration for an R/C plane. Read through your transmitter's manual to see how to adjust the endpoints/signal range (if possible). If your controller has an LCD, you can often do this via the interface under "settings". A "Radio Range Test" is most easily done with someone else's help, or by connecting an RC buzzer or other visual/auditory feedback on the drone. Certain higher-end models have a function for testing range. The basic principle is to see how far the signal travels before the receiver no longer detects it. We suggest following this procedure only after the fight-flight (which should keep the drone within a very small radius around you).
- Power the radio, then the drone.
- Move around 50 feet away and flip the switch associated with the buzzer; you should hear the buzzer.
- If you don't have a buzzer, arm the drone and ensure the motors have started.
- Stop the buzzer / disarm the drone
- Repeat the steps moving farther and farther away (line of sight) until the drone does not react to your input.
- This is the absolute maximum range at which you can operate your drone.
- You might think you don't plan to operate it that far away, but keep in mind that a drone moves in three axes, and things can go wrong.
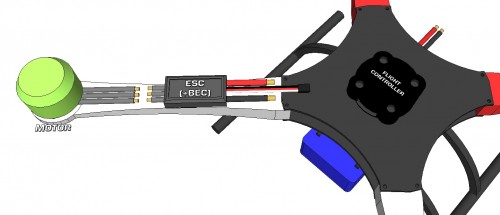
An ESCs will work out of the box, but the signals (PWM) associated with minimum and maximum throttle might not correspond to what your transmitter is providing. You, therefore, need to "teach" each ESC what these values will be. As always, make sure the propellers are not mounted to the motors. Take a look at the user guide associated with your flight controller. Once an ESC has been reprogrammed, it retains that configuration even when it is not powered. You therefore should only need to program each ESC for your multirotor once, during the initial testing/setup. Normally there is a section in the flight controller's manual that talks about calibrating the ESCs and explains how. If not, you can try one of the methods suggested below. Once again, if your propellers are not already off, REMOVE THE PROPELLERS.
Transmitter
- Connect one ESC to your receiver's throttle pin. If your ESC does not have the BEC connected, you can connect the one BEC-enabled ESC to a different pin on the receiver (such as battery input) just to provide power to the receiver.
- Connect the ESC to the associated motor (if it is not already connected)
- Put the joystick associated with the throttle to maximum (usually the left joystick, and full forward / up), and then turn your transmitter on.
- Connect the LiPo battery to the PDB, or directly to that ESC (if the connectors are compatible)
- The motor should beep three times (11.1V LiPo), followed by a short pause and then two short beeps (this sets the maximum signal)
- Immediately after the short beeps, put the throttle to the minimum position (this sets the minimum signal)
- The motor should beep three times (11.1V LiPo) followed by a long beep.
- The throttle range for that ESC is now set and move on to the next one until all ESCs are calibrated.
Other Methods Follow the instructions in the product's user guide so the min/max range of the input signal of the ESC corresponds to what it will receive from the transmitter.
- USB: Certain models of ESCs are programmable via USB either natively or using an adapter.
- Programming Card: An external ESC programming card can be used with almost any ESC and is a stand-alone device which
- Microcontroller: This method is not widely used but it is certainly possible to reprogram an ESC using a microcontroller if you have the right code and can make the right connections.
- Flight Controller: Certain flight controllers allow you to calibrate or program the ESC via their software interface. Read through your flight controller's guide to know if this is possible.
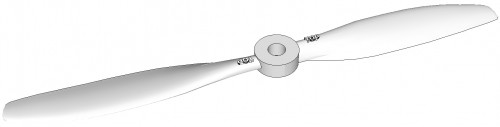
We are now ready to install the propellers. It is good to refer back to lesson 3 which discusses the propeller orientation in order for the propeller to produce thrust. All propellers have a TOP and BOTTOM as well as a clockwise (CW) or counter-clockwise (CCW) orientation. The top normally has raised text indicating the pitch and diameter. When the propeller is placed on the motor's shaft, this top part points towards the sky, regardless of whether or not the motor is mounted on the top of the multirotor's arm or on the bottom.
Although a drone is nowhere near as complex or as dangerous as an actual passenger aircraft, you are still the pilot and need to have a pre-flight checklist to ensure you don't endanger people or property. The following list just covers the essentials and applies to all flights (not just the first).
- Ensure you have some visual way of knowing which side of your drone is the front. At a bare minimum, add colored tape to two arms.
- Check that your transmitter's battery is charged.
- Shake the UAV a bit - nothing should come loose, fall to the ground, or rattle. You never know what a hard landing may have dislodged or broken in a previous flight.
- Check that the propellers are still well connected - it's time well spent!
- Turn on the transmitter first, and then connect the battery to the power distribution to power the drone (keep your hands and arms clear of the propellers).
- Check that you can arm and disarm the motors reliably (they should spin at low RPM when armed, and stop spinning when disarmed)
- Ensure you have done the calibration or the sensors are well calibrated (you should do this every few flights)
- Perform a transmitter range test.
- Check that the area is completely clear and if anyone is in the general area, they need to be informed that you are flying a UAV and not to approach, especially curious children.
Until you have gained enough confidence in your abilities as a pilot and drone designer, the following procedure is suggested for all prototype drones before their very first flight.
- Arm the motors and check that they are spinning in the correct direction which matches what is described in the flight controller's guide.
- Throttle up very slowly and confirm that the propellers are pushing air downwards towards the ground. Using tissue paper is a safe option for a visual check.
- Move the joystick associated with the pitch very gently forward / back to see that the drone pitches forward / backward correctly.
- Move the joystick associated with the roll very gently to either side to see that the drone responds correctly.
If the drone is not behaving properly, there are many possible reasons, the most common of which are:
- One or more motors are rotating in the wrong direction
- The ESC can be connected to the wrong output on the flight controller.
- One or more propellers were installed the wrong way, have come loose or is even upside-down
- The flight controller was not installed correctly and what it thinks is forward is not the same as that of your physical UAV
- One or more of the pins between the receiver and the flight controller are plugged incorrectly, or even into the wrong place
- Everything may have been installed correctly but it reacts far too quickly or dramatically to user input
Most emergencies result in drone crashing, and most crashes occur when you're just getting started in the field and/or with a new drone. The list below is intended to give you things to think about and some ideas as to how to react and why for new pilots. This is case by case and in some situations, the opposite of what is suggested here may be appropriate, so know yourself, know your environment, and be safe! In almost all cases, it's better to lose the drone than risk hitting people or property.
- Drone is very far away and you don't know which way the drone is facing
- Throttle down and see if the drone responds (testing to see if you still have communication)
- If the drone responds to the throttle, try landing right there (if you can).
- If the spot is not good for a landing, gently try pitching the drone forward (nothing drastic) and if the drone responds based on your viewpoint by moving left or right in the sky; this will help you determine its orientation. If it does not seem to go left or right, it may be moving towards or away from you, so undo what you just did and try yawing left.
- Drone suddenly veers off course drastically (with or without reason)
- If you're not skilled at piloting (to try to recover it), throttle down completely and let it crash: Making drastic corrections may cause you to lose sight of the drone or worse, increase its altitude for a crash from a greater height.
- Drone is quickly heading for people
- Throttle up to max to have it go up and over them; your drone is likely still be in the correct general orientation, so it's better to lose the drone than to hit people
- Once it's high enough in the sky, try your best to regain control and position it such that it's over a clear landing spot
- Drone is heading quickly for you
- Throttle down to zero; have it ram the ground as opposed to risking hitting your head
- Drone does not respond to input from the controller
- Nothing you can do. If your drone is still in the air, your transmitter's batteries may be dead.
- Drone loses a propeller
- Losing a propeller affects both thrust and yaw; try to correct for yaw first (you'll likely need to keep the joystick associated with yaw at an extreme position), and then simultaneously throttle up gently to try to prevent a crash, then throttle down.

Regardless of any previous flight experience you might have, your first flight, especially with a custom multirotor, should try to be as "low-key" as possible. The objective of this first flight is to see that everything has been configured correctly and if there are any major issues.
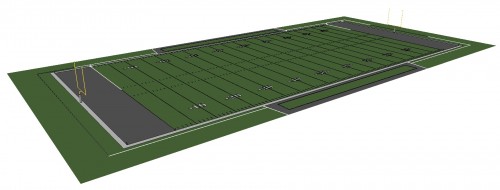
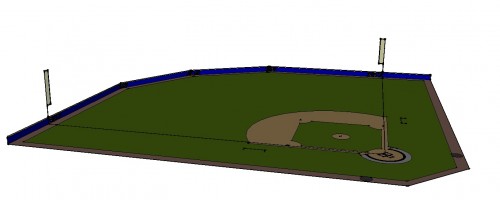
- Location: An open area, away from people and objects. An empty soccer field, baseball field, running track, etc. are ideal. There should be no wind at all.
- Go through the pre-flight checklist.
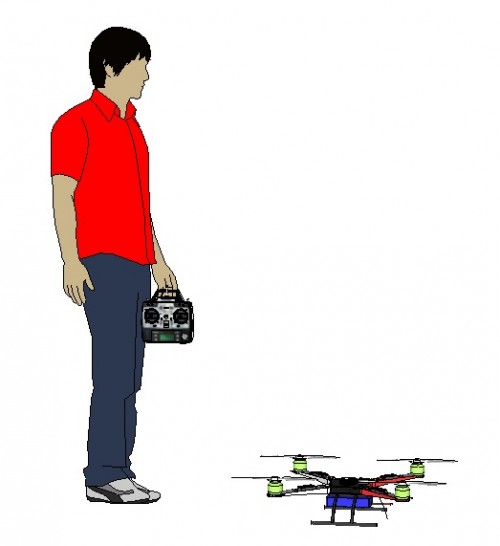
- Stand around 6 feet away from the drone, with the front of the drone facing away from you.
- Arm the motors
- Gently throttle up. You'll reach a point where the drone will look like it's ready to take off. There may be some ground effects that make the drone bounce a bit but don't worry.
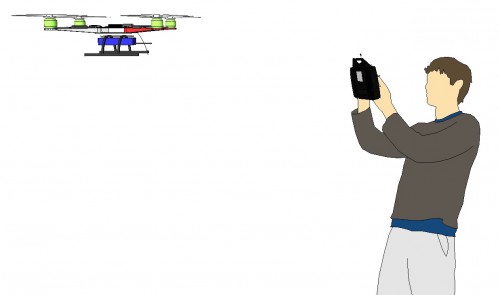
- Throttle up to get the drone just off the ground and get used to the controls - try to keep it within a certain radius and see how it reacts to your input.
- Use small, incremental, and smooth motions - nothing too sudden. Throttle down to prevent crashing
- If your drone does not behave as expected (for example moving the pitch axis causes it to pitch but also roll left or right), something's wrong, and you'll need to investigate.
- If the drone does behave as expected, your objective is to then hover around four to six feet off the ground in the same area. Don't get too wild too fast.
Now that you have worked out the glitches and are comfortable flying in a controlled environment, you can proceed with a second flight.
- Since the drone is still not thoroughly tested, we suggest going over the full procedure for the first flight, which should be pretty quick.
- Using smooth motions, become accustomed to the way the drone reacts to your inputs, keeping it at a safe distance.
- Get used to piloting the UAV without the aid of FPV or too many sensors.