- Lesson 1: Terminology
- Lesson 2: The Platform
- Lesson 3: Propulsion
- Lesson 4: Choose a flight controller
- Lesson 5: Assembly
- Lesson 6: Get it all working together
- Lesson 7: FPV & Long-range
- Lesson 8: Aircraft
Now that you have decided to create your own custom or semi-custom multirotor UAV, the first step is to choose the frame. You can either create your own, or base the project on a UAV frame kit. There are many different types of frames and configurations used to create multi-rotor UAVs. This guide covers the common/basic frame types, materials used to construct the frame, as well as design considerations. We welcome any feedback you have in the comments section below.
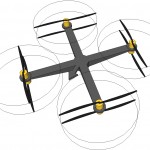
UAV Frame Types
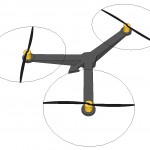 |
Tricopter
|
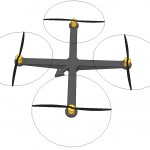 |
Quadcopter
|
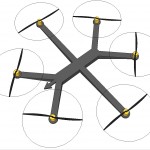 |
Hexacopter
|
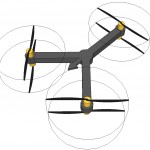 |
Y6
|
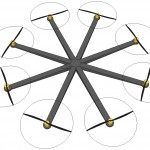 |
Octocopter
|
 |
X8
|
UAVs come in a variety of different sizes, from "nano" which is smaller than the palm of your hand, to mega, which can only be transported in the bed of a truck. Although both very large and very small UAVs may get quite a bit of attention, they are not necessarily the most practical for hobbyists. For most users who are getting started in the field, a good size range that offers the most versatility and value is between 350mm to 700mm. This measurement represents the diameter of the largest circle which intersects all of the motors. Not only do parts for UAVs in this size range come in a variety of different prices, but there is also by far the greatest selection of products available.

Smaller UAVs are not necessarily less expensive than medium-sized ones. This is largely due to the fact that the technology and time needed to produce small brushless motors or small brushless motor controllers is the same for small parts or for large ones. The prices for the additional electronics such as the flight controller, remote control, camera, etc. tend not to change at all. The frame is normally one of the least expensive parts of a UAV, so although the frame for a small UAV maybe half the price of a larger one, the overall price, with all parts needed, may still be very close.
Below are the more common materials found in multi-rotor drones. This list does not include all possible materials which can be used and should be looked at as a guideline/opinion as to the use of each material to make the frame of a drone. Ideally, the frame should be rigid with as minimal vibration transmission as possible.
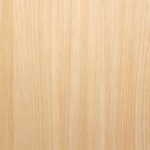
WoodIf you want your frame to be as inexpensive as possible, wood is a great option, and will greatly reduce build time and additional parts required. Wood is fairly rigid and has been a proven material time and time again. Although the aesthetics may suffer, replacing a broken arm after a crash is relatively easy and "dirt cheap". Painting the arm helps hide the fact that it's wood. Ensure you use wood that is straight (no twisting or warping). |
 |
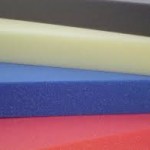
FoamFoam is rarely used as the sole material for the frame and there tends to be some form of inner skeleton or reinforcement structure. Foam can also be used strategically; as propeller guards, landing gear, or even as dampening. There are also many different types of foam, and some variations are considerably stronger than others. Experimentation would be needed. |
 |
PlasticMost users can only access and work with plastic sheets (rather than 3D plastic shapes or objects). Plastic tends to flex and as such is not ideal. Used strategically (such as a cover or landing gear), plastic can be a great option. If you are considering 3D printing the frame, consider the time needed to print the part (versus buying a plastic frame kit), and how rigid the part will be in the air. 3D printing parts (or the entire frame) has so far been more successful on smaller quadcopters. Using plastic extrusions may also be an option for small and medium-sized drones. |
 |
AluminumAluminum comes in a variety of shapes and sizes; you can use sheet aluminum for body plates, or extruded aluminum for the support arms. Aluminum may not be as lightweight as carbon fiber or G10, but the price and durability can be quite attractive. Rather than cracking, aluminum tends to flex. Working with aluminum really only requires a saw and a drill; take the time to find the right cross-section (lightweight and strong), and try to cut out any non-essential material. |
 |
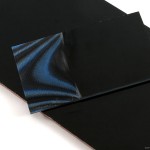
G10G10 (variation of fiberglass) is used as a less expensive option than carbon fiber, though the look and basic properties are almost identical. G10 is mostly available in sheet format and is used largely for top and bottom plates, while tubing in carbon fiber (as compared to G10) is usually not much more expensive and is often used for the arms. Unlike Carbon Fiber, G10 does not block RF signals. |
 |
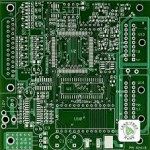
PCBPrinted Circuit Boards are essentially the same as fiberglass, but unlike Fiberglass, PCBs are always flat. Frames <600mm sometimes use PCB material for top and bottom plates, since the electrical connections integrated into the PCB can reduce parts (for example the power distribution board is often integrated into the bottom plate). Small quadcopter frames can be made entirely out of a single PCB and integrate all of the electronics. |
 |
Carbon FiberCarbon fiber is still the #1 sought-after building material due to its lightweight and high strength. The process of manufacturer carbon fiber is still quite manual, meaning normally only straightforward shapes such as flat sheets and tubes are mass-produced, while more complex 3D shapes are normally "one-offs". Carbon fiber impedes RF signals, so be sure to take this into consideration when mounting electronics (especially antennas). |
 |
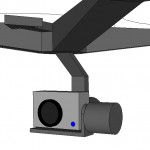 |
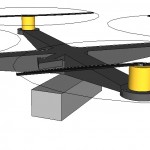
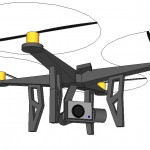
Gimbal A gimbal is often used to stabilize a camera (for FPV or video). Connecting a camera directly to a UAV's frame means it is always pointing in the same direction as the frame itself, which does not provide the best video experience. Most gimbals are mounted beneath the frame, in line with the UAV's center of weight. Gimbals are either connected directly to the bottom of a UAV, or to a rail system. The gimbal system, therefore, means the UAV needs longer landing gear so it does not touch the ground. Mounting the gimbal or camera to the front of the UAV can also be done, and the weight can be offset by placing the main battery further aft in the aircraft. |
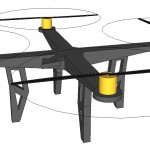 |
Landing Gear Landing gear for a UAV helps in many ways, and although some drones land directly on their bottom plate (normally to save weight), using landing gear can be beneficial in many ways:
|
Step 1: See what materials and machining processes you have at your disposal.
- If you do not have much as far as machining capabilities, are not comfortable with tools, or simply want a more professional frame, then consider purchasing a frame kit
- A decent frame can be made with basic tools and materials, but determining areas where it may be structurally weak, resonate (cause vibration), or may be misaligned takes a keen eye and experience
- If you plan to create a custom frame, take into consideration all of the mountings which need to be done; motors, electronics, etc., and plan accordingly.
Step 2: List all of the additional (non-essential) parts you plan to add
- Additional items might include one, two, or three-axis camera gimbal, parachute, onboard mini-computer, payload, long-range electronics (tend to be larger / heavier), floatation, etc.
- This list of additional/non-essential parts will give you an idea of the size of the drone you will need, and add to the total weight calculation (to be done later)
Step 3: Get a rough idea of the size of the frame you want
- A larger frame does not necessarily make the drone more capable, and a smaller frame does not mean the drone will be any less expensive
- A drone between 400 and 600mm is suggested for beginners
Step 4: Design, build and test the frame
- If you opted to purchase a frame kit, you should not have much to worry about in regard to durability / rigidity / assembly
- If you chose instead to design and build your own frame, it's important to test its durability, check the weight, and see if it can withstand vibration (minimal flex)
- Consider using CAD software (many are free such as Google Sketchup) to design the frame and ensure dimensions are correct
Now that you have your frame, you can proceed with the next lesson.


