WiSpyBot

Hey Robot builders!!


This is my second robot using arduino. I tried to make a robot controled via webpage or processing App using a Wi-Fi router  to connect arduino ethernet shield and IP Camera to PC/SmartPhone with Wi-Fi.


First video

Controlling the robot using app  in processing.

Second video

Testing the app in processing with the robot and the camera ip separately.
At the end of the video broke one wheel, Opps! 


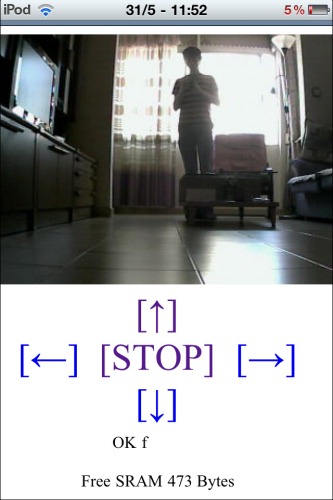
The robot control is very simple, i have used the GET variables to send the robot's movements.

  • Forward = http://192.168.10.150/f
  • Back = http://192.168.10.150/b
  • Left = http://192.168.10.150/i
  • Right = http://192.168.10.150/d
  • Stop = http://192.168.10.150/s

In case to lose the connection has also used a timeout of 1.5 sec. in arduino board to stop the robot.


For control the camera, I used a program (charles) to hack url commands. The most important are:

[MOTION]

http://192.168.1.126/decoder_control.cgi?command=

  • RIGHT = 6
  • Left = 4
  • UP = 0
  • DOWN = 2
  • STOP = 1
  • PATROL_H = 28
  • PATROL_V = 26

[CONF.VIDEO]

160X120 = http://192.168.1.126/camera_control.cgi?param=0&value=2
320X240 = http://192.168.1.126/camera_control.cgi?param=0&value=8
640X480 = http://192.168.1.126/camera_control.cgi?param=0&value=32

BRIGHT value = 0 to 255 http://192.168.1.126/camera_control.cgi?param=1&value=96
CONTRAST value = 0 to 6 http://192.168.1.126/camera_control.cgi?param=2&value=6


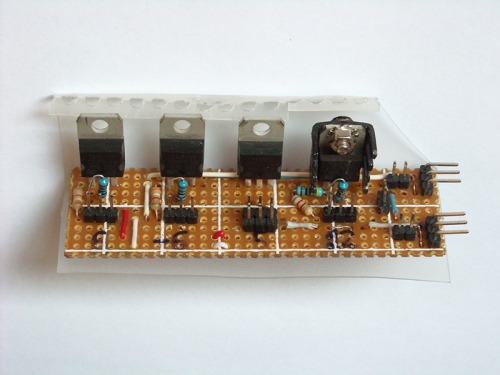
Electronic & schematics

I used 5 voltage regulators:

  • 5 V for Arduino & IP Camera
  • 6 V for two servos (Forward)
  • 6 V for two servos (back)
  • 12 V for router

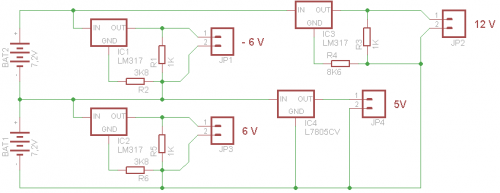
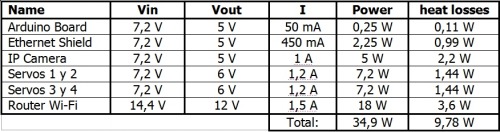
I used this configuration to reduce heat losses from regulators.

But this configuration has a problem, in the scheme is known as -6V but is not a negative votaje. The two servomotors connected to this voltage regulator is imposible connec to Arduino GND.

I solve this problen using two optocouplers for transforming the signal =D

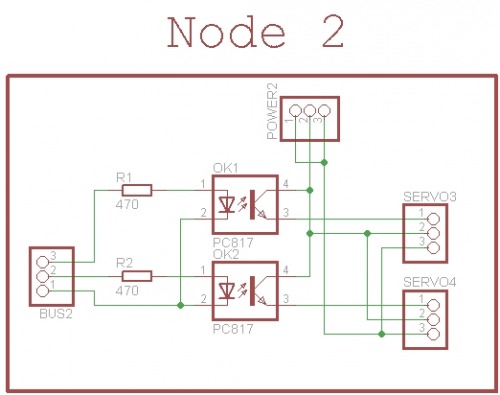
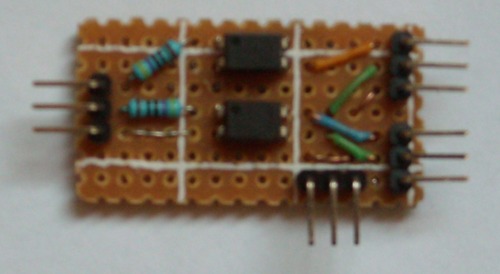
*The "BUS2" is two arduino pins and GND.


Cheap servo wheel !! =)

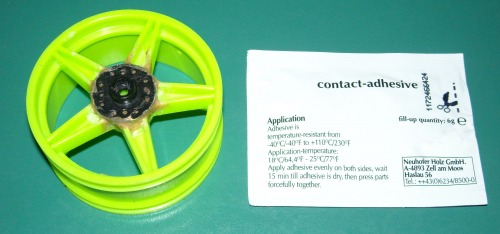
It is 1/10 RC wheel buyed on eBay. I used to stick the contact-adhesiv, but first to stick very strong need to sand the parts and clean them with solvent. Let dry for 24 to 48 hours depending on the humidity and temperature.


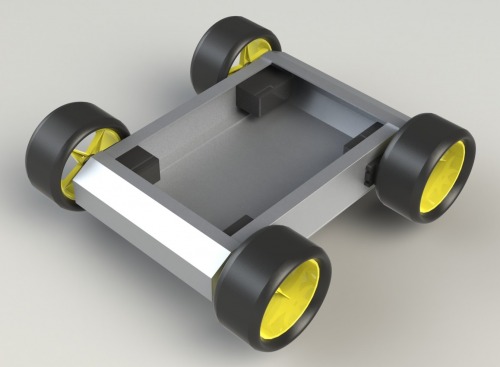
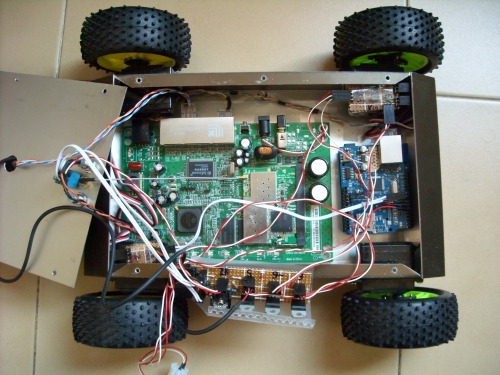
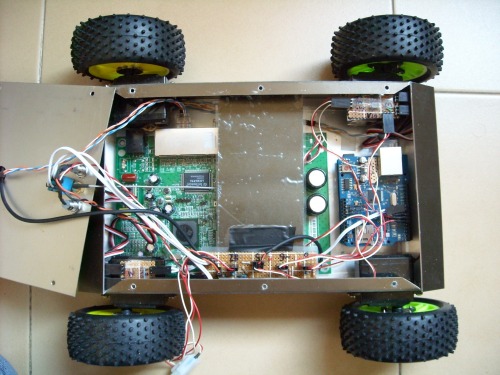
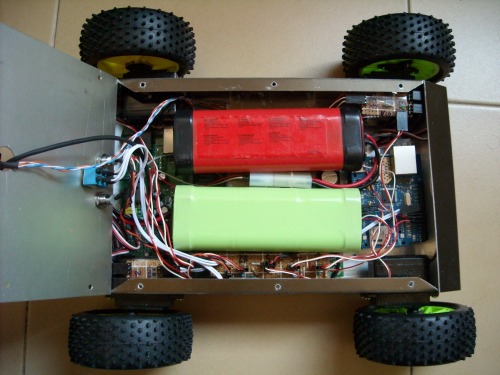
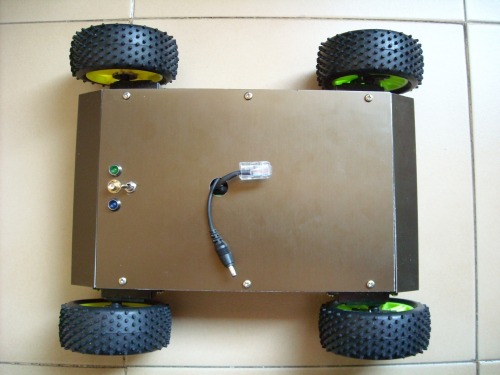
Some photos of the project


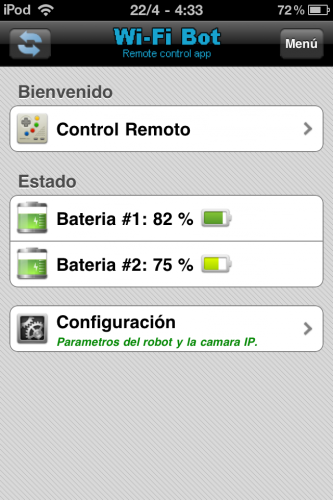
Arduino WebServer ( http://192.168.10.150/app )


This is my first post and I have to update it with more content soon.

Pending tasks:

  • Improve the code to reduce lag
  • Make a html app for smartphones


Make Make Robots!!, J.Rodrigo (@javrodara)

Sorry for my good English =)


Spy People

  • Control method: Webpage over Wi-Fi or processing App
  • CPU: ATmega328P
  • Power source: 2 x 7.2V
  • Programming language: Arduino, Processing, HTML
  • Sensors / input devices: Ip camera

This is a companion discussion topic for the original entry at https://community.robotshop.com/robots/show/wispybot

WOW!

That is some very nice work, excellent documentation, and above average English. :stuck_out_tongue:

Seriously though, nice work, really excellent documentation, nice bot.

When I do get a bot put together, I obviously have a high bar to measure up to, between you and JAX and his hexaspider. :slight_smile:

Very good documentation and

Very good documentation and very complex design. 

Welcome to LMR \o/

You wrote about a 1.5 sec timeout. How deos it work. Is the remote control app sending the strings continuously? And if the connections breaks the bot stopps because no signal is received anymore?

Thanks, the JAX hexaspider

Thanks, the JAX hexaspider is really cool. I’ve always wanted to do a walking robot but it takes many servos = more money.

Thx lumi.You’re right. While

Thx lumi.

You’re right. While having pressed key the App reloads the url every 1 sec. if for any reason connection is lost with the robot automatically stops at 1.5 sec.

The first code had not implemented this option, luckily not run much =D

beautifull work

tho i must admit you make mine look like a right mess now  :wink:

can you post some more

can you post some more detail on how you are using the router? For example, the arduino code, the connection to the router and what software you are running on the router?

Processing code

I am planning to build a similar robot like yours. I am planning to control it by Processing. Could you give more details about your Processing application? 

I just configured the router

I just configured the router with different  IP from my local network ( 192.168.10.*** ) and deleted the configuration of the DSL connection. I use a zyxel 660HW but that router does not support OpenWRT =/

I uploaded the arduino code here www.jra.so/wispybot (temporarily).

I’m working to share more information about this project =D


Similar Project

Hi

I ones made a similar project (but never realy finished it…) but I use the built in camera linux server to communicate directly to the mcu and by doing so eliminating the need of the router.

https://www.robotshop.com/letsmakerobots/node/22674

I really think that your camera brand is also capable to do so, the only thing is missing in my project was the ability to communicate from MCU to camera.

maybe openWRT is an option…

I basically used to create

I basically used to create the graphic interface this library controlP5 for open url robot to control it, i used his code:

String[] url = loadStrings(“http://”+robotip+"/i");


I did’t know that the camera

I did’t know that the camera had JTAG communication =D

I opened the IP camera and found J2 connector ( TX , RX , GND , 3V3 )

wispybot_IP_CAM_JTAG.jpg


I will try it and Mickey thank you very much for this info =D

Code

Could you please upload your code

Code

Could you please upload the code for this

Code

Could you please upload the code for this

i am beginner and try to

i am beginner and try to make a anduino robot with ipcam also,but i do not understand why not connect ipcam direct with arduino without router