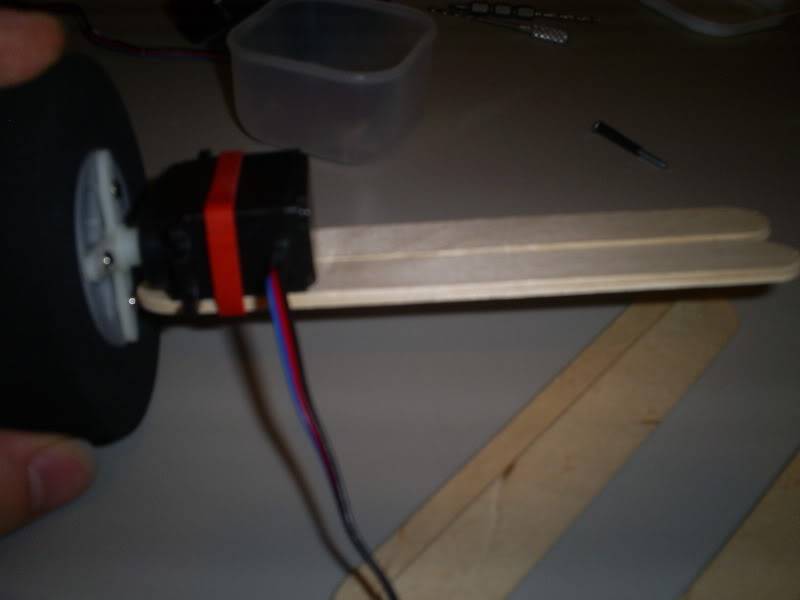
This is just a prototype for my code. I have it right now avoid object about 2 1/2 inches away. This is my first robot and first time actually really programming so its not that great. I still have a lot of work to do on the code. I made this robot out of popsicle sticks, dowel rods, rubber bands, super glue, and hot glue. Took me a while just to figure out how I wanted to do it. First I started with some popsicle sticks to get the servos attached together. I'm using Airtronics 94102z servos. I modify them myself which wasn't a pain at all. I actually enjoyed it lol.
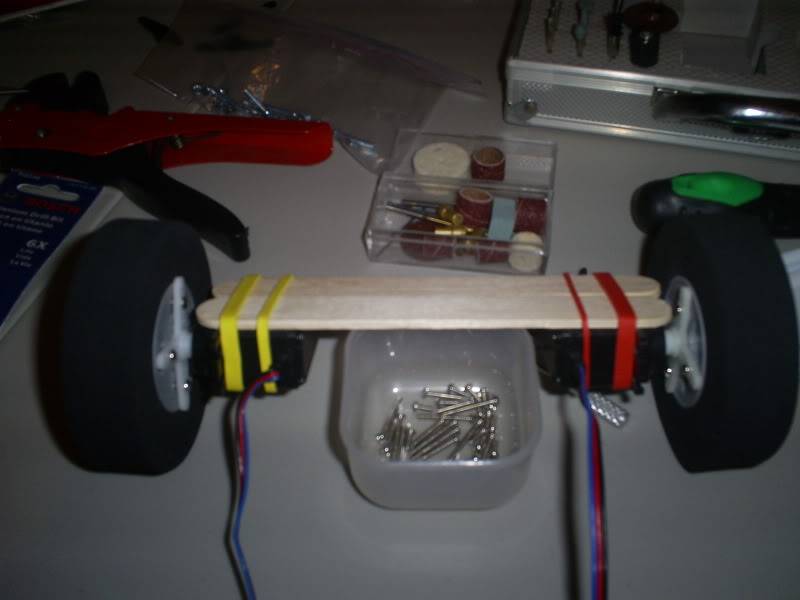
Then what I originally was going to do was give it four wheels.
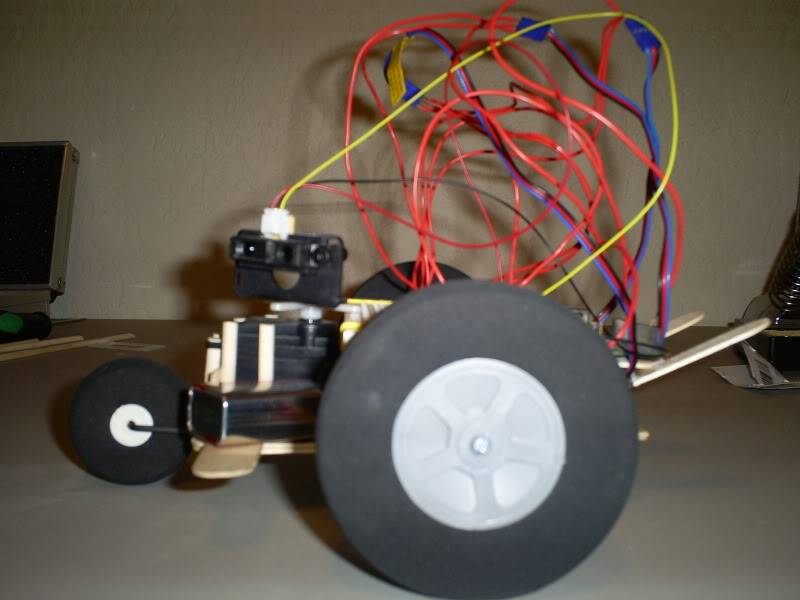
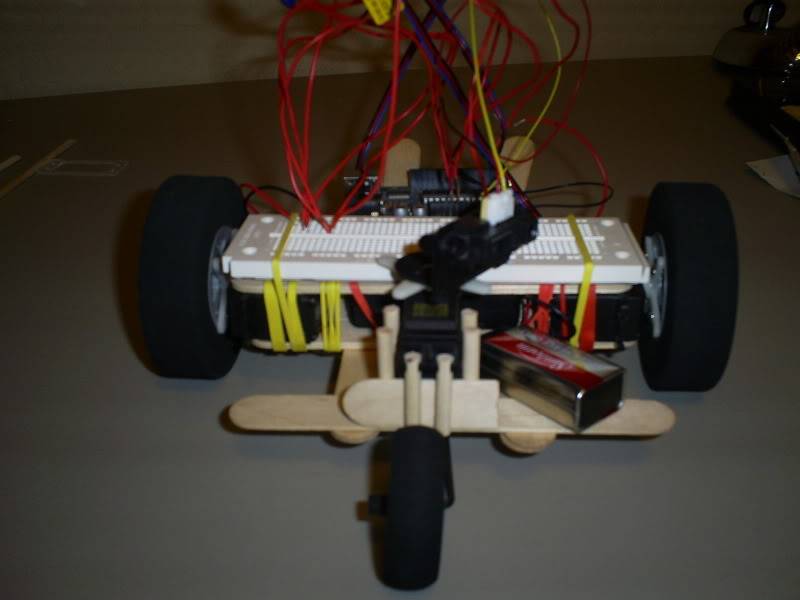
I had to change that for I ran into a few other problems like alot of drag. So I turn it into a three wheeler. The back wheels I got from hobby store which were for airplanes. They are the Lite Flite Wheels and 3 1/4in, which they have really good tractions on them. The wheels I have in front are use for your main landing gears. I use it since I didn't really have to do anything to them but align it up in the middle and hot glue it underneath since it was already connect to a rod.
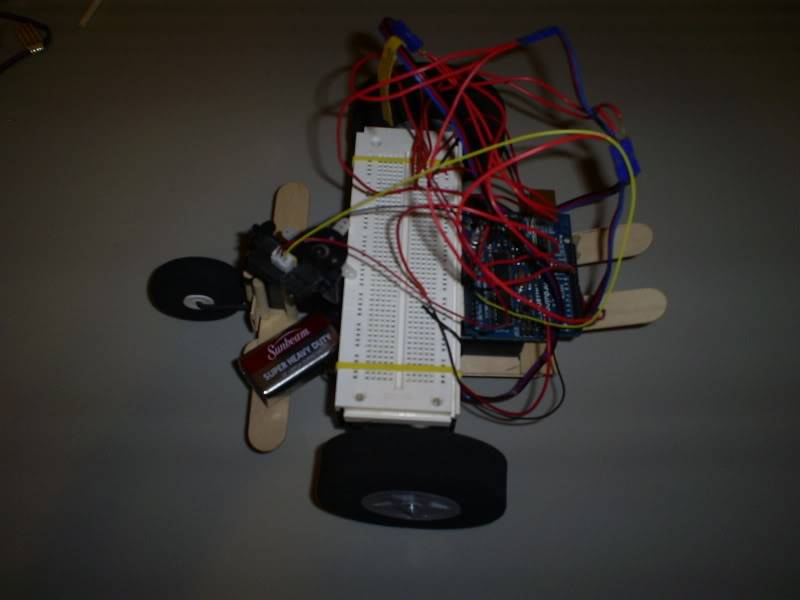
This is the top view, I know lots of wires and a bit of a mess. Actually the way I have it connect is just the 3 servos connected to the 4 AA batteries and I grounded the 3 servos, battery back, and the arduino together. I used a 9v battery to power the Sharp sensor and arudino. So I then grounded the Sharp sensor, 9v battery, and the board together. I figure thats how I was suppose to do it.
As you can see in this picture I have a few dowel rods forming a barrier around the servo. At first it wanted to slide a little to the back so I added two more dowel rods in front which fit right in the two holes. So I place a small piece of popsicle stick in front to make it stay in place. It worked out really good. Anything else you would like to see or I left out just let me know and I will post it. I'm sorry about the bad video, but its the best I can do right now.
avoid objects
- Actuators / output devices: 3 Airtronics 94102z Servo
- Control method: Autonomous.
- CPU: Arduino Duemilanove
- Power source: 4 AA NiMH rechargeable batteries, and 1 9v battery
- Sensors / input devices: Sharp GP2D120 IR sensor
- Target environment: indoor
This is a companion discussion topic for the original entry at https://community.robotshop.com/robots/show/three-wheels-robot
Very cool looking. I like
Very cool looking. I like the color.
Having some issues with my
Having some issues with my code that doesn’t seem to want to work right now. Object on left it wait till the end of loop to react, object on the right wait till the beginning of the loop, and object infront wait till the beginning of loop. Whats wrong???
int i;
if (last_sweep_right) //last round we sweep to right?
{
last_sweep_right = 0;
i=0; // from left to right
for (myAngle = 20; myAngle <= 160; myAngle+=10)
{
servoPulse(myservo, myAngle);
delay(wait);
distance[i++] = analogRead(0); // read sensor in array
Serial.println(analogRead(0));
}
}
else
{
last_sweep_right = 1;
i=14; // from right to left
for (myAngle = 160; myAngle >= 20; myAngle-=10)
{
servoPulse(myservo, myAngle);
delay(wait);
distance[i–] = analogRead(0); // read sensor in array
Serial.println(analogRead(0));
}
}
Yea the red, blue, and
Yea the red, blue, and yellow makes it look good. Otherwise it would look like crap since its make out of popsicle sticks lol. Still I have a lot of work on the design though. Hope it still look colorful when I’m done still.
Sorry I misunderstood before
Sorry I misunderstood before the reason for having the 2 different loops.
The array starts at 0, so distance[i++] might be skipping the first spot. But I can`t see anything really "wrong" with this, although I dont really understand the problem properly.
Can you post the code that does your direction decision making?
since you’re using the
since you’re using the values based on the angle that you are at and put that in an array you could do it slightly differently.
add a function that uses the current servo direction
void myservodir(int s_pos, int dist) {
switch (s_pos)
case 20:
if dist < range;
{ left(); }
break;
case x fill in the rest of the cases here
case 160:
if dist < range;
{ right(); }
default:
do sometheing else
}
Add this call to your for loops maybe before you send out the serial data
change distance to a non array.
the call would be something like:
myservodir(myAngle, myDistance)
sorry I’m a bit hard
sorry I’m a bit hard learning something new. I don’t know anything about break or case. What I read break is to get out of a for loop but don’t know about case.
The break statement does the
The break statement does the same thing with the switch/case structure.
You can use the switch/case which is kinda like an if statement. look here for info.
like
case_number = 22 //this does case 22
switch(case_number) {
case 22:
do_this_stuff();
break; //this exits out of the structure.
case 33:
do_other_stuff();
break;
case 44:
do_stuff();
break;
default: //if it doesn’t match anything, do this
default_stuff();
}
good job!
Great for your first robot…