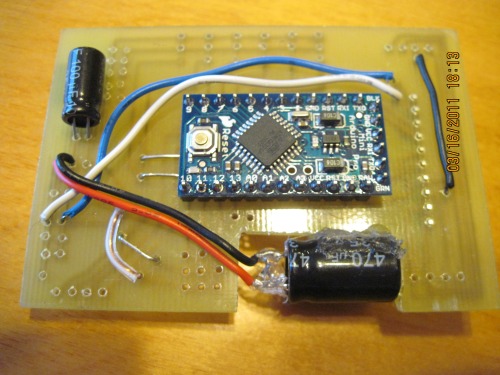
This is my senior project. It is a search and rescue robot. it is designed to be small and remote controlled and fully autonomous. the main processor is a arduino UNO. It connects to my computer via a wireless connection by two Xbee devices. it is controlled by an app called TouchOSC on my iPod touch. the app sends data to the computer and then a processing sketch relays that data via the xbee devices to the arduino, to drive it. I made a custom interface for the app so it can control the motor driver and infrared sensor as well as the sensor resolution. it also control the angle of a servo that has a wireless camera on it, so the camera can tilt 180 degrees. the app can also turn on the head lights and take the robot in and out of autonomous mode. the robot is controlled by an arduino UNO. it has a custom shield that I made for it. the shield has a built in motor driver that drives the track motors. the robot chassis has been machined out of aluminium and holds 4 micro geared 100/1 gear ratio motors. the robot has a 11.1 vol lipo battery pack which powers the entire robot for approximately 1.5 hours. the robot has 2 tracks to move the robot around all sorts of landscape. the robot is able to navigate around objects. this robot is intended to be used in all sorts of aplications. it can preform live video inspection of almost anything, and it is considerably cheap compared to other search and rescue robots which cost around $10,000. it is designed so it can drive into small holes in rubble of colasped buildings and other debris and find trapped victims. we bought this kit http://www.robotmarketplace.com/products/IL-ANTKIT2.html and the we realize that the body was to small so then we made it bigger but still kept the tracks and motors. I made a new lexan cover for the top and the made a front and rear brush guard to help the robot get over larger objects. so far the robot is entirely built all that is left now is programing, for both the arduino and the processing application on the computer. I have attached the custom circut board that i made. it was designed using fritzing. goto http://fritzing.org/ for more info on it. I tried to use the TB6612FNG motor driver found at http://www.sparkfun.com/products/945 , but it blew up in my face. so now i am using the Serial controlled motor driver found at http://www.sparkfun.com/products/9571. this driver seams easier to use becaues i only need TX and RX pins to communicate with it. unlike the 6 pins needed to comunicate with the other driver. i am now switching from a arduino UNO to a arduino mini Pro. which is like a quarter of the size of the UNO. this will make it easier to wire up the inside of the robot because of the less room taken up by the micro-controller. Update, the 11.1 volt battery blew my motors so now I have switched to a new 7.4 volt lipo battery . This is bettery because it has a lower voltage and base more amps 450mAh now to 1000mAh. That should double the run time of the robot from 1.5 hours to about 3.25 hours. i have since switched for the serisl controller to some new drivers that I stole form some old servos. all I did was take the controller board and the pots out of the servo and then hooked up the driver to the motors on my robot. they work perfect now and they are controlled with servo signals. which makes it easier to use with my arduino. since I have switched to the new drivers i have gotten the robot to move and will post a video of it soon moving arounbd all by its self.
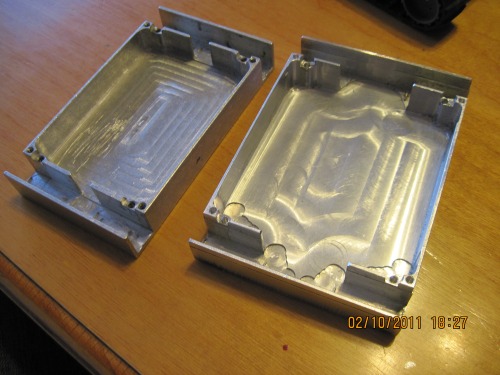
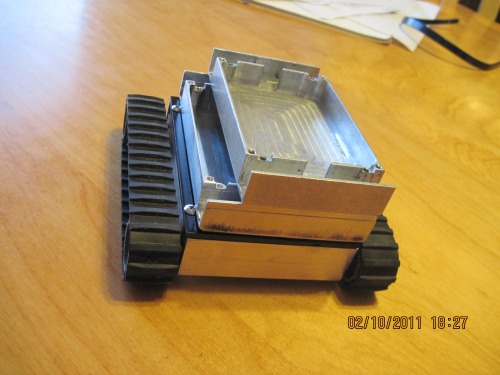
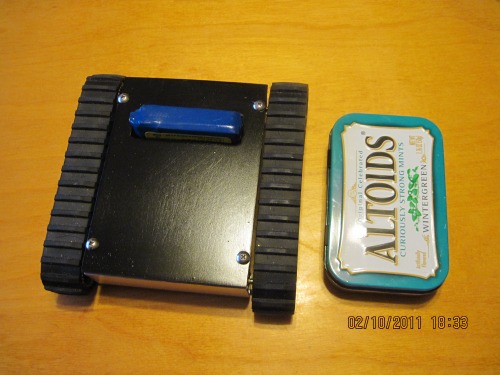
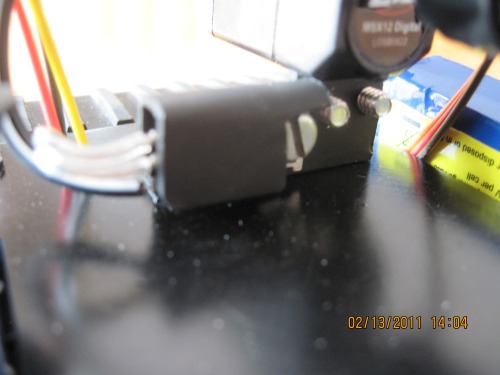
these are some pictures of the build
you can see the size difference in the three chassis
navigate around via infrared and wireless connection to computer and ipod touch.
Actuators / output devices: 4X 100/1 ratio micro motors, micro servo, medium servo
Control method: Auto/ Manual
CPU: Arduino Pro Mini 5V/16MHz
Power source: 7.4V 1000mAh lipo
Programming language: Arduino Processing
Sensors / input devices: Sharp GP2Y0A21YK0F IR sensor
Very nice robot ! I hope you will post more info about it (pics, videos or schematics), I would like to see it in action
I am currently working on a similar project (when Xbee comm will be finished, I’ll start the mechanical part), so this is very interresting to me ! I was wondering about power source… is the use of lipos really worth it for this kind of vehicule ? I guess you use an ESC ?
Oh, another question : are you satisfied with your camera ? I bought two (cheap) cams on ebay quite similar to yours (http://hosting.westernbid.info/images/uploads/ypadalko/img_1811.jpg). Quality is not great. Sufficient for distant control (by human), but I don’t think advanced image processing will be possible.
Very nice looking build. With the relatively low cost, a rescue squad could probably afford a whole set of these. Longer battery life might be a plus. Does the camera include audio? Listening for trapped survivors could be a very useful feature! Conversely, a speaker and radio receiver would be very good, so you can let someone know that rescue is on the way, or call out for people to respond if they hear the RES-Q-ME bot calling for them.
yes sending 11.1 volt to the arduino is fine it can take up to 12 volts saftley. here is where i found out how to use the motor controller.http://www.arduino.cc/cgi-bin/yabb2/YaBB.pl?num=1263858213 and here is the data sheet for it.http://www.sparkfun.com/datasheets/Robotics/TB6612FNG.pdf. the motor controller needs 2 PWM pins thoose are pins 3,5,6,9,10,11 on the arduino it also needs 4 digital pins which are 1-13, (dont use the analog input pins they wont work.) to tell the motor what to do( go cw, go ccw, brake, slow brake). so all togeather 6 pins to controll the driver.
I have now gotten the scanner/ radar screen to work. i have adapted the code found below to fit my needs. it works really well and i will post a video in the upcoming week.
Yeah. It took about 7.5 Yeah. It took about 7.5 hours on our three axis CNC machine. But it was worth it because I looks really nice. We also polished the bottom and the sides so it could help not get stuck on rocks and other objects that we will be crawling over.
Camera If you goto one of my earlier comments you will find the website where I got my camera. They have very good prices and you can find a camera with audio there. Or the other thing you might be able to do is buy the camera that i got and if you take it apart it has a part onthe board for the mic and I am pretty sure that you can just solder one into the holes and it might work. I haven’t tried it but it might transmit the audio if you do that. I looked at the schematic and the only thing missin on the one that I got and the one with audio is that it is missing a mic. I haven’t tried due to fear that I might break my camera but I might work.
Yeah they seem kind of Yeah they seem kind of sketchy. But me and my school have bought wireless survanence cameras from them before and have not had any complaints. ( no stolen information and such). I have had nothing wrong with the camera. It is very nice and the lens does not have a fish eye effect. The range is incredible 500 + feet. And it consumes barley any power and is very small. You can find a different website if you want, b/c they do seem sketchy. But I have had no complaints
well if you have any problems with them, tell me and I will tell people not to go there. I have told about 5-6 people about them and if you have problems I will tell others about it and I will stop my bussiness with them. thanks and good luck.
i dont think that i would try sticking a mic onto the board that docent already have one it might screw up the board. there is a processing chip on it and it may be only programed to handle and tranmsmit the video only and not the audio as well. also the reciver does not have an audio port on it so even if you were able to instal a mic and it didnt screw it up there would be no way to get the audio.