Mini R2D2

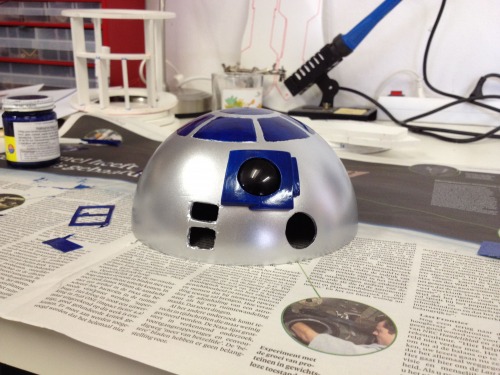
A while back I stumbled upon a couple of plastic spheres sizes 16cm and 4cm in diameter. The spheres came in separate halves, making them ideal for a small robot project. So after 2 years of hardly touching anything robot, aside from a few minor modifications to my previous creations, I've decided to take on a more ambitious project. This time I set out to fullfill a promise I made to myself about 30 years ago and the same promise I made to my four year old son last year: I will build an R2D2!

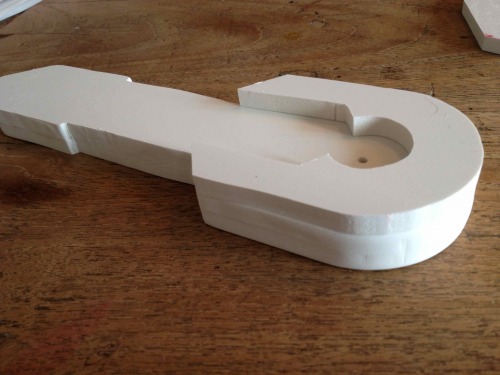
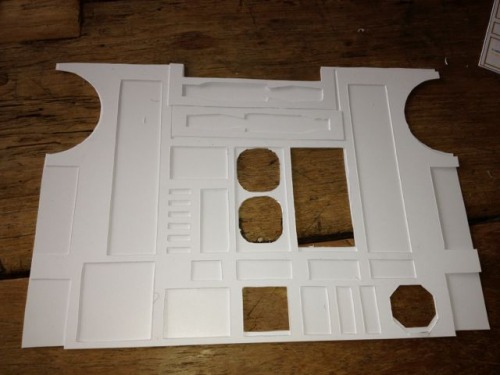
Because the dome is a fixed size, all other sizes have been derived from that. This robot will stand about 35cm tall and, being build from expanded PVC, it will not weigh all that much. That size will be enough to place a few distance sensors in the feet. It will have a rotating dome with lights, sound effects and a automatically retractable third leg. Other stuff such as moving arms and periscopes and stuff like that will be left out (at least for now)

I will maintain several blog posts for the different sub-projects: 

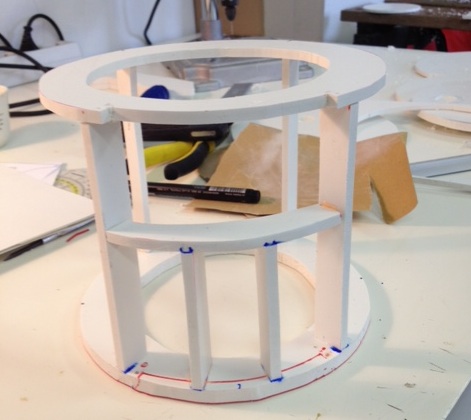
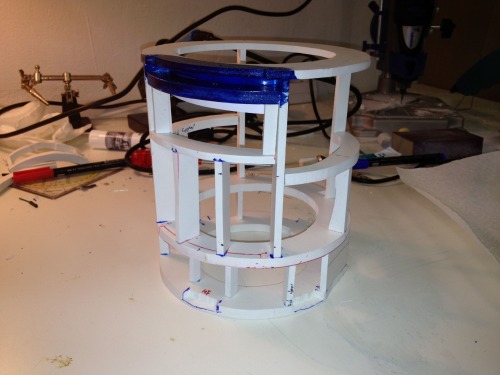
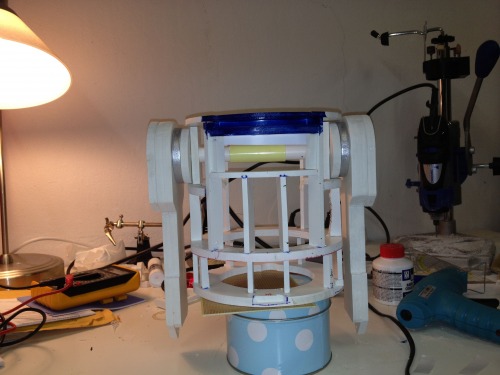
Update: Lights and motor are added to the Dome. still needs proper mounting of the motor and lights for the front eye. The PVC tube center axle works well.

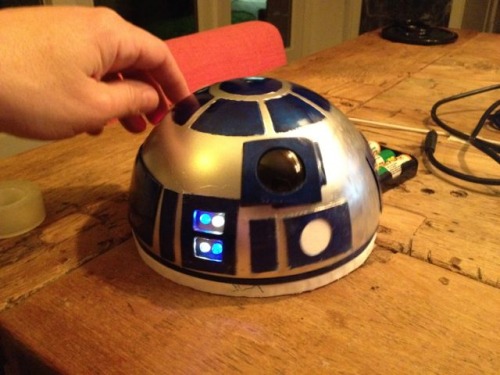
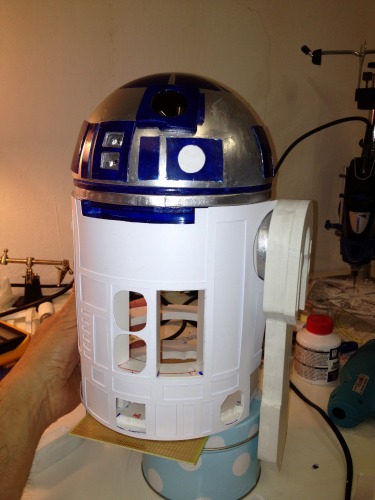
Update May 13th 2012: The extra bright LEDS for the front eye came in last week. They look okay and hopefully they are bright enough to be visible through the white paper circle. Did the first test fitting of the skins and that looks good. The silver colored hub needs work though, it is not thick enough to hide its edged behind the skin. See the detail blog pages: Body and Legs.

Work on the electronics and the programming have also started. This robot will probably use a picaxe 40x2 RaspberryPi Model-A as a brain.  My 20X2 board will be enough to control the dome functions. The electronics for the legs will only be able to change from two legged upright position to three legged moving position and back. As it looks now, those will be added last so I'll decide on the controler when the mechanics are functional.

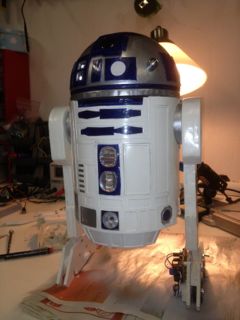
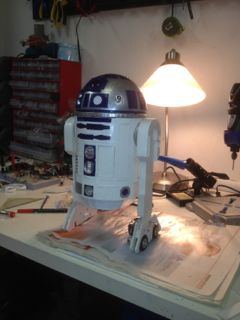
update june 1st 2012: Painting the skins is done and I am satisfied with the results. Now the silver and blue details will have to finish the looks. I'm looking forward to adding all the panels and vents. 

Update july 15th 2013: Lots of work on the feet and electronics. Dome has been improved a lot.

Update july 28th 2013: Build the lifting structure for the third leg. Started making the second foot. Made the skirt and attached it to the bottom. Added first draft of front vents where an SRF02 will be hiding behind. fitted everything together for update pictures.

Drive around, beep, blink and look good

  • Actuators / output devices: none yet, lots planned
  • CPU: Picaxe 20x2, Raspberry Pi
  • Power source: 9.6V or 12V NiMH from 8 penlites
  • Programming language: Picaxe basic, C
  • Sensors / input devices: TBD
  • Target environment: indoor

This is a companion discussion topic for the original entry at https://community.robotshop.com/robots/show/mini-r2d2

Oh! So good to see you, sir.

It is a nice thing inded to see you,my friend. 

I can tell already this is going to be a good one. Edward is still one of my all-time-favorites around here --It is nice to see you have not lost the love of expanded PVC. Ah! Such a great building material!

thanks

Thanks. its good to be back.

Fantastic Mintvelt, makes me

Fantastic Mintvelt, makes me want to try an R2D2 as well.

Extremely cool Mintvelt! I

Extremely cool Mintvelt! I love it! A few years back I was contemplating on building a real size R2D2 and downloaded all I could from the R2D2 builders club. Never started it, instead I bought the Hasbro toy, extremely cool, played with it for a while then sent it to my son in Romania. Perhaps it’s time to do something with my ER1 kit… many real size droids use it.

Builders club

Thanks. I also got the designs from the builders club. On top of that; lots of pictures from the internet where needed to get all the info straight.

Main reasons for not doing a full size R2-unit:

  • You cannot take it with you unless you have a trailer
  • It is way way more expensive to build.
  • It takes up too much space 

Cool, another one… will
Cool, another one… will follow the progress with interest.

Love This

I love this project, it’s a real work of Art!

Building an R2D2 is not for

Building an R2D2 is not for the faint of heart. Only a Master can do it. His droid will love him for ever!

Amaising body work! It looks

Amaising body work! It looks brilliant! Will be following your progress. :smiley:

Is it going to be run by a bunch of 08Ms? :wink:

08M rules the world!

Haha. No i dont think so. I made a list of all the sensors and motors I want to chuck in this robot and 08Ms wont do. It will be a bunch of processors, though I’m not sure about the setup.

I’m thinking:

  • Picaxe 20x2 or 28X1 for the dome (1 motor, some positioning detectors and a bunch of LEDs)
  • Picaxe 20x2 or 28x1 for the Legs (2 motors and some positioning sensors)
  • Arduino something for the main IO, navigation and logic (2 motors with wheel watchers, bumpers,5 IR sensors and sound)
  • Picaxe 40X2 for lots pushbuttons and display

The picaxes will be I2C slaves with the arduino as the master. The main reason for the arduino is that it has real math. The idea of doing all those motor, sensor and navigation calculations using picaxe integer math is not very attractive.

The only arduino I have is a small arduino nano and I may need something beefier. The other procs I have lying around.


A small point

I seriously doubt that arduino actually does floating point math at all. More likely there is a library that converts floats to ints and back to floats. I just don’t think the ALU hardware required to do actual floating point is built into the chip.

That being said a PICAXE might be able to handle your top level functions.

Usin a library for that is

Usin a library for that is OK. As long is I dont have to do the conversions in my own code or by sending stuff to a co-processor with I2C. I’ll try to use the stuff I allready have first. I.e. a few 28X1 and an arduino nano. Depending on the amount of IO pins and program memory I have available, a separate proc for the user interface is probably not needed. 

Nice project, mintvelt.I

Nice project, mintvelt.

I want to give some suggestions:

- Paint everything, even the white main body. UV light etc. will change the color of the plastic later anyhow (yellowing). Then the arms are still white, but the main body yellow.

- Get tutorials, how to paint in the right way (which primer, kind of color for which material etc.). It’s not the first time I nearly messed up a project by a bad paint job. Not saying, you did a bad one…

- Don’t use any glue which dissolve the surface of the plastic or paint. Super glue is a good solution for plastics like PVC or ABS. Just roughen the surface of the plastic before you glue it. Use workpiece clamps to hold it in place, particular at the corners which easily peel off.

Thanx

Thanx for the tips. I was considering painting everything to make sure the colors are the samen. I never thought of the pvc turning yellow. 

I bought some grey primer in a spray can that is suitable for PVC and I used that to paint the dome silver, which came out very nice before the glue ruined it :frowning: I’ll try spray painting the PVC foil grey and then white on a test piece first.

The glue I was using, was the type for plumbing, which indeed melts the pvc. I thought super glue also did that.

Hi mintvelt,Super glue only

Hi mintvelt,

Super glue only reacts with the humidity of the material/air to set.

Neat work

http://www.youtube.com/watch?v=nzvhWfHcEqE&list=UU3_DKpw6Wal20h-GB9xaIhA&index=1&feature=plcp

it took me years to get mine on his feet and running reliable. there always seems to be something more to do.

some kids actually called it “walley”!

+1

+1

this is awesome!

this is awesome!