Jazzy The Robot Nearing Mechanical Completion

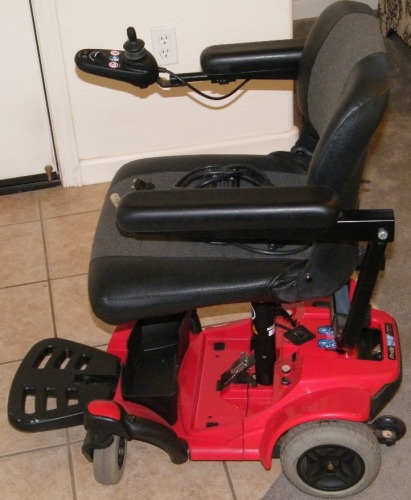
I have purchased, what I hope, will be a good base for my next robot. It is a Jazzy "Z" chair from Pride Mobility that I bought at auction for $27.50. This chair is smaller than the normal size chair and easily breaks down into 5 pieces for fitting in your trunk. It also runs on (2) 12 volt 12 AH gell cells instead of the huge heavy car batteries that most chairs require. Even though the chair is smaller and lighter weight, it is still rated to carry a 300# person at 8MPH.
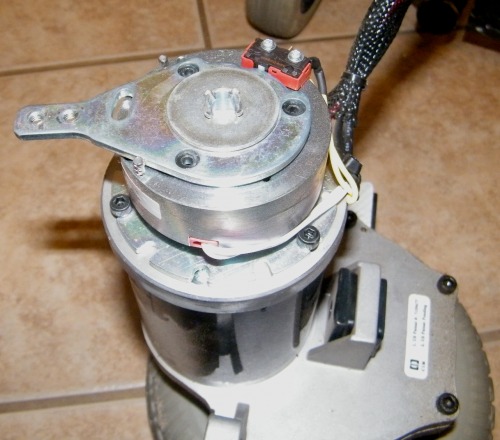
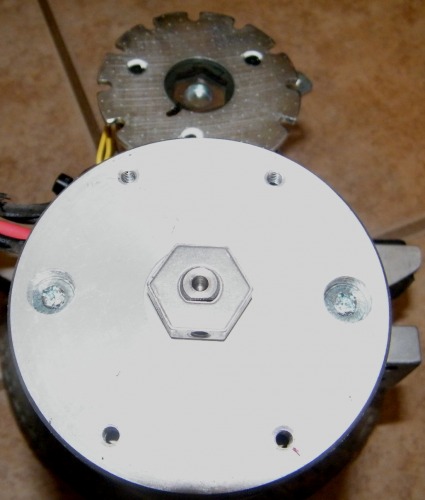
This is what the motor / brake assembly looks like removed from the chair. The brake comes off very easily with only 4 allen bolts to remove and the entire assembly comes off.

With the brake removed, you can see the hex head attachment that fits up inside the brake assembly to hold the motor in place with no power applied. A simple allen set screw holds it in place on the flatted shaft.

With the removal of the brake assembly, the motor can be checked for speed and current draw before it is re-attached to the chasis. This will provide a perfect mounting surface for a shaft encoder, which will be added a little later.
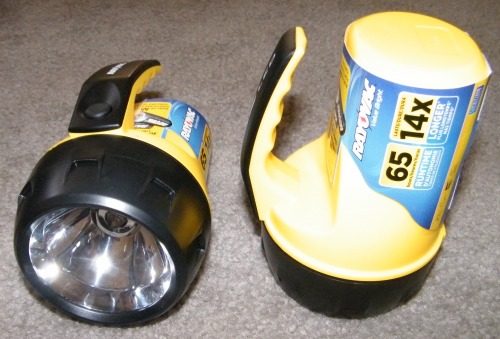
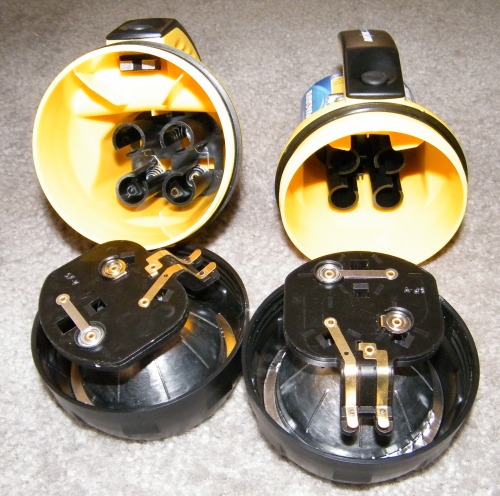
I've been working on the head but it took awhile to find just the right flashlights to use. These Ray-o-vacs were perfect. They are made of a very tough thick plastic that isn't brittle at all and they were the perfect size for my needs.

First order of business was to gut them.

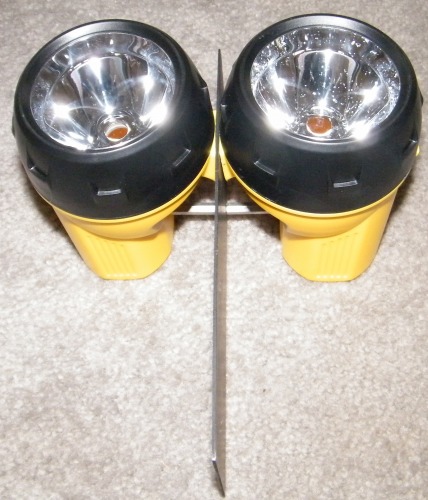
After cutting off the handles, I put a bolt through where the handles used to be and used a standoff to support the rear.
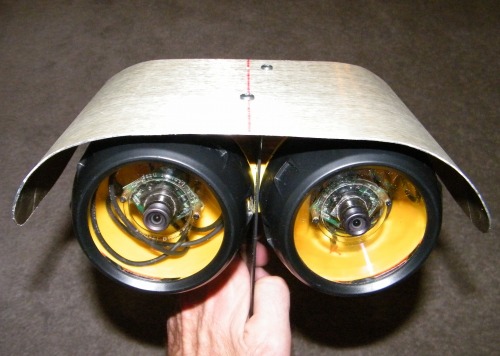
I removed the reflectors andĀ fashioned a piece of gold anodized aluminum for the top of his head.

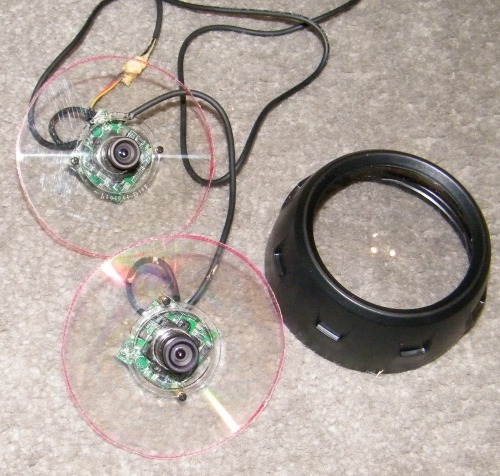
I needed a easy method to mount the cameras so they could be removed easily to disassemble the head section when needed. I used the plastic spacers that come in stacks of CD's & DVD's. They already had a hole in the center and they are easy to cut with a nibbler. I trimmed them down to the same diameter as the front of the flashlight so when you screw on the front lens assembly, it is held tightly in place. Next step is to decide on the covering for the disk, (so you can't see through to the back of the flashlight), and to mount the blue LED's around the circumference so the eyes will blink, (like Loki). I have a ball & socket to support the front of the head, (to provide 360 movement), and will use 2 servos on the back of the head for up / down, and tilt.

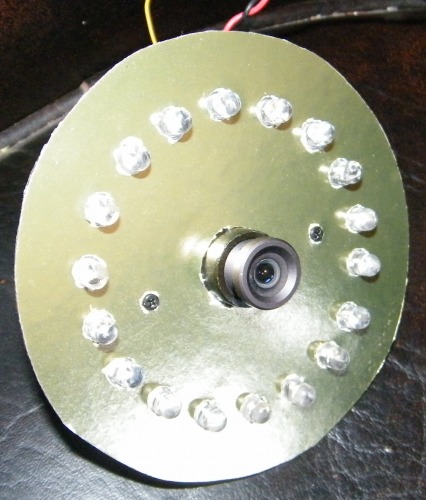
I covered the plastic with adhesive backed gold foil / paper and mounted 18 blue 5mm LEDs. I built up a circuit board with a LED bar graph driver IC. LEDs opposite each other are wired together so the lights will attack & decay from the bottom to the top to give it the effect of blinking, (like LOKI), thanks for the idea Dave.

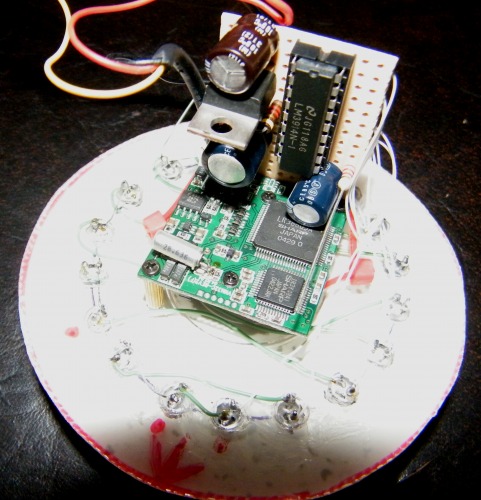
This is the rear showing the board for the video camera as well as the LED driver board. The LED board has an 8 volt regulator and some filtering to prevent problems with long lead power leads.

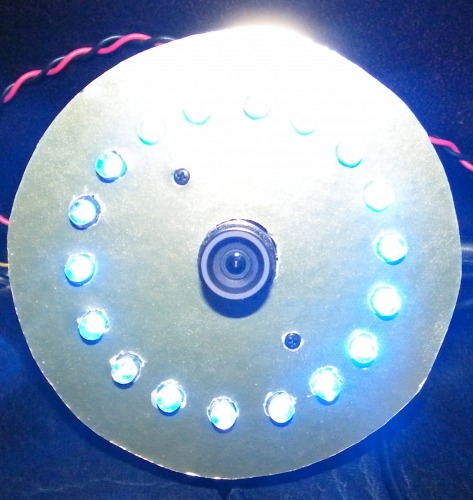
This picture was taken with a flash and LEDs full on.
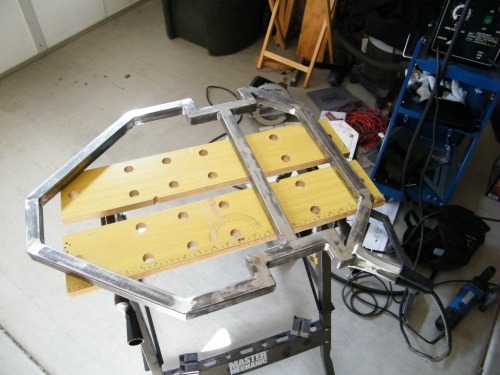
Well, I've finally got a good frame welded up and I can get back to work on "Jazzy".
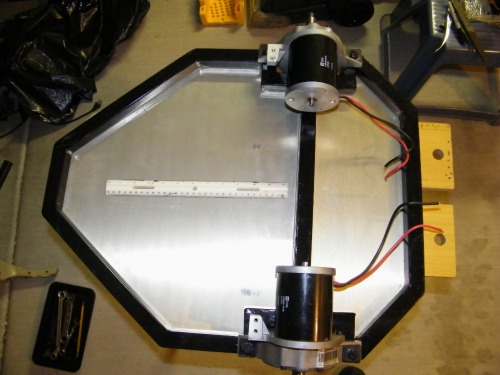
Bottom pan & motors attached.
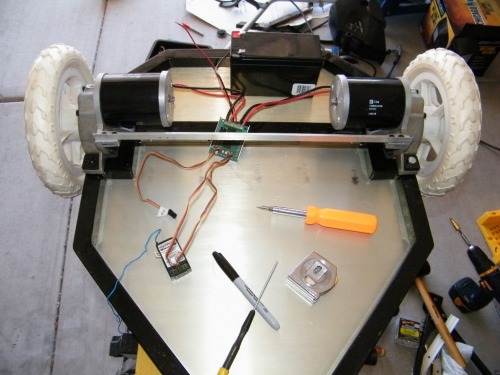
Got the wheels drilled, notched for the keyway, and mounted. Temporarily hooked up ESC, receiver, & battery to try out the setup. Things looking good, now I have to find a dolly wheel for the rear. The one I had is a little too tall and she doesn't set level.
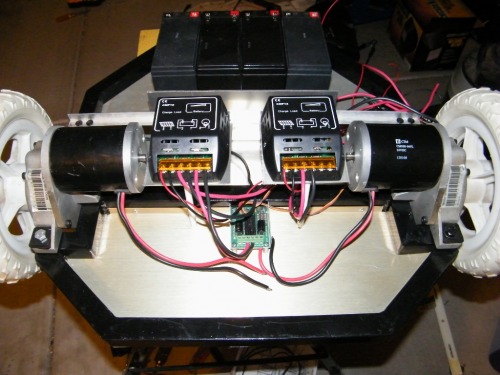
Power management modules, ESC, and battery box mounted and partially wired. Soon I'll be ready to start putting the body on her.
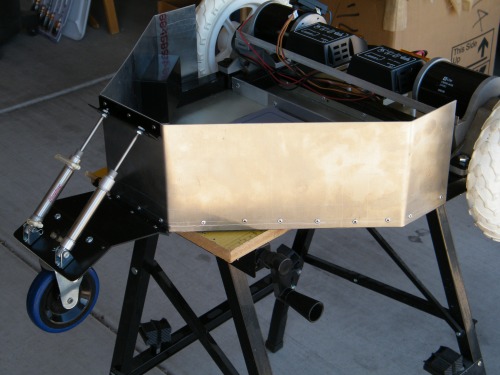
I got the rear caster wheel mounted, (with pneumatic cylinders no less), and the rear skirting attached.
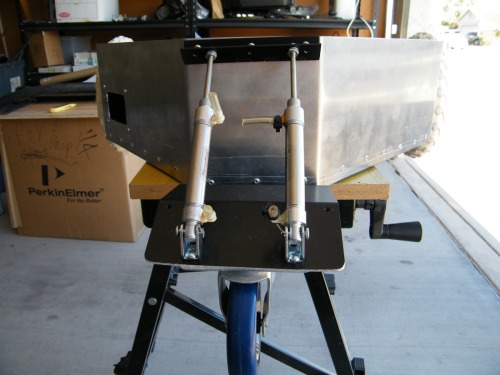
This is a closeup of the rear caster arrangement and you can see the recessed opening on the left side for the power switches. This is so they don't get broken off or accidently tripped.

The knuckle has been welded, all the bearings have been mounted, and the linear actuator and struts have arrived. I still have to machine the mounting ends for the struts and the mount for the head & arms. Once everything fits & works as it should, I'll take it apart & paint it before reassembling it.

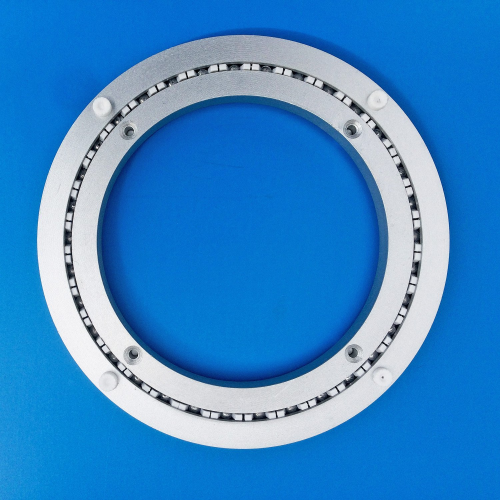
This is the 8" turntable I just ordered off Ebay to mount the body to the base. It looks like it'll be perfect and is rated to 300lbs. They are available in sizes from 4-16".

Ā 

Ā 

Ā 


This is a companion discussion topic for the original entry at https://community.robotshop.com/robots/show/jazzy-the-robot-nearing-mechanical-completion

awesome!

i knew that the picture reminds me of something bozo-y

Awesome!

I canā€™t wait to see how you put it all together.
Do you plan on using hydraulics in yours? Very cool.

Hydraulics?

I have some small bi-directional air cylinders I may use but probably just linear actuators so I donā€™t have to mess with a compressor, air tank, and control valves.

The Wizard TV show from the 80ā€™s

This robot, PAL, was the last dying gasp to save the show. Unfortunately, it was too little, too late. I have this episode on video if anyone is interested. It was taped off-air on Beta, commercials edited out, and then burned to DVD. Even though it isnā€™t Blue Ray quality, it still makes a good watch and there are lots of nice close-ups of the mechanism. See how many things from Short Circuit they ā€œborrowedā€. I will make the DVD available to LMR members for $5.00 / US which just about covers materials & shipping.

Ok, you got me.

I just keep clicking back to this one, Mr. Salvageā€¦

Damn, I think I am going to have to build one myself --or at least something close. Letā€™s seeā€¦

  • Wheel chair from Ebay
  • Ton of aluminum
  • Lotta endmills
  • Big battery, big motor
  • Lotta McMaster Carr stuff

Ā ā€¦and then after the whole project snowballs on me:

  • Pneumatics
  • 1000ā€™s of dollars in all the stuff you need to make pneumatics go
  • Probably a lot of linear acuators
  • ā€¦then you have to stick a netbook in the base
  • ā€¦might as well add Wifi and stuffā€¦

Yeah, I think I have been bitten. This oneā€™s gunna cost a lot, methinksā€¦

Yup!

Chris, Since I updated earlier today, Iā€™ve taken it out for a test drive and it is very impressive. Even on a partially charged 12v gell-cell, speed isĀ awsome and it is unbelievably smooth and quiet with sport car handling. As I mentioned in the blog, this is not your typical powerchair and is much smaller and lighter than normal with a lower power demand from the motors. The extended motor shaft out the back as well as the tapped holes in the motor back plate just beg for some spacers to mount a board with a shaft encoder on it. Currently, with one battery, the whole thing weighs about 50 lbs, (estimate), havenā€™t actually weighed it.

The other nice thing about going this route, I have already sold the un-needed parts, (charger, joystick, controller, seat, etc) for enough to pay for the chair and give me over $200.00 towards construction.

Iā€™ll be watching

I keep checking back on your progress as there donā€™t seem to be many bigbot builders. Most seem to be doing the small ones. Even the ones Iā€™ve found based on wheelchairs donā€™t seem to get past the ā€œremote control baseā€ stage.

I need to snap pictures and start a page for my latest which is similar to yours. I stripped down a Pride Jazzy Select (big brother to the ā€˜Zā€™ chair I guess) and will convert it to an R/C lawnmower. Iā€™m trying to do it without replacing the stock controller since finances are tight. I donā€™t mind the built-in safety features for the mower and might look into reprogramming the controller if I need to tweak it some. I was going to make a full-size robot but, for reasons Iā€™ll go into on my own page, decided to make the mower with this and use the Drive Medical Cirrus Plus chair for the bigbot.

Yes, I got a deal on 2 ā€˜brokenā€™ power chairs. :slight_smile:

Ā 

Thanks

I also have the Jazzy Select, I got 3 chairs in the same auction, (Invacare also). I have run into a slight roadblock with mine, I canā€™t find any way to make the chassis into what I want, soā€¦it looks like Iā€™m going to buy some square tubular steel bar stock and learn to weld up a new frame. Itā€™s been over 40 years since I did any welding but this new wire-feed MIG looks a lot easier.

Updates

Iā€™ve updated my progress if youā€™re interested.

1 Like

Excellent update

Glad to see you still working on this. It looks like one of those long term projects.

Long-term

Yes, itā€™s been awhile, I had a lot of items on order and had to think about how best to do some of it but everything is finally coming together.

If youā€™ve never been to EZ-Robot.com, you need to check it out. This is the controller board I am using and it is awsome.

20 digital channels, 8 analog, built-in bluetooth, speech synthesis, speech recognition, and image recognition.

1 Like

You understand the IR sensors you have purchased

are simply adjustable IR switches, and not, remotely comparable to typical Sharp sensors or their ilk?

Sensors

I am aware what they are. You donā€™t need distance data for collision avoidance, just go /no go.

roadblock here too

Since you also have a Pride Select youā€™ll see my problem which wouldnā€™t exist if I had the Z Chair. I want to separate the motor section from the battery tray/rear swivel wheels. The Z Chair splits apart exactly how I want but the Select is solid heavy duty one piece frame. Basically I want to cut out the battery tray and mount the lawnmower deck in itā€™s place. Since I donā€™t have the tools or welding experience I put it all aside for now and started work on the bigbot project using the Drive Medical Cirrus Plus chair.

I need to get a page up for that build. Iā€™m using 2 of those same proximity sensors for bump switches to detect obstacles too big to roll over but too low for the ultrasonic that will mount about head level (5 feet maybe). I might put a Sharp in the center watching the floor to keep from running off a stage/platform/stairs.

I like your head setup. Another area where Iā€™m lacking is creativity. I had an old 13" terminal monitor I gutted for a head but it looked like crap and tossed it. Iā€™ll have to figure it out later after I get a body built up.

Jazzy

Another Jazzy Select just came up on auction and I donā€™t know if I should bid on it, itā€™s in nice shape and would be a shame to part it out but if cheap enough:-)

If you want a cheap and easy head for a large robot, the plastic dome off an old salon style hair dryer works well. Iā€™ve used these on several robots and itā€™s an easy build. A snap-ring holds the dome in place so all you have to do is use the base as a pattern and trace it onto a thin piece of metal. Set the dome on the metal base you just cut out and put the snap-ring around both the lip of the dome and the metal you just cut out and youā€™re done. They generally come in a smoked plexiglas and have an opening where the dome is mounted and the air comes through. This works out nice to mount your speaker with a piece of perforated speaker grill.

I still have a couple sitting around waiting for another build.

Check out

your local craigslist, I find them cheap if you don mind them a bit old and sometimes nasty. The ones I got were sitting in a garage and originally came from a relative who died and apparently weren used there either. Of course you won get godd batteries or resellable parts. My stripped off parts were too bad to try to resell. I see them often for $50 to $100. The motors alone go for $50 each on Ebay.

That is a very nice and

That is a very nice and invention. Shows your hard work and efforts. I think such inventions deserve to be patented. go here and find out more.

It is getting better and

It is getting better and better! Great work in the chassis.

Thanks!

Thank you for the kind comments, it is appreciated. Iā€™m getting the ā€œknuckleā€ welded Monday morning and the body will go together pretty quickly after that.