Ignoble Idiocy

"Those who cannot remember the past are condemned to repeat it." - George Santayana

mistake_0.gif

Nobody's perfect, least of all me. Here I intend to record some of my roboting mistakes for my own good. Perhaps you can learn from my errors, or even contribute your own.

Latest Update: 2010-02-04

Over doing it (wiring)

On my first robot build, I thought I’d be smart and use some extra heavy gauge wire for the motors. Not only was it overkill for the intended current, but I wound up breaking one of the motor contacts, requiring this fix.

Now I stick to the proper wire gauge for the application at hand.

I think you could reinforce
I think you could reinforce it with some hot glue, that’s what i usually do.

Good tip! I could have
Good tip! I could have learned from that one. However, there really was no good reason to use 18 gauge wire. Waaaaaay to heavy.

Continuous servo rotation for dummies

I just received ten mini servos from DAGU. I was so excited to get them working. I also bought the nicely LMR branded sensor mounts. So I combined these great DAGU parts to make a pan/tilt mount.

However, during programming on the PICAXE, I typed "255" for the servo position, instead of 225. The PICAXE manual advises NEVER to go higher than 225, and now I have personally experienced why. The poor little servo started spinning around! I broke right through its own mechanical stop (nice torque on those mini servos!).

The servo is still working… sort of. But it is definately out of whack. Lesson learned. Check your code before you run it!

It would be nice if the
It would be nice if the program would see that in your code and yell DANGER WILL ROBINSON DANGER!!!

Robot Program Critic

I know! I need to create a robot that is better at programming than me (probably not hard to do). Then it can stand over my shoulder and shout warnings, encouragement, and derision as most appropriate my coding efforts.

Oh, wait. That’s what you folks at LMR are for. ; j

Wobbly Gear

I took a shortcut drilling out the center hole of a gear to accomodate a larger diameter shaft. Although I have a drillpress, I didn’t spare the few minutes it would have taken to make an accurate hole that is perpendicular to the gear. I used a hand drill instead.

Now I have a wobbly gear. It doesn’t matter in my application. My son just wanted to see a fan-like add on on the back on my Shovel Head Fred robot, “to make it go faster”.

So it doesn’t matter that it wobbles, but if I ever need that gear for another project, I’m out of luck. Two more minutes and a little patience and I could have avoided this. Lesson learned.

awsome, I shall visit here
awsome, I shall visit here regularly. I had the feeling that my general impatiance and hence incompetance in construction was an isolated case. It’s good to know that for other people naturally choosing the correct method is also hard won! :smiley:

Glad to know you like it.
Glad to know you like it. I’ve promised myself to post my mistakes, and not be embarrassed by them. I will learn from them. Others will be amused, disgusted, or entertained as is their wont. I’m cool with that.

Alright so I ordered these
Alright so I ordered these servos http://www.pololu.com/catalog/product/1040. I had the intent of modifying them in the usual way. I opened the case and took the first three gears off. I couldn’t find a stop so I put the gears back on in their proper places. I reassembled the whole thing and when I rotated it by hand it rotated continuously. This happened for both. I hooked it up to my board and used 0, 90, & 180 for full speed one way, neutral, and full speed other way. The first servo just sorta spun in one direction full speed, and stopped and twitched, then spun full speed until one of the gearshafts broke and took a few gears with it… :(. So I thought I’d try the second servo. I hooked it up and it spun way with 180, and was nuetral at 90. When I entered 0, the gears stopped moving and only the pager motor was spinning. It got really hot and just went caput. So yeah, I think part of the problem was that these servos were just pieces of crap and poorly built. So I recommend you don’t buy these… Anyone know of good reliable and relatively cheap micro servos?

How do they compare to the
How do they compare to the DAGU mini servos?

I haven’t used the DAGU
I haven’t used the DAGU servos… Have you? I’m looking for another good tiny servo. Mine that broke were pretty noisy but were very small as a plus.

Used Dagu Mini Serovs on Pan/Tilt Mount
I used them here on my pan/tilt mount.

Andrew Fails to center a hole

I’m trying to make some couplers so I can connect the Mr. Basic drive shaft to a short length of steel cable. The goal is to create a flexible drive shaft.

Here’s the problem, I have so far consistently failed to get a hole drilled straight through the axis of a 1/4 inch steel rod.

Update 2009-09-28: Success! I had another blunder and then finally got it. I added pictures too.

Attempt #1:

  • Used a Dremel to cut off and clean up an 8mm piece of steel rod. No problem.
  • Center tapped “by eye” the end of the rod.
  • Used a 3/32 inch drill in a drill press, with the rod held in a vice.

Coupler_try__1.jpg

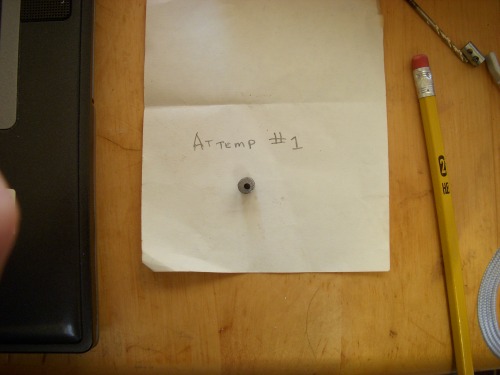
Result: The hole was visibly off-center.

Attempt #2:

  • Used a Dremel to cut off and clean up a 5mm (which is too short, I forgot to double-check the required length) piece of steel rod.
  • Tried a cute idea I read about on the web for a center tap jig. The result was WAAAY off center, so I went back to just visually centering and taping the end of the rod. I had to Dremel down the originally off-center tapped hole.
  • Used a 3/32 inch drill in a drill press, with the rod held in a vice.

Coupler_try__2.jpg

Result: The hole was off-center. The rod was too short.

Attempt #3 (a bit better):

  • Cut and center tapped the piece as before.
  • This time I really watch the drill as it started to cut, and I saw that even with the center-tapped hole, the bit tended to wander.
  • I REALLLY slowed down the downward pressure, and let the hole establish itself in the center before pushing through.

Coupler_try__3.jpg

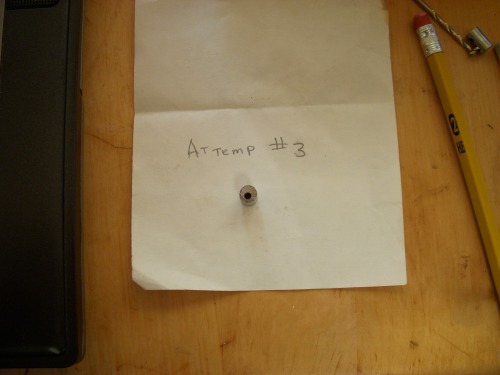
Result: The hole was centered on ONE SIDE, and off-center on the other. GRRRRRRR!

At least I'm learning. Next time I'll be 100% sure I have the piece in the vice vertically. I'll go slow all the way through the cut, and i'll try using some oil to lubricate the drill bit before cutting. I'll also double check the speed I'm running the drill press at.

Update!

Attempt #4 (Oh! The humanity!)

  • Tried another one. It was still off-center, but at least the hole went straight through.
  • Decided to try the two side holes for the set screws. Tight fit since the piece wound up about 7.5 mm long, and each hole is 3/32 (almost 2.5mm).
  • Two side holes center-tapped, drilled, and threaded. OK!

Coupler_try__4.jpg

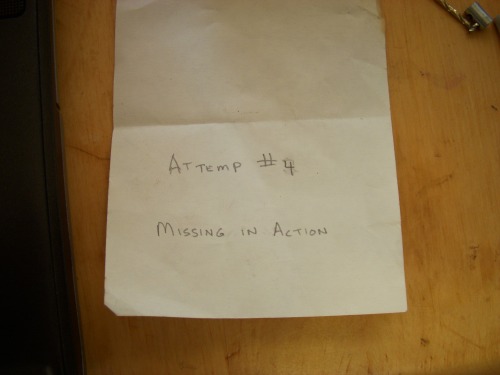
Result: Put in the set screws, but one got stuck and wouldn't back out. One half of the slotted head snapped off, and I can't get the f***er out even with vice grips. I ALMOST had it.

Attempt #5 (Busted drill bit!)

  • This time I thought I had it.
  • Everything was going so well.
  • I got as far as drilling the hole for the last set screw and BAM! The piece went flying.
  • I didn't have it clamped down well, and the tip of the drill bit snapped off!

Coupler_try__5.jpg

Result: Busted my nice shiny drill bit and had to substitute an old, not so sharp one.
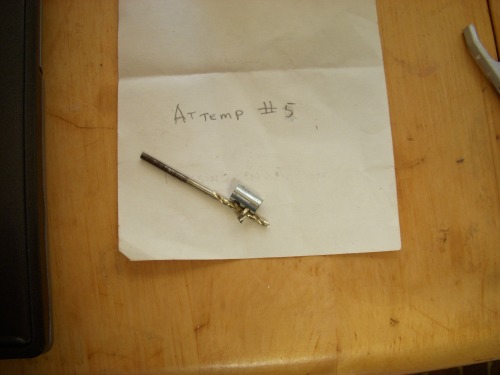
Finally! Success!

  • I was able to salvage the piece from attempt #5.
  • Pausing only long enough to document my disaster, I got a new bit and this time rigged a good clamp.
  • Everything came out swell.

Coupler_success.jpg

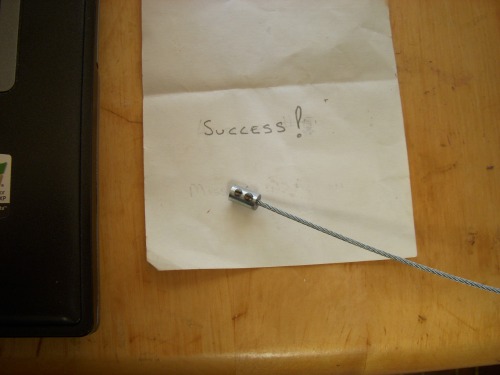
Result: Set screws are holding in the steel cable. Now I just need a 2.5mm drill bit so I can widen the center hole for the Mr. Basic drive shaft.

Oh, yeah... and build like seven more of these.

Learn well from my mistakes, oh reader.

Updates w/ Pics: Fail to center hole

Now with pictures to document my inability to center a hole on a metal shaft.

I was talking to a friend of mine yesterday who works with machinists. He said the best way to get a center drilled hole on a shaft is to start with a square rod, drill the hole, and then use a lathe to round out the rod around the center hole.

Nice for him. He has a metal lathe.

Bang goes the driver – Testing on good hardware is a bad idea

I got some shiny new 75oz-in 24V bipolar steppers (1.4ohm/coil) to replace the weaker 90ohm/coil 24V printer motors on my homemade CNC machine. Today I finally had the time to play with them. My plan was to test out the motor the easiest way I could by plugging in the motor to one of the stepper drivers on the CNC. I took precautions by disconnecting the other drivers, but I overlooked another flaw in my plan – testing on good hardware. The beautiful thing about using the driver on the CNC is that I didn’t have to reprogram my microcontroller – I just opened up a hyperterminal (yeah I use Windows) and told the motor to go! And it went for a while, and then stopped and shuddered, as if it were too weak to turn. I reached in to investigate.

sizzle went the hair on my knuckles as I almost touched the L298 stepper driver IC. “That shouldn’t be that hot,” I thought. And indeed the driver had gotten quite hot. When I plugged in the old motor, it no longer worked, confirming that the L298 had let out its smoke. Such is testing – drivers sometimes burn. It was a shame I had decided to test on one of the driver boards I needed for the CNC.

120 minutes later, I had desoldered my spare L298 from a spare driver board (the one I should have used from the start), desoldered the dead L298 from the disabled CNC driver, and the CNC is back in commission. The lesson I have learned is that with new components, do not test on hardware you need. It would have been worth the extra 20 minutes to use the spare stepper driver instead of spending 2 hours fixing the mess I made. oops.

And I probably should have done a quick Ohm’s Law calculation of current draw. My motors have 1.4ohms/coil and are driven at 24V, so they want to draw 17A/coil, or 34 Amps with both coils. The L298 was not current limited and can handle 4 Amps.

It wouldn’t be nearly as fun

It wouldn’t be nearly as fun if you didn’t blow something up once in a while.

I wonder how much time is wasted on mistakes we make trying to save time?

How much time we try to save…
Well, I think everytime we try to save time or money it costs a lot of both…just my not so humble opinion.

This one is embarrassing. I

This one is embarrassing. I wanted to film GRAB-E’s new features, so I put him on a table and started filming. The only problem was the table wasn’t quite bit enough! I knocked the poor guy’s head off.

I have video, which I may post if I can get over my mortification.

Update: Alright, video will be available at the link below as soon as YouTube finishes processing it.

http://www.youtube.com/watch?v=UsfdRYBJwSc