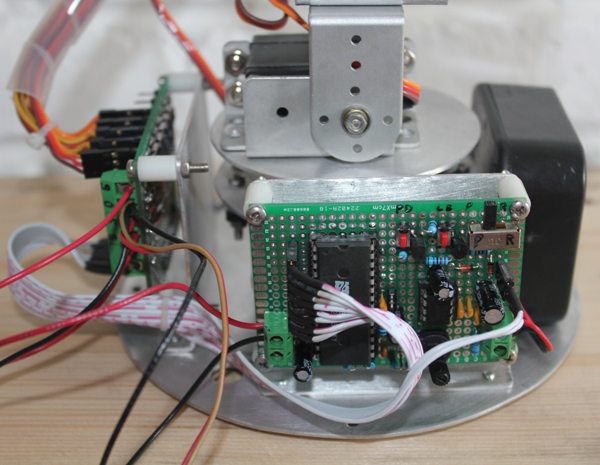
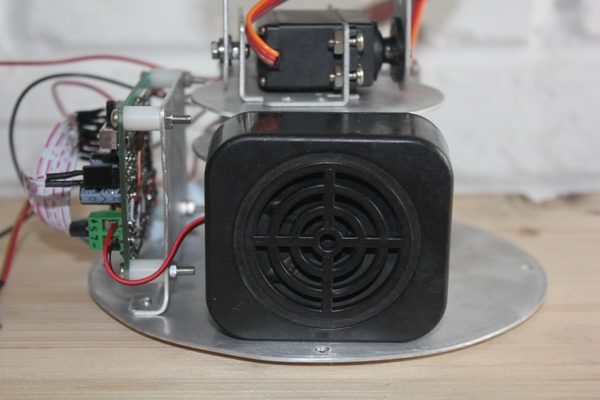
Voice recorder board finished and assembled. The loudspeaker (0.5 W/8Ω) is from an old toy, came in nicely in a small plastic box, which covers the speaker and improve the sound (soundbox). Some basic programming done, see video DOC_0002.
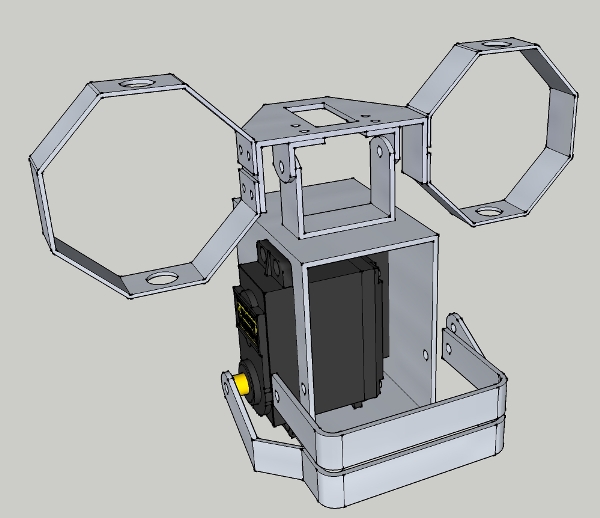
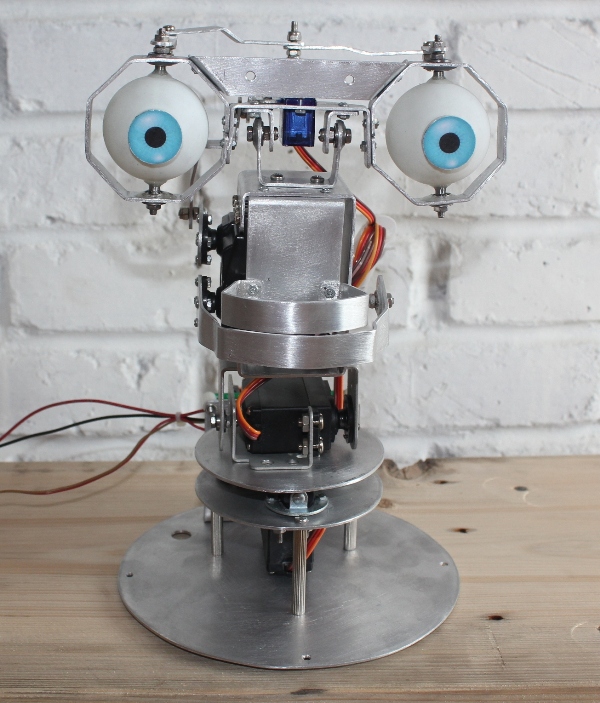
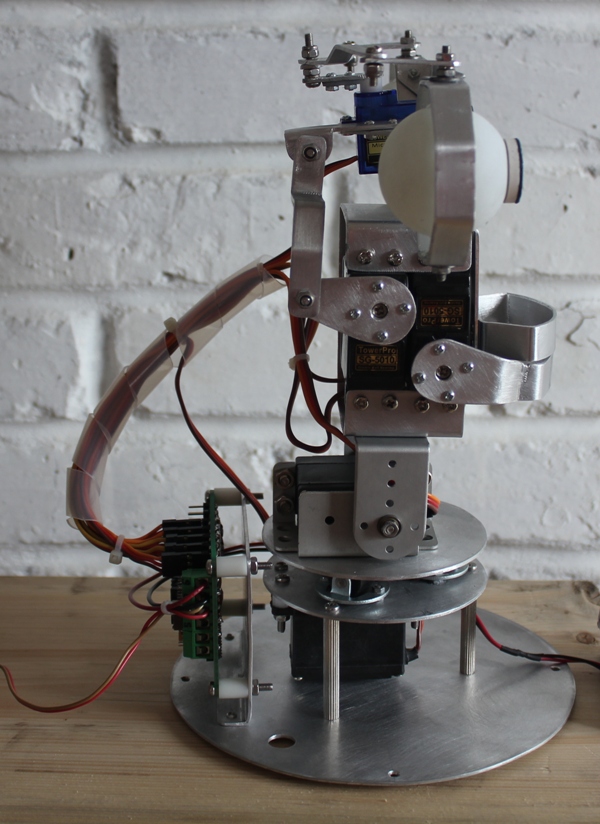
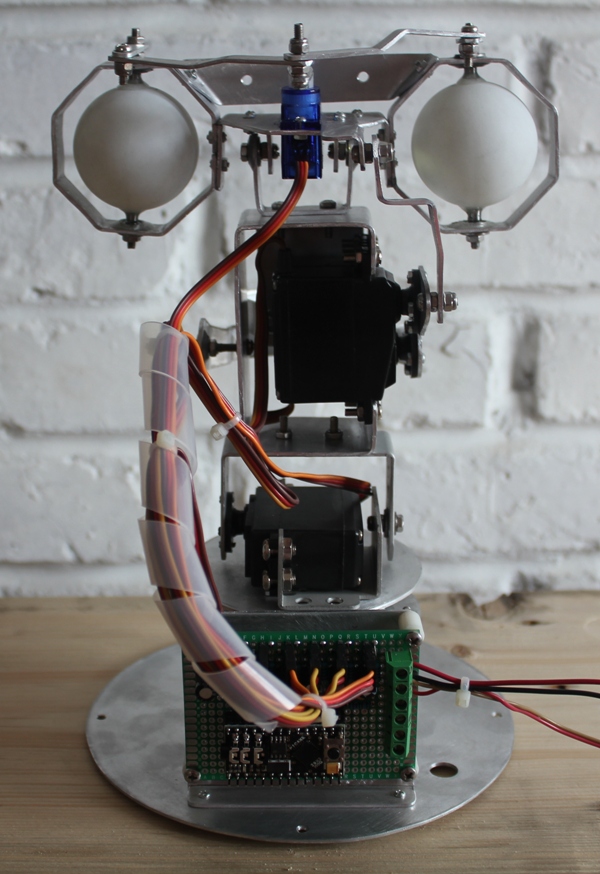
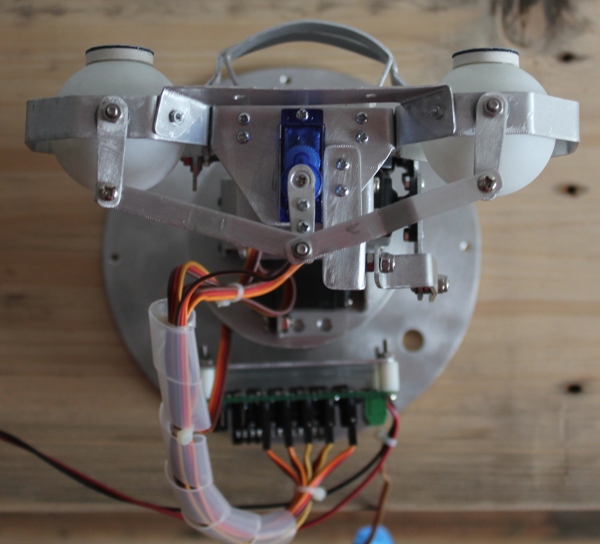
This is one of my projects, I wanted to share with you before I am going to holiday. Inspiration for the robot was the DRK8080 from Doctor robot, hence the name DOC. So far I have finished the 5 DOF robot head. The head was partly designed with Google Sketchup, mainly to avoid faults in construction. I can only recommand this, even your robot is much simpler from the mechanical point of view. Tools and materials I have used:
Cordless drill/various metal drills
Cordless Dremel clone with various tools
File
Sanding paper (various grain sizes)
Tin snips
Several pliers
Steel rule
Try square
Circle
Scissors
Squared timber (to bend the aluminium)
Clamps
Mini tubing cutter
Propyl alcohol (for cleaning)
Aluminium sheet, thickness 1 and 1.5 mm
M3/M2 screws and nuts, washers and snap rings
Ø 8 x 3 mm bearings (supplied usually with C-servo-brackets)
Common servo-C-bracket
Servo mounting bracket
Tiny casters for the pan unit
2-component epoxy glue (for the eyes and holding the bearings in place)
Super glue (to fix components before drilling and secure nuts on moving connections)
Table tennis balls (for the eyes)
1 Tower Pro SG-90
2 Tower Pro SG-5010
2 Tower Pro MG-995
Plastic tube, outer diameter equal to the pupils diameter
Ø 3 x 4 mm stainless steel tube
Color print/carton/transparent duct tape for the pupils
Stands out as standalone This stands out even if it’s standalone. A sophisticated head concept that could be used for several projects. Thanks for sharing. Collected.
Hi, I just have a quick question: How did you put the ping pong balls on the axles? Because, I tried using a small drill bit to make a hole through an eye I made for a recent project, but it split in two. Please help.
Tip: I am using ping pong balls made from celluloid. It’s difficult to see from which material they are made, but if you drill a hole in it, you can smell camphor (smells like a mothball). Camphor is used as a softener for the celluloid. Always drill on the seam of the ping pong ball. You might not see it, so put the ping pong ball in front of a bright light. Make a marking with a pencil. Start to drill a 2mm dia. hole firstly, then use a 3mm drill etc. Drill slowly and without applying pressure.
There is also a trick to align the axle. Use a stripe of paper, wrap it tightly around the ping pong ball and make an according marking on the paper, so you get the circumference of the ball. Use a ruler and measure the circumference. Divide it then by 2 and make another marking on the paper stripe, where the half of circumference is. Put the end of the paper stripe on the first marking you made on the ball (it doesn’t matter where, just on the seam). Wrape the paper stripe around the ball again. Make another marking on the ball, exactly where you had made the marking on the paper for the half of circumference. The second marking on the ball should be also on the seam.
Finally, glue the axle with 2 component epoxy into place.