Yes…
i sure want you to take a look and help me… LOL
A bit too far from me.
Ok…
Tomorrow is the end of vacation.
Also soon the end of the complete rebuild of my CNC.
Just got some picture of the X axis tonight… take a look…
http://farm7.static.flickr.com/6194/6091535280_22b9f521b3_o.jpg
http://farm7.static.flickr.com/6072/6091536068_0d27c7ac59_o.jpg
http://farm7.static.flickr.com/6086/6090992685_cb6f254735_o.jpg
http://farm7.static.flickr.com/6201/6091535754_af783d7733_o.jpg
http://farm7.static.flickr.com/6075/6091535592_47031eb4b5_o.jpg
Can’t wait to see it all assembled… 
Yeah! That’s a great looking machine!
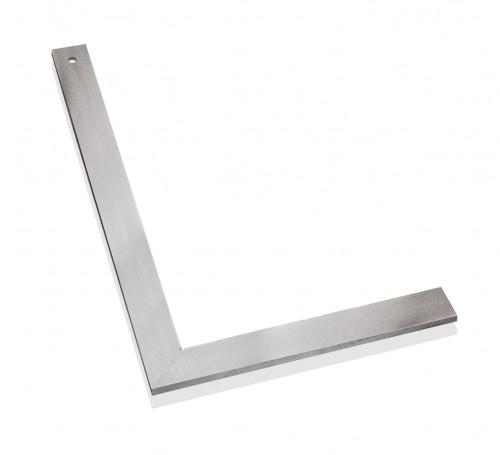
Do you have a good square?
Alan KM6VV
I don’t have much infos… 
he is supposed to have extend the x size. Since the rods where 36"
That thing is huge! Hate to think what it cost with all the upgrades!
Where’s the stepper motors!
Alan KM6VV
Still don’t have it.
They are picture that the guy send me… 
I will probably need a good set of motor next… But will begin with the one i have.
575$ Original price (Witch include the stepper he gave me)
For the upgrade, the deal was that i order all parts in double. One set for me one set for him.
100$ acme antibacklash nuts
80$ 1/2" ground rods
80$ 1/2-10 acme screw
150$ 20mm rods and bearings
± shipping … some where ordered with FedEx office account… so don’t know the price
Thoses price are for 2 set…
Looking good, Eric,
I like the way each letter slants further and further to the right as you go along. It gives a sense of motion.
But please tell me you didn’t use that tiny bit to route away the entire background and still get it beautifully smooth and flat. I used to route three dimensional unit plaques for departing office mates. Even with a custom template/jig, they were never that perfect. 

It’s a 1/16" bit
Just testing… the relation to reality 1mm = 1mm is not done yet.
But it look good… 
The “Logo” is a sample in the software i use. EMC2 is the software.
The picture was taken reverse and i flip it… looking kind of weard in that way… lol
I have invest a lot in that CNC… and i am at begining of cutting. Still need good 1/2" linear bearings.
Now i need some material.
I am looking at Home switch. Does anyone use them or just manualy do it ?
Looks good Eric!
You might or might not want home switches.
On my CNC’d Sherline mill, I don’t have any. I touch off on a corner of my stock (usually metal), and then set the corner to 0,0. Or maybe I center the stock (round) under the spindle, and then zero my axis. Depends on what I’m doing. It you will make multiple parts, then home switches and a fixture can be an advantage.
LIMIT switches, on the other hand on a big router or mill might keep you from slamming into the mechanical stops at high speed, but good programming and “testing the run” can do that as well.
Don’t forget an “Emergency Stop” switch! When you need it, you need it.
My CNC controller program uses the space bar to quickly decelerate to a stop (the E-Switch just kills everything to stop), without loosing position. And then I can press a key to continue.
Preview of the cuts to be made beforehand prevents the (embarrassing) mistakes of forgetting to set the “home” on the CAD drawing, or of not using the same home position, both of which result at least in wasting stock, and at worst attempting to run off the end of the ways!
Happy CNCing!
Alan KM6VV
Tanks for all the info Alan
I will mostly do fiberglass sheet cut… so Homing at the same spot all the time could be interesting… i think…
Order 4 sheets of FR4-G10
1/8" 12"x12"
Maybe screw down some small stops, like a little ‘L’ down in lower left corner of working area. Or a long edge to the bottom of the little ‘L’ to give you something to align your fiberglass stock to.
If the router and it’s control software are kept running, then you’ll probably keep your origin (0,0) reference between stock changes.
Alan KM6VV
That’ll work!
Just put one or two more counter-sunk holes through it and bolt it down securely.
Alan KM6VV
It’s alive “again you will say” …!
Now with Xylotex CNC controller and Motors…
http://farm8.staticflickr.com/7031/6434119265_c9448df7de_z.jpghttp://farm8.staticflickr.com/7173/6434128605_f45b944ca5_z.jpg
http://farm8.staticflickr.com/7007/6434127039_3627968dbf_z.jpghttp://farm8.staticflickr.com/7173/6434125577_b7b6f10c27_z.jpg
http://farm8.staticflickr.com/7006/6434124813_44d8220a92_z.jpghttp://farm8.staticflickr.com/7006/6434124813_44d8220a92_z.jpg
And the first cut.
1.5mm Fiberglass sheet (G10)
1/16 - 4 Flutes cutting tool
RotoZip
Table was not level ok… one corner didn’t cut thru all the way.
But for a first try… it’s good
Also the part is not the right exact size, a little bit bigger.
On the pictures you can see a good part that was cut by another CNC.
Finish Part
http://farm8.staticflickr.com/7161/6434606437_a0fb4d628b_z.jpg
Comparaison…
http://farm8.staticflickr.com/7169/6435986941_db38d8e3c2_z.jpg
Looking great Eric!
ASAP get the ends of those motors sealed up! Duct tape, shrink wrap plastic sheet, or whatever, especially on the Z axs (up/down) cause the dust will get in and destroy the bearings. Trust me I learned this the hard way. 
Thanks Jim,
Will do something to seal them.
Congratulations with your own CNC machine!


