BERNT

"My First Robot" - BERNT

EDIT: 2009-02-02 - BERNT IS ALIVE!

New video added, I know the performance sucks and all that...but i just wanted to show it. =o)

EDIT: 2009-01-11 - FIRST POST

Part one of the "How to Build Your First Robot"-code is implemented with some minor changes in order to suite the somewhat different components htat i've used.

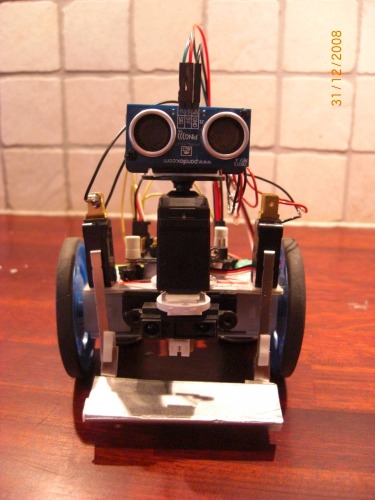
The difference from the tutorial is that i've used a Parallax PING))) sensor and added two "bumper"-switches that actives an interrupt in the code.

The IR-Sensor isn't activated just yet btw.

This lil quite works as a charm.. =o)
It really really really annoys my poor dog as well.

EDIT: 2009-01-15 - PARALLAX PING))) Sensor

Some of you have emailed me and asked how I got the PING))) sensor to work with the 28X1 board. All of you should take a look at the following excellent walkthrough/tip: https://www.robotshop.com/letsmakerobots/node/1276 made by Vince v2.0

The main thing is to make sure that the sensor is supplied with 5V! ( I made that mistake)
The walkthrough discusses most of the problems that may occurs while dealing with this sensor.

The subroutine in BERNT dealing with the PING))) sensor looks like this:

get_distance:
high portc 0
pauseus 5
let dirsc = %00000000
pulsin 0,1, w0
return

EDIT: 2009-01-29 - New Navigation Code

BERNT is now a little more "smooth" in his navigation and I've decided to add a video of his performance. =o)
Next part is to make him follow a wall using his Sharp IR Sensor. Video will of course be added.

Beer is great.

EDIT: 2009-01-30 - BERNT IS DEAD

Bernt the way we know him is dead! A new-born BERNT will be published soon though, this time with some more sensors, new code and some cool accessories.
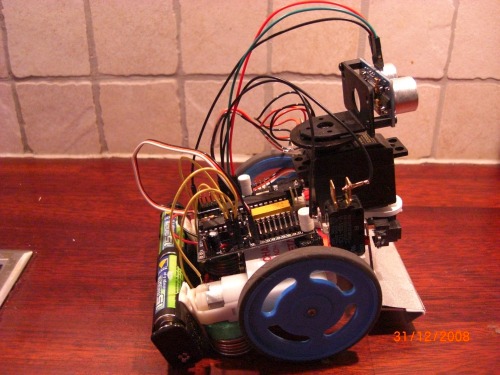
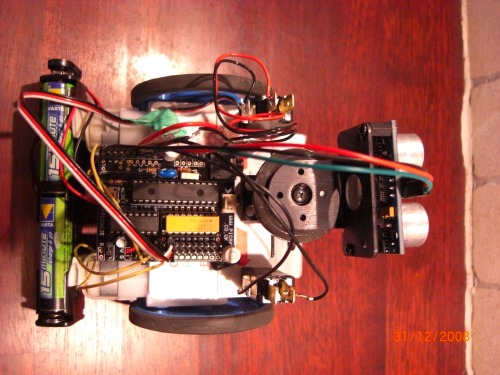
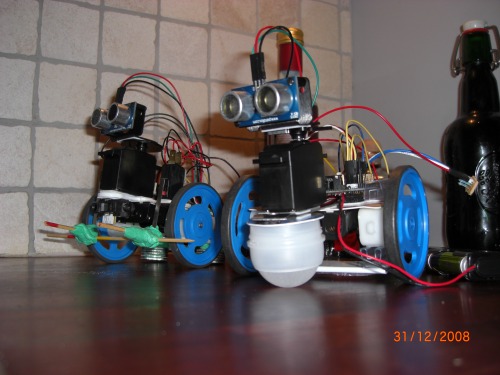
BERNT with friend.

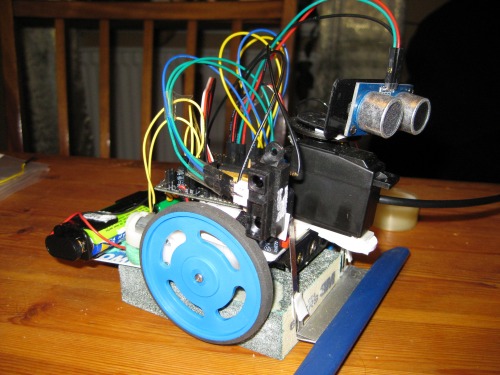
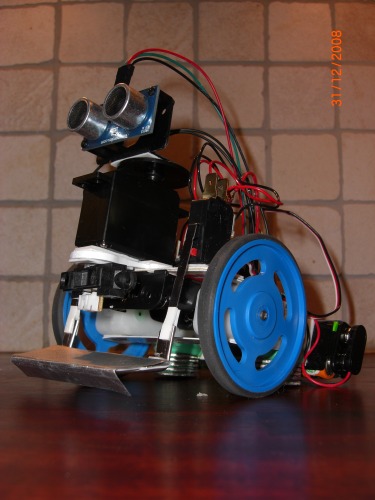
Navigates around using ultrasound and with a bumper to detect low-level obstacles.

  • Actuators / output devices: 2 motors, 1 Servo
  • CPU: Picaxe 28x1
  • Power source: 4 AA batteries
  • Programming language: Picaxe basic
  • Sensors / input devices: Sharp IR, Parallax Ping))), 2 Bumper switches
  • Target environment: indoor

This is a companion discussion topic for the original entry at https://community.robotshop.com/robots/show/bernt

Looks good, at LMR we go
Looks good, at LMR we go apesh*t if we dont get video. Therefore, I demand video!

Video will be available shortly!

hahaha, i know that! I hate crappy posts without videos. =o)

I’ll try add one later this week!

Sharp Sensor?

Why the Sharp Sensor isn’t connected?


I didn’t have the proper
I didn’t have the proper connections for it and didn’t want to completely ruin it by solder the wires on to it. That’s why. =o)

I like the way you did with
I like the way you did with the bumper switchs :wink:

Will look forward for the video :]

A lil clip is now added on

A lil clip is now added on youtube…it’s just as crappy as it’s supposed to be. =o)

Regarding the bumper only the left switch activates the interrupt. The right one has to wait until its time in the code to do something.

Pretty good obstacles avaoidance!
Little bot does pretty well getting out of a jam.

Cool thing you are using

Cool thing you are using interrupt’s not many people know about this feature! :slight_smile:

Nice bumper-work (despite the ending :slight_smile: - And with a head that high you sure need it! However, they are always a good idea.

You may find the code in part II interesting / fun - I know you are capable to adapt it, it has better navigation :slight_smile:

Actually it could be optimized using interrupt’s as wel!

l00ks great!! maybe a more

l00ks great!! maybe a more rounder back dragging device or another back wheel would help go through the merciless carpet… hehe.

Thanks!

Yeah, i’ve been looking all over the house for a better solution, but haven’t found anything useful just yet! I may have to visit my parents and slaugher some poor toy cars soon. =o)

Carpets are evil I tell ya…EVIIIIIL!

I’m looking forward digging

I’m looking forward digging into the part 2 code! And yeah…the ending is quite embarrasing, but had to show it anyway.

Interrupts are cool, no point in letting the poor robot smash his head into a wall just because the execution of the code is slow. =o)

Too bad that there’s only one interrupt case allowed though … (as far as i understand)

There is a way around this.

There is a way around this. Wire up 2 sensors to where both report to the pin that controls the interrupt and their own pin (both sensors are hooked up to 2 pins each, 1 of which is shared). When the interrupt is triggered the code checks the other 2 pins to see which sensor tripped the interrupt.

For example a bumper switch and an LDR are hooked up to detect instances where an interrupt is needed. Both are hooke dup to a common pin which will trigger the interrupt and the bumepr switch is hooked up on IN0 and the LDr is on IN1. When the interrupt is triggered it looks at IN0 and IN1. If IN0 is HIGH it knows the bumper was activated and it moves backward away from the obstacle. If the IN1 was the trigger then it looks at the value of the LDR and sees that a light was turned on so it needs to hide.

That’s exactly what I’ve

That’s exactly what I’ve planned to do! =oD

Perls!
https://www.robotshop.com/letsmakerobots/node/2112

hehe, yeah…a little bling

hehe, yeah…a little bling bling is never wrong!

I actually tried to a third wheel out of an empty deodorant bottle, worked fine but was waaaaaay to big for my lil sweetie! My buddy used it on his bot instead! (isn’t published here)

Hmm…maybe I’ll look for some beads around here afterall

ty for the tip =o)

Tracks are the answer, Not a third wheel!
Install a pair of tracks and your problems with wheels are over! Carpet will bow down to plastic solarbotic tracks!

It does seem a lot more fluid.
Good job man… :stuck_out_tongue:

Thanks!
Thanks mate! =o)

hahahaha
WTF is he pulling behind him? a lady bug? lol nice upgrades. :slight_smile: