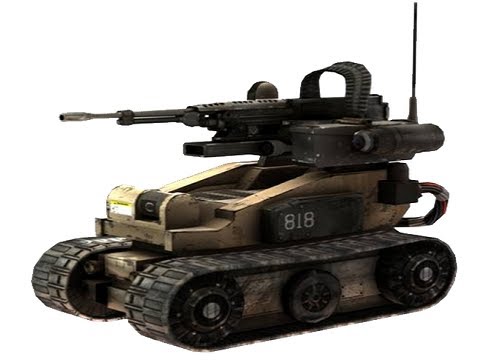
Hey all, I just finished my Assault Drone I’ve been working on for the last 4 months and I thought I would share! I have had this idea to recreate the assault drone from one of the older Call of Dutys for some time now and I finally went and pursued it. This is my first robot so I definitely learned a lot in the process of the design and build. I have tons of pictures, CAD drawings, and files so I will try and pick out the best ones!
 Assault Drone from Call of Duty
 My initial CAD draft to scale
 Had the frame welded at a local fabricator
 CNCed wheel hub disks and snowblower track wheels
 Wheels with hubs and axles
 Motors mounted 4x 312 RPM Spur Gear
 12V 14aH SLA Battery
 The roboclaw! 2x30A

Arduino Mega, 60A Fuse & Switch, Vertical Axle, and the first Tread
 Starting to look like a robot, Lynxmotion PS2 wireless controller
The first drive
 Airsoft gun (had to do a few mods)
 Mounting disk
 Rack and pinion for vertical motion
So the gun is mounted on a pillow block which is attached freely to an axle on the disk. The back of the gun is mounted to a pinioned servo which moves up and down a rack to complete vertical motion of the gun. The disk is mounted to an axle controlled by a continuous servo for horizontal motion which also has 2 limit switched on either side to prevent torquing the wires that run to the gun.
 Wired my first every PCB!
 The fun part.
I mounted a feather servo the the trigger with 2 positions. Off trigger and On trigger for firing. The gun has Semi Auto and Full Auto settings so I just left it on Full Auto. The 3 servo are connected to a Maestro Servo controller which is all connected to the single Arduino Mega.

It works! As you can see on the side I mounted a battery charger terminal so I don’t have to disassemble the entire bot when I want to charge it. I also mounted an Arduino port on the bottom so if I want to make any changes to the program, I can just plug in underneath. I don’t think I have any pictures of this.
 Designing the shell

My first time working with sheet metal. It was not fun and I did a pretty shotty job.
 Primed
 And painted!


Driving around the garage
The first round of shooting!
I spent a little more than I should have (probably around $2500) but it was over the course of 4 months and it was an absolute blast learning Arduino IDE, mechanical work, programming Motor and Servo controllers, and discovering other projects to help excel my own! If you have any questions on the program or parts I used don’t hesitate to ask! I have a new build in mind similar to this one so I’ll try and keep you guys up to date.

