This is my first robot. It can't do much now, but drive ahaead, since there are no sensors on it yet.
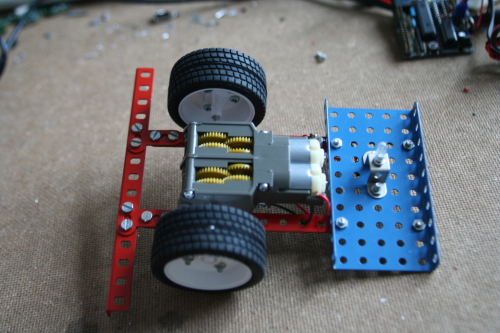
It's a simple robot made from a Tamiya Twin gearbox and some Tamiya wheels. The body is created from some old toys I had lying around. The rear end is supported by some plastic gizmo, that I found. What you probably can't see is, that the support is not perfectly centered, so in the first test, it dragged the robot to the left. I'll find a way to center the thing and maybe find something with less friction.
One other problem is that the gearbox is open. When it tried to drive over the carpet, the carpet got stuck in the sprockets and the vehicle stopped. I'll have to mount a cover under it to avoid this.
For sensors, I think I'll start out with a line follower. Then later, I'll go for a distance sensor.
UPDATE:
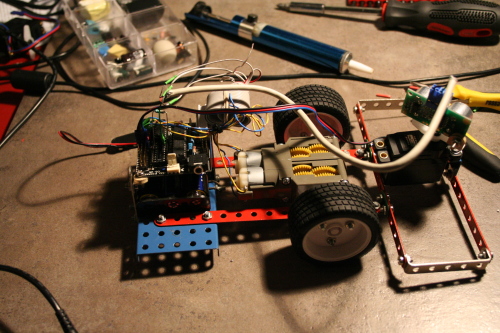
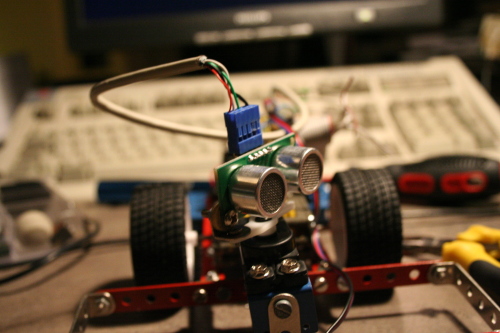
I just added a servo and a range sensor:
...making it a "real" robot. Next task is to program it to avoid crashing into stuff.
I see this robot as more of a "platform" than a real robot. The frame can be used to add all sorts of sensors and test them. The frame in the front could be used to mount a pcb with line sensors, for example.
In supermarkets they have trolleys. In some, on the trolleys, there are ads for whashing-powder etc. These ads are made out of plastic, and you can take it off easily. This plastic is stif, but like paper; perfect to cut with a scissors, and tape over the open parts of the gearbox
Nice tip. You should put it Nice tip. You should put it in the tip’s’tricks section as a general building material. I’ll use some plastic or cardboard to cover it. In general, you should avoid getting dust and dirt into the gearcase, because it will stick to the gerase you apply to the sprockets when you assemble the gearbox
Colourful indeed It’s an Colourful indeed It’s an old Meccano-like set called Merkur, that I have. It’s perfect for making robots and the spacing of the holes matched the mounting holes of the gearbox. Unfortunately, the axles of the track and wheels set are too small, so I’ll have to make some mountings myself. But that will have to wait for the next robot.
B) My sensor came without cables, but with an angled row of pins. The connector is from an old computer-connector. Think it was a dual USB port. I removed one row of wires and moved one of the wires (only 4 wires are used).
First problem: The little First problem: The little pin on the underside (see picture of bottom) gets stuck between the floorboards. When it doesn’t, the motor pulls just fine. I might want to go for belts instead of wheels or change the support pin for something larger.