Hellow there LMR i geus i haven't made any robot if i hadn't found this webpage ;)
so here i am with my first robot. its a pretty basic idea, but for me ofcource its special because its my first robot.
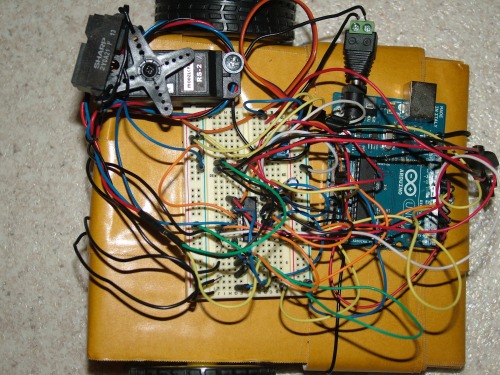
so when i found this webpage the first thing i did was ordering some stuff to start with. i ordered some wheels some motors an arduino and lots of other electronics.. now when they arived i had no body to put the wheels on. so i found this piece of carton and i wrapped Yellow tape on it (There is my Robots name from) to make it less flexible. then i began wiring things and testing and every step i toke got me closer to this robot
now finaly after about 40 trys (including the ones when batterys were empty when i didn't noticed) my robot can turn to right and left, move back and forward combined with a IR sharp distance sensor and a servo LMR got itself an other object avoiding robot.
thanks for all help on forum to achive this and ill try to make another robot in the future.
super LMAO @ 40 trys (including the ones when batterys were empty when i didn’t noticed). I am waiting for my kit to get to me but i kind of saw myself going through that and it is kind of nice to see that i am not the only person who will struggle
I am really clueless in this electronics stuff but i am trying to learn. Just out of curiosity why do you have soo many wires?
Nice job working through your first robot. It sounds like you have learned a lot from the experience.
Now that you have learned some valuable knowledge, one way to achieve a cleaner robot is to use a shield on top of your Arduino. I can strongly recommend Ro-Bot-X’s Robot Builder’s Shield. You will be amazed at how much nicer your robot looks with all those wires eliminated!
You can find info about Ro-Bot-X’s boards by searching this site, or go to http://robotxdesigns.ca
yah im pretty happy to see my wires do their job correctly as i told them.
but now i’ve finished i dont know what to make this time because all the ideas i got are a riding robot agian, isn;t there something uniqe what i can learn from??
and about that RobotX’s Robo builder shield:
yes i see it looks nice when it is fully assambled, but…
i dont think i can make it connected without glitches, because as i see it looks like i’ve to connect everything myself on the board,
or am i wrong on this one?
anyway i hope you can give me some tips on my next project (something wich isn;t too hard, but maybe it needs to be hard to make so i can develope my skills, so ill just hope u can give me some insperation)