It is not very solid yet... i'm working on that, and also on the code... trying something similar to the navigation from part 2 but with the hardware from part 1 of the "start here" robot.
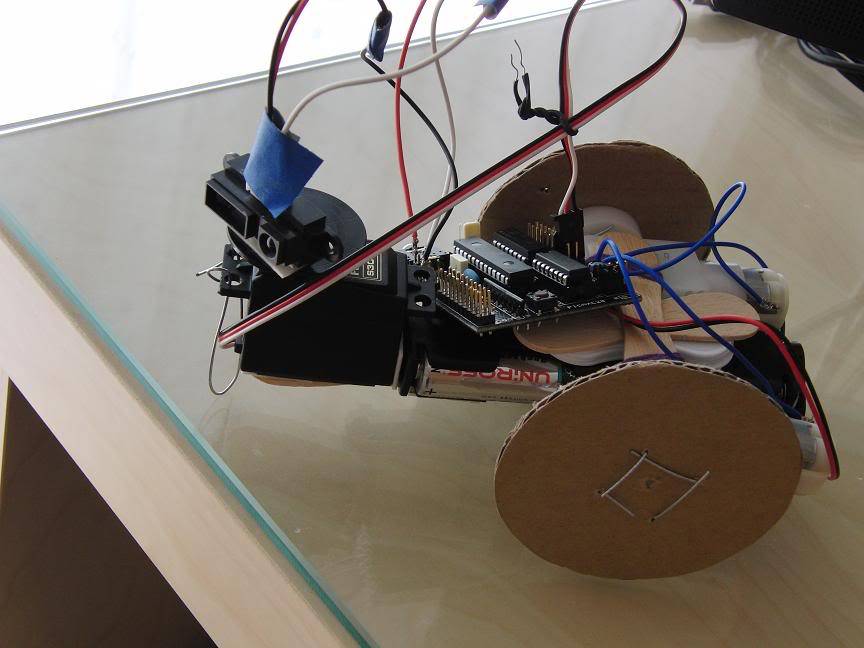
It was built with some ice cream sticks for the body, cardboard for the wheels, everything attached with double sided tape, blue tape, and some cotton thread.
As you can see in the video this is just an initial prototype and it still does fall apart sometimes.
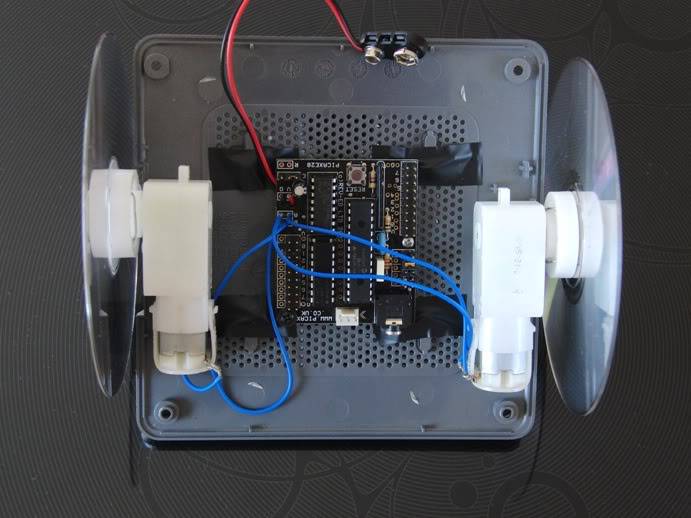
I'm thinking of using an old router body to house the components decently.
Also, the wheels are temporary - i made a mistake when ordering them, and only noticed when they arrived by mail... then i saw they were way too small... so i just attatched the cardboard wheels, since they where the easiest to attach i could think of... (CDs are better, but would be harder to attach)
LOL My first bot was held together with cable ties and a prayer. I upgraded to hot glue and hook and loop strips, plus a few strategic screws and bolts.
begginers luck… my begginners luck was finding solarbotics (they sell you those nice official-lookin’ wheels and some colorful pvc sintra[which i am using on my robot])) i wish i found that stuff sooner lol good stuff… goooooood stuff…
Just a tip that may or may not be of use. You said: “CDs are better, but would be harder to attach”.
From my experience CD’s would be pretty easy to attach. If you don’t have a drill (I don’t) you can melt holes in a CD using a heated up metal item like a nail or pin. I used a paperclip… Went right through the CD after heating it up a few secs with a lighter. That way it’s easy to screw it onto something (eg. a servo horn).
You could also use CD’s for the body. With a heated up hobby knife you can easily cut a CD in any shape you wish…
Getting better It is starting to look better for sure. There are better things to recycle then cardboard and popcicle sticks. Plexaglass and used erector sets keep me happy and look semi pro. Time to get creative.
I actually never used it for wheels. I’m making my own servo brackets cutting the CD’s in rectangular shapes and buring screew-holes in them, for a cheap DIY lightweight walking robot. But I’m glad you found another use for it.
Just one question: Why is there tape on part of the wheel. If it’s a tire shouldn’t it go all the way around?
And to PrettyBird’s comment: “Time to get creative” ???
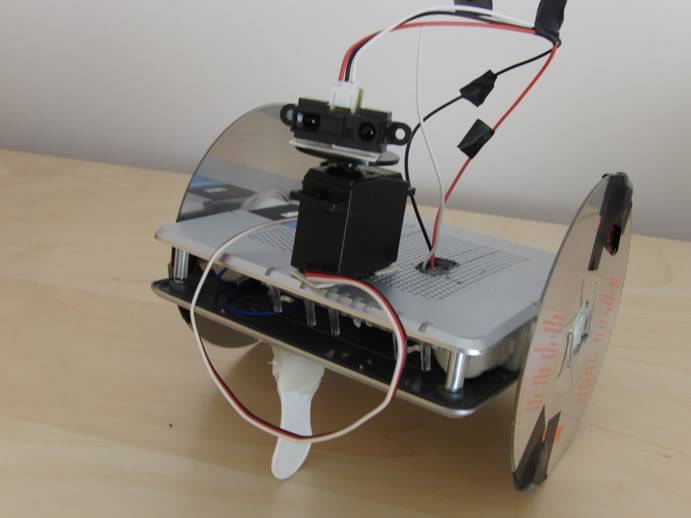
I’d say that using a ROUTER CASING as body and CD’s for wheels is pretty creative.
The problem with plexiglass is that it requires a lot of tools. Well… a drill and a saw for starters. I don’t have any of those.
And erector sets are cool but if you don’t happen to have one around they’re pretty expensive, and most of the pieces may not even be useful. Plus they’re also quite heavy…
That’s a very useful tip. Would you consider creating a tip/walkthrough on fabricating with CDs?
I’ve seen CDs for wheels before, but I never thought of using them for brackets and other body parts. I need some servo mounts, so maybe I’ll give that a try.
Actually I DID consider that…once I get it all up and running. Right now I’m having a hell of a time finding a way to put the rectangular pieces together in 90 degree brackets.
Basically I need a bunch of these (or similar) and I’m all set:
I think they're called "shelf pins"?! I've been checking out some local "handyman"-shops, but so far I've only found some big and heavy ones. None that fit my purpose. So if anyone has any tips regarding this I'd be grateful?!
I'm also considering using GLUE to attach the pieces somehow, but I'd prefer using screews so I can make adjustments later on...
About the tape… it was About the tape… it was used to hold two little pieces of rubber to increase traction… yes, the tires should be all the way around, and actualy they are now… i removed the tape and hot glued little pieces of rubber all around the cd… it behaves nicely on lots of surfaces now… later i will post some pictures