

what is myCobot 280 for Arduino

myCobot 280 for Arduino is a six-axis robotic arm controlled by M5stack-esp32, which can be connected to Arduino Uno, Arduino Mega 2560, and Arduino MKR 1010 WiFi demo board. The official firmware of the Arduino demo board is provided for beginners to get started quickly. It can quickly build an industrial simulation scene for experiments.
Maybe someone wonders how the demo board can be combined with a robotic arm.
Let’s see how to control it.
Step 1: Write the code (program) on the PC side, then send the control command to the demo board.
Step 2: The demo board transmits the motion command to the ATOM.
Step 3: After ATOM receives the command, it will control the joints, speed, and coordinates of myCobot.

This is how to connect the board with myCobot

After installation, we need to compile the Arduino IDE on the PC.

We need to install the compilation environment in advance in PC, a detailed tutorial is in Gitbook.
There are many official examples provided here that we can run.We choose the case of changing the color of the atom’s led.

We compile the following piece of code to control the change of the atom’s led light.
#include <MyCobotBasic.h>
#include <ParameterList.h>
// Arudino mega2560
MyCobotBasic myCobot;

void setup()
{
    myCobot.setup();
    myCobot.powerOn();
}

void loop()
{
    myCobot.setLEDRGB(0XFF, 0, 0);       // set RGB show red
    delay(1000);
    myCobot.setLEDRGB(0, 0XFF, 0);       // set RGB show blue
    delay(1000);
    myCobot.setLEDRGB(0, 0, 0XFF);       // set RGB show green
    delay(1000);
}
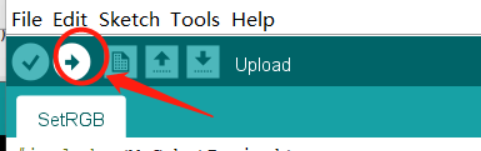
Then click “upload”, and the myCobot will work!
As the image shows, the LED light of the Atom changed from green to blue, blue to red, and red to green at intervals of 1s.
Arduino board
What is Arduino
Arduino is an open-source embedded hardware platform for users to create interactive projects. In addition to being an open-source hardware and software company, Arduino also has a project and user forum, an Arduino forum with many active users and exciting projects, and an extensive collection of open-source material. It is an excellent platform for enthusiasts who love embedded development.
What kind of demo board are suitable for us?
Now we will introduce the features of the three demo boards that can be used with the myCobot 280 for Arduino.
Demo Board
A demo board is a board used for embedded system development. It includes hardware components such as a central processor, memory, input devices, output devices, data paths/buses, and external resource interfaces. Embedded system developers generally order demo boards according to their development needs, or the user’s research can design them. Demo boards are designed for beginners to understand and learn the hardware and software of the system. At the same time, some boards also provide a virtual integrated development environment, software source code, hardware schematics, etc.
Here are three supported demo boards.

We have summarized the information about arduino boards to help you make a better choice.
Arduino Uno
The Arduino Uno is an ATmega328P based microcontroller board. It has 14 digital input/output pins, 6 analog inputs, a 16 MHz ceramic resonator, a USB connection, a power jack, an ICSP header, and a reset button.
Arduino Mega 2560
The Arduino Mega 2560 is an ATmega2560-based microcontroller board. It has 54 digital input/output pins, 16 analog inputs, 4 UARTs, a 16 MHz crystal oscillator, a USB connection, a power jack, an ICSP header, and a reset button.
Arduino MKR WiFi 1010
The MKR WiFi 1010’s main processor is the Arm® Cortex®-M0 32-bit SAMD21. WiFi and Bluetooth® connectivity is run by u-blox’ module NINA-W10, a low-power chipset that operates in the 2.4GHz range. In addition, the Microchip® ECC508 encryption chip ensures secure communication. Unlike the last two development boards, the Arduino MKR WiFi is able to connect to the Internet, a very powerful feature.
Here is a table of their specifications.

(Image data from official Arduino data)
It is clear from the flash memory, SRAM, EEPROM, and Digital I/O pins that the Mega 2560 is an upgraded version of the UNO.
Which demo board is suited for you
Uno
● Users who are new to desktop robotic arms and Arduino hardware
● Users who have a small need for digital IO interfaces and memory when developing projects
Mega 2560
● Users who have some knowledge of embedded development and need a high performance development board for their development projects.
● Users who need a large number of digital IO interfaces in their projects
MKR WiFi 1010
● Users whose projects require a network for development (MKR WIFI 1010 with encrypted communication)
Use cases
We have an example of a weighing project for an industrial simulation scenario built with myCobot 280 for Arduino -Mega 2560.
Here is video

The myCobot280 starts the conveyor belt button. The conveyor belt starts rolling and transports the material to the scale for weighing. When the weighing value reaches the specified value, the myCobot280 makes a lifting movement, and the conveyor belt stops.
More details about the project are here.
Summary
After the above introduction,do you understand how the Arduino board and myCobot are controlled? If you had a mycobot in your hands right now, what exciting projects would you use it for!
myCobot 280 for Arduino has a set of perfect API control interface, we can easily control the robotic arm.The demo board can be very helpful to help us to finish external various sensors and other helpful hardware devices. Your likes and comments are our motivation!
Data in the text are from:https://www.arduino.cc/