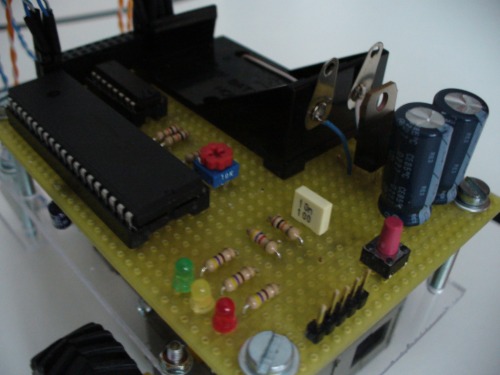
The core of the circuit is the PIC18F4331. I know it's definitely over sized for the project, but since it came as a free sample, I didn't loose time to find a cheaper one.
Ground color is detected through two photoresistor. The signal is read in the middle of the serie between a 2-20k photoresistor and a 10k resistor: with this configuration the difference of voltage read from the adc is quite high, and can be easily treated like a digital input.
Motors are actioned by the L293D driver. PWM signals move the enable pins and set the velocity of the wheels through a simple algorithm.
Power supply is made with a 9V battery regulated by a standard 7805 voltage regulator. This is the worst part of the project, since I used the same power supply for the microcontroller and the project. I had some difficulties in avoiding the PIC to restart every time a motor was actioned and I finally did it putting a lot of decoupling capacitors near to the microcontroller.
I put the ICSP connector in the back in order to be able to program the robot without removing the PIC from the socket. Very useful idea.
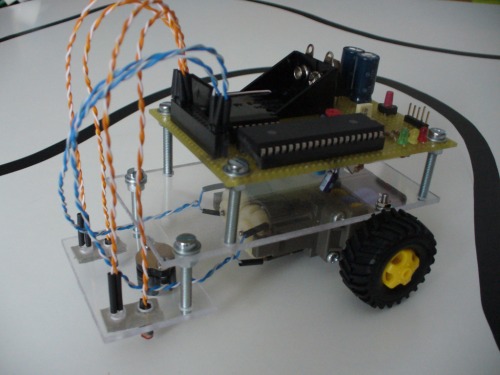
White LEDS allow the robot to "see" the line in a dark room.
Structure is made with Plexiglas and long screws. It's light and simple but it took me a long time to make the several holes in it.
Bill of Materials: PIC18F4331 Microcontroller – FREESAMPLE Resistors & Capacitors – €5 (approx.) Sockets, Connectors & Wires - €3 (approx.) 2 * White Led - €0.80 ea. 2* 2-20k Photoresistors - €0.80 ea. L293D - €2.5 MC7805 – 1€ 9V rechargable battery - €4 2 * Wheels - €3 both 2 * DC Motors - €14 both Ballcaster - €3.5 Plexiglas - €2.50 Screws - €0.50
Bill of Time: Construction – 6 hours Soldering – 6 hours Programming – 4 hours Prototyping the circuit on the breadboard – 10 hours Personal comments: + it works + it's cheap + photodetectors work well even if not well shielded
- bad battery last - bad power management - dc motors are not very precise - quite slow
Please, please post your comments here or on youtube and feel free to ask for any further information about the robot.
Maybe you could ad an extra photoresistor to detect the amount of light in the room, making the robot able to turn on the white LED’s only when the room is actually dark. I gues that would propably add some extra life time to the battary…(?)
Also, you say you got the PIC18F4331 as a free sample - that sounds cool (geting something for free always does ). I just can’t stop my self from asking: how, where and why did you get it for free…?
I like the idea of an extra sensor to detect room enlightment… but I don’t think I will get a big improvement in battery performances… LED absorb something like 10mA, while motors absorbs some hundereds… In the best case I would get a 10% last improvement.
You should register with a valid email address (such as your college or company domain) and you will be able to order almost every kind of microcontroller produced by microchip. Just don’abuse of that service
That’s a really smooth running robot. What kind of code did you program it in (BASIC, C, Assembly?) and would you mind posting it?
I’ve also been dying to know more about that motor assembly. I was considering buying that set last night from Pololu but don’t know the kind of speed, torque and noise they generate. I especially would like to know how they compare to these:
As you can see, it’s written in C. I’m not very sure about the comments… I mean sometimes what is called “left” could be “right”, but that is the code that works. It’s quite short and linear, so I don’t think you will have difficulties with it, otherwise, plase ask!
Motor set is nice. Quite simple to assemble and can run quite fast. Indeed I used the highest gear ratio possible (344.2:1) and I slowed it down further with the PWM control. I don’t now speed and torque but, come on, that’s a light set… If you put something too heavy on, it will break in peaces before stopping
Are you talking about electrical or sound noise? First should be huge, but uninportant for the kind of application… second is low, something like an electric toy…
I like the motor you suggested and I was in dubt with it before buying mine. I could try that with my next motor!
Great info, thanks. I don’t completely understand what torque means but use it to compare 2 motors based on their RPM and torque. But ultimately, like you said, it doesn’t matter as long as it pushes your robot.
I really like that the grearbox gives you the full drive train and body to build from – no need to stick the individual motors to something.
The C code looks pretty straight forward. Since I’m new to microcontrollers I’m trying to experiment with PicAxe BASIC, Adruino and now straight PIC with C. Did you program it with a normal programmer or do some sort of in circuit programming? I’m still trying to figure out how all this stuff works.
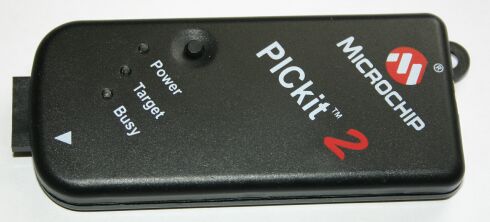
Look at the ICSP (in circuit serial programming) part of the schematic. You can also see the connector in the last picture. That allows me to directly connect my PIC programmer to the robot: five wires are required. In particular I have the PickIT 2 (picture) which has a USB cable to send data from the PC to the programmer.
I used CSS PIC-C Compiler to generate the .hex (needed to load the controller) file from the .c.
Bill of Materials: Tells you what you need to make the robot.
As far as an algorithm go straight. If one of the two sensors detects a black line turn left or right slightly depending on which sensor was detecting the line. Line detectors have a pretty easy algorithm. Now if you want all of the code thats a different story. If you haven’t made a robot yet I suggest the START HERE link at the top of the page. That project is laid out in detail so you can duplicate it easily.
there is no picaxe in it. I used the PIC18F4331 (4431 is good too) microcontroller from microchip, as you can see both in the schematic and in the bill of materials.
Hello, I love it, plus the Black Sabbath song WarPigs, i’m a big fan of them, absolutley cool bot, i want to build my self a one, to join the war pigs army, can i ask for the code and the schematic please ?


 ). I just can’t stop my self from asking: how, where and why did you get it for free…?

