【Wall E】 in action ?!


Intro:
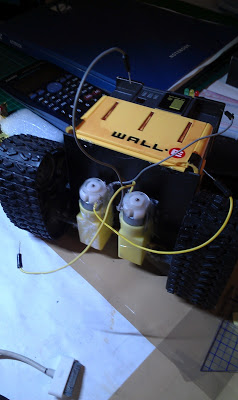
This project is aimed to bring the Wall-E robot from the movie into life! it will have a camera in his eye, the information will be processed in the computer, and commands are sent via bluetooth back the Wall-E. It can also recognised sounds, and can be controlled manually as a spy robot.
The source code you see in this project are written in C++ and with Qt Framework and OpenCV library.
=============================================
update 08/08/2012

I think i have most of the project planned, and come up with quite a few functionalities.

For Object tracking and recognition, I will write the code myself with OpenCV in C++. And the program will run on a PC, images are transmitted from Wall-E using the wireless Wecam, and after processing the corresponding cammands will be sent back to Wall-E via bluetooth.

I have been looking very hard for programming solution for speech recognition, and hope someone has already wriiten a API or some sort. And Iaccidentally bumpped into a YouTube Video showing a much simpler way of doing this - EasyVR Arduino Shield! So I might use that instead of writing codes myself!


=============================================
update 10/08/2012

Wall-E arrived! :)
I should have started this week, but just before I was going to take the video for my lastest version of the hexapod robot, one of the servos broke!! I guess i just had to wait...


It's a great toy for 8's, it's only got one motor, which means it can only turn left, or go forward. Moves its hands as well, but that's pretty much it. Here is a video showing roughly the same one:

http://www.youtube.com/watch?v=VEoh8Iws-kk 


=============================================
update 12/08/2012

Still waiting for the servo gear to arrive, I am so bored, so I started working on the robot hardware. 

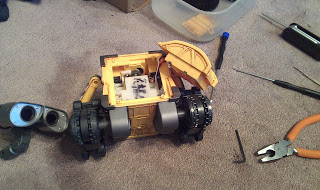
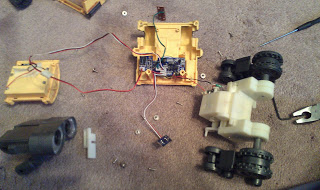
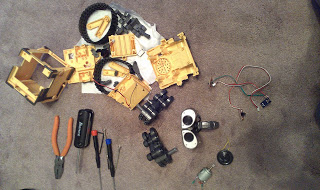
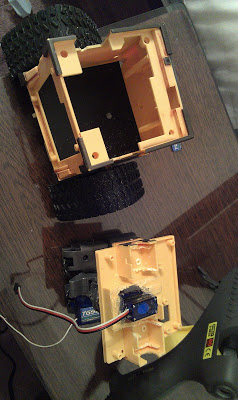
I took it apart and amazed by how well it works considering it's only got so few components.


It was quite dirty since it's second hand. I had to wash every piece of it with soup water! 
I will leave the assembling another day. 

=============================================
update 14/08/2012

Finally found the time to look at the robot pieces and could get started to assemble it.

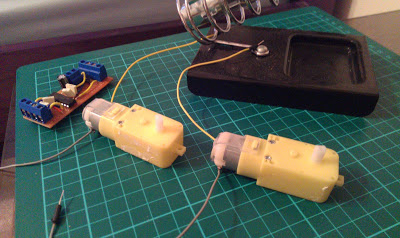
I recycled the motors and motor driver from my previous robot (Wally Object tracking robot). 


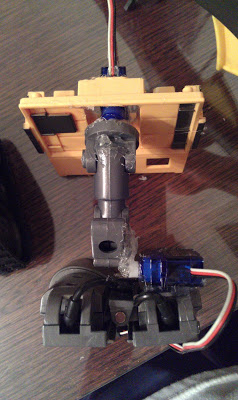
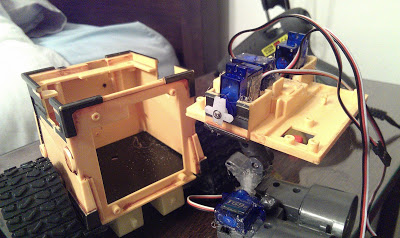
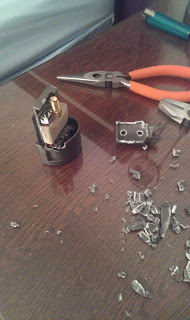
It was quite challenging to modify the robot to fit the servos. but i did at the end ^.^.
I will start coding another day!


=============================================
update 17/08/2012


Here is the first draft of colour tracking code! 

    capwebcam.read(matOriginal);

    if(matOriginal.empty() == true) return;
    inRange(matOriginal, cv::Scalar(0,0,175), cv::Scalar(100,100,256), matProcessed);
    GaussianBlur(matProcessed, matProcessed, cv::Size(9,9), 1.5);
    cv::HoughCircles(matProcessed, vecCircles, CV_HOUGH_GRADIENT, 2, matProcessed.rows/4, 100, 50, 10, 400);

    for(itrCircles = vecCircles.begin(); itrCircles != vecCircles.end(); itrCircles++){
        ui->txtXYRadius->appendPlainText(QString("ball position x =") +
                                         QString::number((*itrCircles)[0]).rightJustified(4, ' ') +
                                         QString(", y =") +
                                         QString::number((*itrCircles)[1]).rightJustified(4, ' ') +
                                         QString(", radius =") +
                                         QString::number((*itrCircles)[2], 'f', 3).rightJustified(7, ' '));

        cv::circle(matOriginal, cv::Point((int)(*itrCircles)[0], (int)(*itrCircles)[1]), 3, cv::Scalar(0,255,0), CV_FILLED);
        cv::circle(matOriginal, cv::Point((int)(*itrCircles)[0], (int)(*itrCircles)[1]), (int)(*itrCircles)[2], cv::Scalar(0,0,255), 3);

    }

    // Convert OpenCV image to QImage

    cv::cvtColor(matOriginal, matOriginal, CV_BGR2RGB);

    QImage qimgOriginal((uchar*)matOriginal.data, matOriginal.cols, matOriginal.rows, matOriginal.step, QImage::Format_RGB888);
    QImage qimgProcessed((uchar*)matProcessed.data, matProcessed.cols, matProcessed.rows, matProcessed.step, QImage::Format_Indexed8);

    // update label on form

    ui->lblOriginal->setPixmap(QPixmap::fromImage(qimgOriginal));
    ui->lblProcessed->setPixmap(QPixmap::fromImage(qimgProcessed));

=============================================
update 24/08/2012


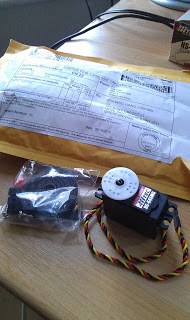
The Servo Gear finally arrived! (actually the servo did, i guess they must have send me the wrong thing, ^.^ )

Anyway, i immediately fixed the hexapod robot, and started making the video, hope I can finally begin working on the coding for Wall-E.


=============================================
update 27/08/2012

As a starting point, I wrote a Qt program to detect colour (red), and send out command via serial port to arduino, to turn Wall-E's head to follow the object. I will extend the object that can be tracked to faces, certain objects, light source etc..

I struggled so much at the beginning, because everytime i connect to arduino via serial port, it freezes the video. I later realized it's the thread issue. when the program is waiting for data from serial port (or reading, or writing? i am not sure), it actually hangs the thread, so I decided to modify both serialport class, and video class to have their own thread when running.

Some people suggest it's not a very good idea to use thread if we don't have a formal education on this subject. And I did find it confusing how to start with thread, because some say we shouldn't make QThread subclass and we should instead move a object into a thread. But since it's in the official documentation that we should make it subclass, I followed the latter.

I am still very new to Qt and OpenCV, since I only started learning these a few days back, and I was already thinking about multithreading, and I now realized how crazy that was!

With frustrations, I spent the whole weekend and my bank holiday just debugging the code. I dropped my diet  routine, my exercises, and my movies!  But I won at the end. Altought it is still not as good as I would expect, tracking is quite slow and inaccurate, and the head shakes a lot, at least it works ^.^

I will look around for some better algorithm, at the meantime might add a few more functionality in the program like adjusting the video properties, and better threading coding...

see you now..


=============================================
update 28/08/2012

The whole reason i spent so much time coding the colour tracking was because, i needed to write a program that does multithreading, and that's because i need to listen to the serial port for input from arduino while processing video.

I need to confirm arduino has completed the previous command before i send another one out. but still, it's not fast enough.

I saw someone has done a project similar to this, but he doesn't listen to signal from arduino, but send out commands from computer every frame he processes. and the result is actually better than mine!

i am thinking, with enough delay between each frame, there might be a possibility that this could work. I can also say good bye to the confusing multi-threading programming too!

I should also stop sending commands when there is nothing detected.

should calculate the middle point of the detected image, so it will work regardless the size of the detected image.

i might try it out tomorrow.


=============================================
update 29/08/2012
So I tried sending commands without feedback signal from arduino, and it works great! I modified the code based on my initial Qt program, using single thread, it  was lagging at all! So now I know what was slowing the program down, must be the 'serial port data listener'. For whatever reason either I am using it wrong, or by nature it is blocking other processes, I should avoid using it. But in the future when I add the command recognition functionality, I will need to somehow send data back to computer, to run certain applications, for example, if I want Wall-E to track Faces, I would say 'Wall-E, follow faces', and arduino will send the computer the command, and open 'track faces application'.


=============================================
update 01/09/2012

Assembling the 
eye. Hot Glue gun is really helpful :)


Ta Da !!!
 
Currently working on object tracking and face tracking. will update soon! 
^.^


=============================================

update 05/09/2012


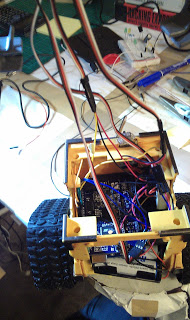
Finally I have some time to sit down and continue my project! I finished the inside layout and tidied up all the cablings tonight. I Also tested the servos and motor driver, all seem working fine!


But i just have to say how much i hate soldering right now!! I literally spent 2 hours trying to solder a switch to some long cables. The first try, i found the cables was a bit out of contacts, so I put hot glue to stick them together, didn't help. So I tried very hard, to take the glue off, and replace all the cables with new ones, and soldered again.


This time was better. I then installed it on the robot, and hot-glued it on. Only found that the switch itself isn't working properly, I have to occasionally push the plastic bit. I guess i might have damaged the switch when I was taking the hot glue off... 


There is a reason I love programming so much! When I was at Uni doing projects, I always left all the soldering and cabling works to my lab partner, and I would take care of all the coding and maths. I just don't have the hands to do these things i guess... :(


Motor Driver information can be found here:

http://arduin0.blogspot.co.uk/2011/12/what-does-it-do-it-will-take-external.html


=============================================

update 08/09/2012


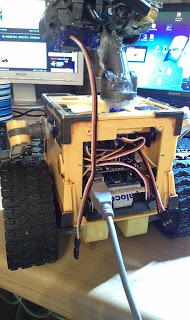
We can now control Wall-E from PC.


We can also use it as a spy robot :)


With some modifications, we can see the video on a web interface, and control it over the internet.


=============================================

update 22/01/2013


Sorry I haven't been making any progress on this robot, as I am currently working on a few website projects.


But I have decided in the next few updates, I will be using Raspberry PI instead of Arduino as Wall-E's brain, which will make Wall-E more compact and react faster.


  • Sensors / input devices: camera sound bluetooth

This is a companion discussion topic for the original entry at https://community.robotshop.com/robots/show/wall-e-in-action

object tracking

hi

is it possible to post the object tracking app and source code it will be very helpful in my next project


kind regards,

keyboard

of course, actually i have

of course, actually i have posted the first version of my tracking code in my post, and in my blog, which i used in the video.

i have come up with an improved one, which i will test and make a video of before i share it here, or in my blog.

:slight_smile:

**steeler… **

steeler…


isn’t that a band? LOL

isn’t that a band? LOL

Computer…

You should see if you could fit a raspberry pi in wall-e, so it could act by its self! You wouldn`t have to link it to your computer then, but you could make it able to act on its self and you could control it!

That’s a very good idea.

That’s a very good idea. :) 

I have been thinking to get a Raspberry for ages… it might be time!

Nice work!

I like your work. Would you please tell me where you purchased the wall-e body frame from?

WOW .He’s coming alive !!!

Those guys at Disney are probably going to call you.

Thank you Rasoul.I bought

Thank you Rasoul.

I bought the body frame from ebay for 10 GBP (~ $13)


good deal!

Is the body frame “Disney Pixar Thinkway Wall-E”? I found a few of them on ebay. I want to be sure before going to purchase one.

No… this is not…the 9

No… this is not…

the 9 inch Disney Pixar toy is so expensive and i couldn’t afford it…

this is actually a 8 inch remote controlled Wall-E toy… It’s a little smaller than the 9inch one, but still gives me enough space to place the battery and Arduino board.  (i can’t remember what it’s called now, sorry)

8 inch or 9 inch, It doesn’t really matter as long as the price is accpetable…

Confusing!

As you mentioned 9-inches version is expensive. I wish you could remember the product name. It is hard to find a remote controlled Wall-E body frame with appropriate size online. If you by chance managed to find out the product name, please let me know.

Sorry buddy, I just searched

Sorry buddy, I just searched through my email for ebay invoice, and realized it’s actually also called Disney Pixar… Since they have the same name, the only way to tell which is 9’ and which is 8’, you need to look  at the picture advertised.

9’ has this remote controll

!BwKOe,!!mk~$(KGrHqEOKj0EwOYbW1,eBMHqnpPhnQ~~_12.JPG


and 8' has this remote controll (which I bought)

!BwKOe,!!mk~$(KGrHqEOKj0EwOYbW1,eBMHqnpPhnQ~~_12.JPG


I would recommend buying the bigger version of frame (9 inch one)  if price is not a problem for you, because it's easy to modify and fit the arduino board.

Hope that help! :)


You made it clear!

Thanks a lot! I was confused which one is which! The pictures make it clear to me. I’ll try to find the bigger one…

Hey it’s ez robots lol it’s
Hey it’s ez robots lol it’s a good board and program

No, it uses Arduino to

No, it uses Arduino to receive data, and data are processed in a C++ application I wrote myself. 

EZ Robot is for kid, and people who can’t code…

haha… I double they would

haha… I doubt they would bother with me as there are always bigger fish to catch (people who use it to make profit)… 

But I will let you  know if they are really so impressed by my robot and decided to shut me down… LOL

I was just messin with ya,
I was just messin with ya, you have some of the same parts as their kits, but I knew it was different somewhat. Plus I can’t code very well… yet lol

Ditto!!!haha… i guess it’s

Ditto!!!

haha… i guess it’s good idea for new starter to use ez kit to get a feeling how to build a robot after all… :slight_smile: