Using a wiimote with processing to control your robots

wiimote-762302.jpg

FireTracker_0.zip (1185Bytes)

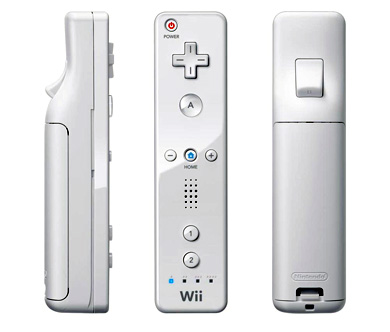
The wiimote is a really cool controller to use with your robots. It has many buttons, accelerometers and even a camera which tells the coordinates of the four principal IR emitters that it sees.

There are many examples of applications using it, some of the most populars are from Johnny Chung Lee. But there are much more, just search for "wiimote" or "wiimote robot" on youtube or google. Here on LMR we have some examples too:

And others with just its camera:


But I wanted to use it, without having to hack it, to communicate with processing and control my robot TheBox.

On my computer I have installed WIDCOMM bluetooth software which I found here.

If you've never used processing you should take a look here


To install the processing libraries I followed this tutorial.

I had some problems placing the folders so here is a simple scheme:

+ Prossessing

    + libraries

        + Loc

            + library

                - Loc.jar

            + lll

                + Loc

                     - ...

        + wrj4P5

            + library

                - bluecove-2.1.0.jar

                - bluecove-gpl-2.1.0.jar

                - WiiRemoteJ.jar

                - wrj4P5.jar

                - Loc.jar (optional)

            + lll

                + wrj4P5     

                    - ...


To test if it is all working you can try these examples found here:

If they work, you can pass to the next step, the serial communication with your robot.


The application MyFirstWii is really easy to adapt. On the movie you can see my robot TheBox using it.

All you have to do is to import the serial library, create a serial object, define the COM port & the baud rate and add the serial communication where the data about the buttons is analyzed. Here is an example:

import processing.serial.*;

import lll.wrj4P5.*;

Wrj4P5 wii;

Serial TheBox;

void setup() {

  size(300,300,P3D);

  wii=new Wrj4P5(this);

  wii.connect();

  TheBox = new Serial(this, "COM5", 4800);

void draw() {

  background(0);

  stroke(255);

  translate(300/2,300/2,0);

  lights();

  rotateX((int) (wii.rimokon.senced.x*30+300));

  rotateY((int) (wii.rimokon.senced.y*30+300));

  rotateZ((int) (wii.rimokon.senced.z*30+300));

  box(100,100,100);

}

void buttonPressed(RimokonEvent evt, int rid) {

   if (evt.wasPressed(RimokonEvent.TWO)) println("2");

   if (evt.wasPressed(RimokonEvent.ONE)) println("1");

   if (evt.wasPressed(RimokonEvent.B)) {

     println("B");

     TheBox.write('g'); 

    }

   if (evt.wasPressed(RimokonEvent.A)) println("A");

   if (evt.wasPressed(RimokonEvent.MINUS)) println("Minus");

   if (evt.wasPressed(RimokonEvent.HOME)) println("Home");

   if (evt.wasPressed(RimokonEvent.LEFT)){

     println("Left");

     TheBox.write('a'); 

    }

   if (evt.wasPressed(RimokonEvent.RIGHT)){

     println("Right");

     TheBox.write('d');      

    }

   if (evt.wasPressed(RimokonEvent.DOWN)){

     println("Down");

     TheBox.write('s'); 

    }

   if (evt.wasPressed(RimokonEvent.UP)){

     println("Up");

     TheBox.write('w'); 

    }

   if (evt.wasPressed(RimokonEvent.PLUS)) println("Plus");

}


I didn't found the IR Sensor Tesr application  easy to understand and modify, so I decided to write a new one which I believe it's more practical to use:


import lll.wrj4P5.*;

import lll.Loc.*;


Wrj4P5 wii;


float x;

float y;

float w;

float h;


//Change here:

 //Size of the window

   int camWidth = 512;

   int camHeight = 384;

 //Number of IR Emmiters that you want to track

   int IREmitters = 4;


void setup() {

  size(camWidth,camHeight);

  wii=new Wrj4P5(this).connect(Wrj4P5.IR);

}


void draw() { 

//Defines Background color

  background(0);


//Draws ir emitters

  for (int i=0;i<IREmitters;i++) {

    Loc p=wii.rimokon.irLights[i];

    if (p.x>-1) {

     // Reads the value sent by the wiimote and multiplicities them by the size of the window

       x=((p.x)*camWidth);

       y=((1.-p.y)*camHeight);

       w=p.z*50;

       h=p.z*100;


     //Prints the values to the console

       print(x);

       print(" ");

       print(y);

       print(" ");

       print(w);

       print(" ");

       println(h);


     //Draws the circles

       noStroke();

       fill(255,255,0);

       ellipse(x, y, w, h);


     //Draws the lines

       stroke(255);

       line(x,0,x,camHeight);

       line(0,y,camWidth, y);


       delay(50);

     }

   }

 }


I developed this code and created another application to my robot which you can download here. It seems to work well, but how the robot is having some motors problems, I didn't had chance to test it with it, but you can see the test I did on the second movie. The application uses this library


Comments, advices, doubts and suggestions are always welcome! :)

https://www.youtube.com/watch?v=jM6HBxXWXEc

this is awesome!

this is awesome!

This is just the beginning ;D

This is just the beginning ;D

Nice! I see this as a good

Nice! I see this as a good way to do home navigation. How? Install 4 IR LEDs on the ceiling and have the IR camera on the robot looking at the ceiling. Camera being I2C, I suppose it is easy to interface with any microcontroller. Care to try that?

I’ve been thinking about

I’ve been thinking about buying a wiimote from dealextreme.com as they are pretty cheap.  I miss using them for powerpoint presentations using GlovePIE.

RobotFreak made a good

RobotFreak made a good tutorial about using the camera as a standalone sensor and used it to make a firefighting robot. So I guess that it is not very hard. But I don’t want to destroy my wiimote for now, thats why I’m using it this way. I think I’ll try your idea soon, using processing. 

I’ve tried the

I’ve tried the application IR Sensor Test and it works well, at least it detects my lighter. 

Next thing I want to do is to modify that code to send data to my robot and make it capable of finding  candles. I will post the result here or in my robot’s page.

I like it!

I am testing the Wii nunchuck, but i must say that the wiimote is really cool! wireless with a good skin. I used it at school, it is not very hard to obtain great results! I am improving my robot (https://www.robotshop.com/letsmakerobots/node/23509) and I am still having problems with the hardware. I tried to get some infos about yours but it seems that there is the dead link: could you just tell me what kind of motors are you using and were did you get them?

Thnak you, keep the good job :wink:

I got them when I

I got them when I participated in a event organizated by the University of Minho called RoboParty, two years ago, where I built this robot. The motors are from MODELCRAFT and their specifications are:

  • Operating voltage: 12V/DC
  • Speed under load: 174rpm
  • Max. gear load: 6kg/cm
  • Steady gear load: 2kg/cm

Sorry, but I could only find this page in portuguese…


thank you for your quick

thank you for your quick answer!

but 55€ is a bit too expensive for me, and I will need 2 H-bridge too. Maybe I will try to adapt 2 motors from drills… still searching! ^^

You’re welcome!

Yes, I know, I think I’ll never buy things from that shop. 

That’s what I’m planning to do, too. I’m waiting for this board to arrive to control the two drills motors from my tank. The drills where 30€, the board 6€ and the components about 18€ (shipping not included).

I found one

I can’t create my own printed circuits so cheap as you, so I found this: 

http://www.solarbotics.com/products/k_cmd/

two H-bridges with protection, with a 5V regulator ( maybe it will power my arduino and my servos if I need to), for about 27$ (20€?) shipping include. Sure I would rather design it myself, but I prefer that it works well, to have time to improve other parts. And I will do the soldering… :smiley: I think I will buy it, and the drills will follow :stuck_out_tongue:

I think you can…

DON’T BUY it before you buy and test the drills. My motors can pull up to 8A, I think that board can only handle up to 4A. 

That’s why I decided to design it myself. My is made by this shop, I think they make pcbs for around 0,10€ for cm2.

argh

8A ?! whoa, hum, I thought the batteries were not able to supply so much current… and I was wrong! so back to the start ^^ I will take a closer look to your PCB… But I think that mechanics is the really most expensive part of the robotics!

Why don’t you buy the drills

Why don’t you buy the drills and see how much they pull? That’s what I did…

PS: The guy form that shop says that the shipment of 100g to France should be around 3€. 

Yes, it would be probably

Yes, it would be probably the best way, but I just wanted to ensure that drill motors can be used, for cheap driving components. But I guess I just have to “jump” ^^ . Just a question, why do you use so much pin IC socket? I thought that 3 or 4 per motor will be enough?

Sorry

I’m sorry, but I can’t understand your question :S.

Could you explain it better?

Wow, very well done!Its a

Wow, very well done!

Its a pleasure to read your posts XicoMBD !

Will need to get a wii remote soonish … maybe Santa will pull through for me…

Thanks!

It’s funny, I think the same of your posts :smiley:

ok, I made a mistake, no

ok, I made a mistake, no problem. Today I will go to my favorite electronic components seller see how much I have to pay for all of this, and I think I understand the way it works ^^