

Hi guys!
I know I've been super inactive lately, but I finally created another robot project to share with the world. My other projects I've been doing in the meantime haven't really been seen to finish - the Butler Bot platform got scrapped to be used as a Raspberry Pi platform, but I haven't done much with that bot at the moment.
Anyways, thanks to Sparkfun's cyber Monday sale, I finally decided to commit and buy the parts for a new robot. So, I ordered 12 9g servos from valuehobby.com for $3 each, as well as the Spider Controller by Dagu from Sparkfun (along with 8 AA NiMh batteries and two 4xAA battery holders).
I've had this idea in my head for a long time on the simplest way to build a hexapod with independent legs... I knew I'd want to go 2 DoF to minimize cost, and for 2 DOF I basically need an x-y joint for each leg. So, I realized that by simply gluing a servo horn onto the side of a servo, I could use one servo as the toe and the other to connect to a baseplate as the hip. It may not look as sexy as hexapods built with proper brackets, but it's cheap and seems to work. However, the main caveat is that it is slow because the "toes" don't extend out very far... you'll see when I upload a video.
Also, for probably the first time every I've been trying to take photographs of my project as I go. This way, when (if) I write up instructions for Instructables, I won't have to take everything apart and start from scratch like I did with MAEP (even harder cause of the glue involved). Anyways, without further ado here are my pics:
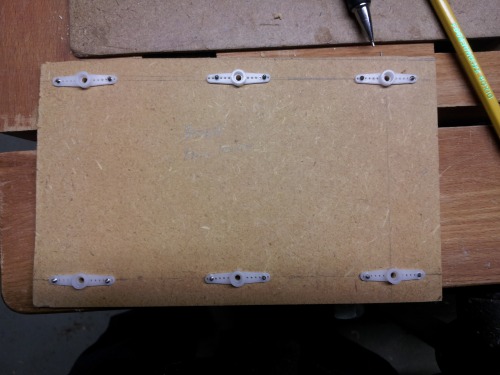
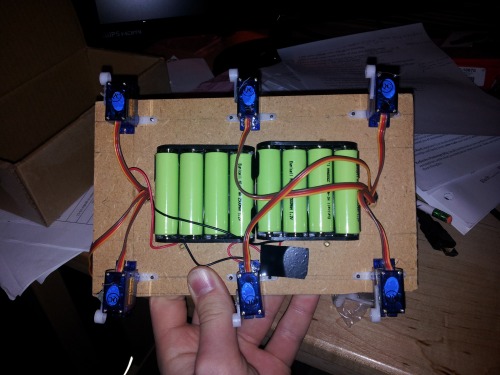
Used a piece of wood as a base, about 8x4 inches I believe. You can see by the lack of straight cuts my wonderful craftsmanship. The 6 servo horns were mounted with the included screws.
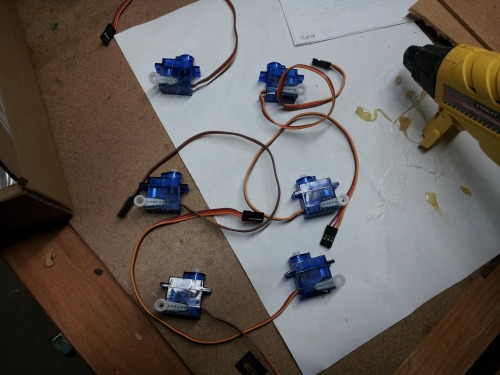
As you can see, I have hot-glued servo horns onto all of the hip servos... hopefully the hot glue will also act as a fail-safe against stripped gears, by breaking off at the joint when under stress. It seems to hold up pretty well under normal walking, although when finishing up the construction I had to repair several joints due to aggressive handling.
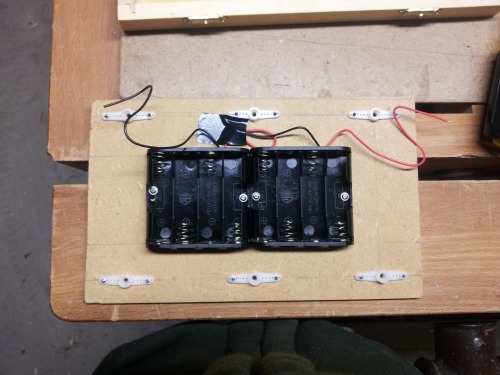
Two 4xAA battery packs wired in series for a total of 8x1.2=9.6 volts, more than enough to drive the Spider Controller. I probably would have gone for 6 batteries actually, but Sparkfun doesn't sell 6 or 2 battery holders... I used the same screws that came with the servos that I used with the horns for mounting the battery packs. They worked well, although I had to drill another hole through the pack on the left when I accidentally used a drill bit one size too big (I drilled a hole too big in the wood for the screw to thread inside).
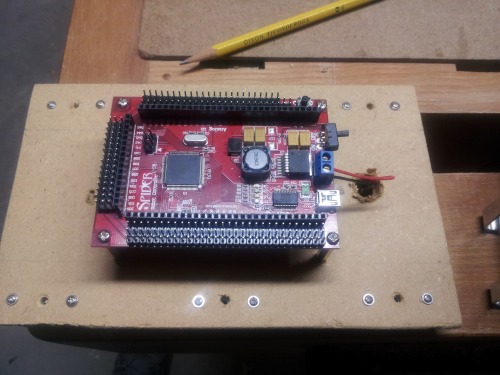
And here we have the Spider controller mounted with the included standoffs. I also drilled two holes in front and back for wires to feed through. I have the battery packed hooked up, but the negative wire is under a ton of strain... I think I'm going to have to splice another wire on it.
Nearing completetion! The astute observer might be able to tell a change in scenery - I've moved from my dad's workshop to bedroom "programming lab". All those papers on the desk are the homework I should be doing right now :D. You can see the battery pack filled with the batteries from Sparkfun... it's kind of strange - they don't seem to fit very well in the pack. It's under a lot of strain, and they're a pain to put in and take out... it's going to be no fun to charge these guys.
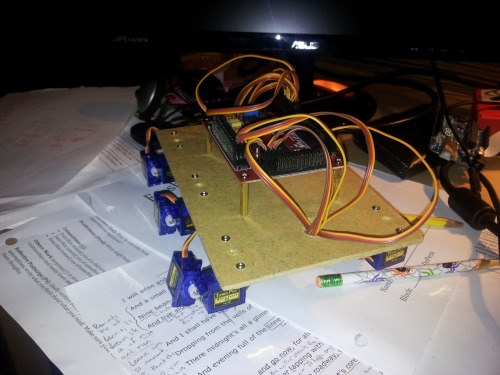
A shot of the finished product... I'll try to get a better one when it's day time and I can make use of that natural lighting, and also find a space without all the clutter of my desk.
Well, there you have it! A chronological build log - better than I've ever been able to do. I'll post more pics of the chassis like I said, also from different angles. There isn't much more to see now, but I plan of course on adding sensors and even a bluetooth module so I can control this bad-boy with my Android phone. Video coming sometime in the near future as well, hopefully! See you guys soon with more updates!
PS - One more thing, I need a good name for this bot. I like using acronyms, so I need to think of a suitable one for this guy.
walk
- Actuators / output devices: 12x Towerpro SG-90s
- Control method: Eventually Bluetooth
- CPU: Atemga1280 (Arduino Mega Clone)
- Power source: 8x1.2v NiMh AA batteries
- Programming language: Arduino C
- Sensors / input devices: none yet
- Target environment: indoor
This is a companion discussion topic for the original entry at https://community.robotshop.com/robots/show/unnamed-hexapod