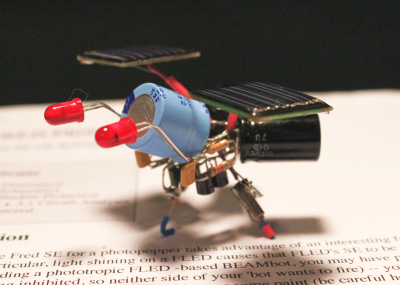
File this one under "stuff everyone else has done so I guess I better do it too" I've been wanting to put together a BEAM photopopper for awhile -- I pulled most of the parts together about three years ago (ouch!). Oh well. Better late than never, I guess.
For the first attempt, I'm following Ray Diaz' tutorial for building a FLED (Flashing LED) photopopper using Ben Hitchcock's Fred Photopopper circuit, but with a few minor layout changes. Following my own advice, I prototyped the FLED solar engine on a circuit board and tested it out then built the photopopper you see here.
The little bug works... sort of. It's persnickety about the orientation of motors, weight distribution, side height, amount of indoor light, and so on.
Too much rear weight and it wants to pop a wheelie and fall back on its butt. Too much front weight and it has trouble dragging the skid around so it just sits there. Tuning the motor orientation for optimum performance takes patience.
Nevertheless it is strangely fun to tinker with and to watch once it's operating correctly. I haven't added the obstacle avoidance Solarbotics antennae (spring switches) yet but that should make it all the more interesting.
This photopopper was supposed to be my first robotics project to sort of get my feet wet. Instead, I dove in head first (or fell in...) building Sparky then Pokey.
Following a naming trend... I'm calling the little guy Spunky.
Spunky the Photopopper
Seeks light a little jump at a time
- Actuators / output devices: Dual pager motors
- Control method: autonomous
- CPU: FRED v1.3 solar engine
- Power source: dual Solarbotics 22x24mm solar cells
- Sensors / input devices: dual FLED
- Target environment: indoor, outdoor
This is a companion discussion topic for the original entry at https://community.robotshop.com/robots/show/spunky-the-photopopper


