

Well, this is my first robot in approximately 15 years and damn but things have changed! Put it this way, the last book on robotics I read was 'The Robot Builder's Bonanza: 99 Inexpensive Robotics Projects - 1st edition 1987!
This little creation just sort of...happened. I've been soft-modding legacy Xboxes for a while and was looking to make a custom controller when I discovered the Arduino site. This led to buying one and many hours of playing with the code and the pretty LEDs. One night I was stripping an alarm clock/radio down for parts for a project & was about to bin the case when my other half stopped me & said I could probably use the case for something - fatal mistake! I ordered the DFRobot motor shield that night with the intention of building everything inside the case. Unfortunately, it was physically impossible to fit everything inside so the case got shelved until I get proficient enough to make my own PCBs (again - relearning's a pain).
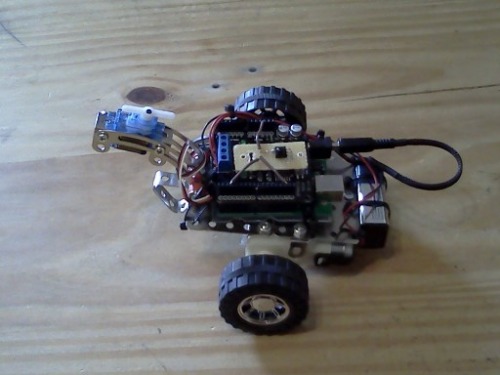
Anyhow, I started looking around & found an old Roboraptor that'd seen better days. Turns out it's got 5 very nice little motors inside, each with their own gearbox. I picked up a couple of Meccano-style models at a local £-store to build the platform with & the wheels from a toy car out of the same shop. The servo-motor & SRF10 came from eBay & the IR receiver came from an old set-top box.
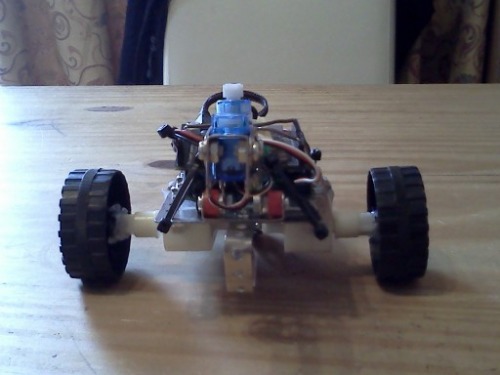
As you can probably see from the pictures, construction is mostly in the Bodger style as opposed to professionally done but that's what prototypes/experiments are suposed to look like, right? Hot-glue & zip ties are my friend. About the only concession I made to precautions was the small sheet of plastic under the Freeduino to stop it shorting out on the metal plate.
Apologies for the poor quality photos but they were taken on my mobile (still waiting on a cheap camera). Hopefully they will suffice in the meantime.
Currently, this little fellow is remote-control only as I'm still trying to get my head around the SRF10 code. I've got the sample code running and showing the distance via serial monitor but I'm still trying to tie it into the motor code etc (right about now, I could do with a second Arduino to test code on without stripping the 'bot apart.) I've got most of it algorithm'd out but just need to tweak it. The remote I use is a SkyHD controller, mainly because it was the closest thing I had to hand after I found the IR receiver! I ran a test program to print each code out to the serial monitor when I pressed a button then assigned the relevant ones to forward, back, left, right, stop, faster, slower etc in the main code.
Power for both the controller & motors is currently supplied by a 9v battery although I've plans to update this so that each has it's own supply once I get my hands on a decent RC battery pack.
Just before I took these pictures I realised that there was an issue with a 'blind spot' directly in front of the sensor hence it being headless. I'm going to turn the 'neck' 180º so that the sensor is more centralised & the blind spot ends at the front of the robot. Hopefully I'll have it running autonomously within a week or so (free time is a little short atm due to my house being renovated but I'm building a workshop soon so expect more random creations in the future hehe.)
Since this is my first post, I've probably left out many vital details while rambling so please feel free to ask any questions & I'll do my best to update it. Oh, before I forget...the name just seemed natural after I looked at the shape and I'd recently watched Wall-E, sorry :-s
Planned updates:
- Finalise sensor so it's autonomous.
- Update power supplies so microcontroller & motors have their own power.
- A Tamiya twin motor/gearbox & track set is on order to update the propulsion system.
- There's a ton of foamboard & perspex lying in the loft which may (I stress may) be worked into a bodyshell for the 'bot.
- Put some flashy lights on it - everything looks better with flashy lights!
I'll leave you with the photos to date, enjoy :-)
*** Update: 2011-07-13 ***
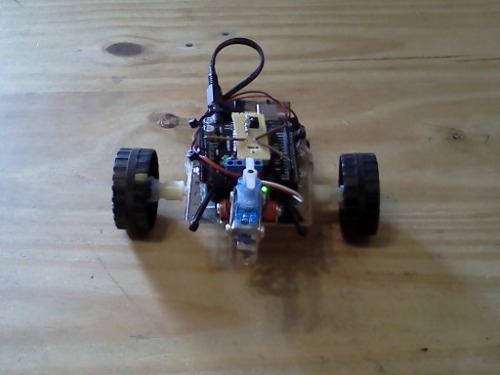
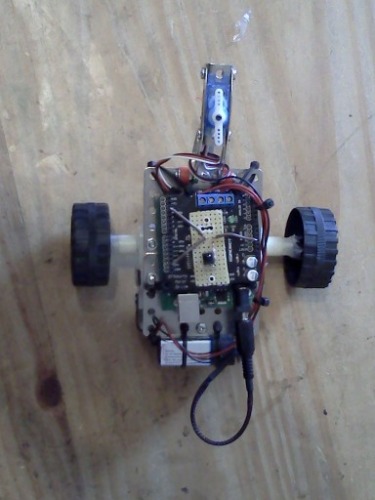
Well, thanks to renovations to my house and too much of a workload, I haven't had the time to work on my little friend much. I finally got a week off work though and went full steam ahead so here's the new & improved Serenit-e:

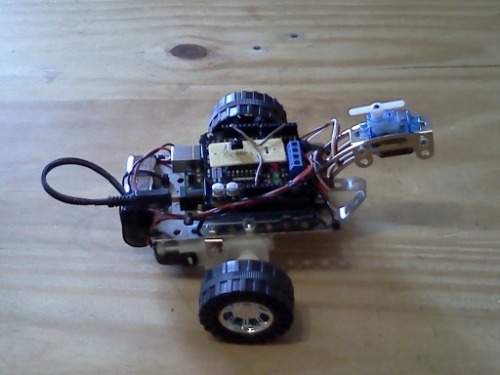
As you can see, the sitting around has made his butt bigger - this was the first upgrade he got. The new batteries do help with eliminating brownouts & runtime although they were a pain to mount, 9v ones are so much easier.
I ditched the IR remote shield and replaced it with one that has 2 I2C headers and a servo header made out of stripboard (great stuff to work with!)
The SRF cable is home-made although I think the braiding is making it a little stiff as I've had to compensate slightly in software for the servo not returning completely to straight ahead. Originally, I had the SRF pins coming straight out the back of the unit but they got dislodged after only a few sweeps. Thanks to some right-angle header pins, it's much more reliable now. The SRF is mounted on some spare uPVC fascia board (from my renovations). I saved all the scraps and have about enough to make 100+ robot bodies/mounts etc now hehe.
As far as the servo goes, it turns out that you do get what you pay for - this one was bargain basement of eBay and won't do a full 180 sweep, it gets 'stuck' approaching 0 so I just accepted a 45-135 sweep which worked out ok.
I've been forbidden from changing the shape/wheels by my partner because she likes it as it is so the twin-motor gearbox & tracks will go into my next 'bot instead. Truth be told, I'm kinda attached to this little guy as it is so he gets to stay :-)
Anyway, I've uploaded a clip of him in action: (About 2 seconds after the camera turned off, his left wheel fell off!)
Some more pics:
Front 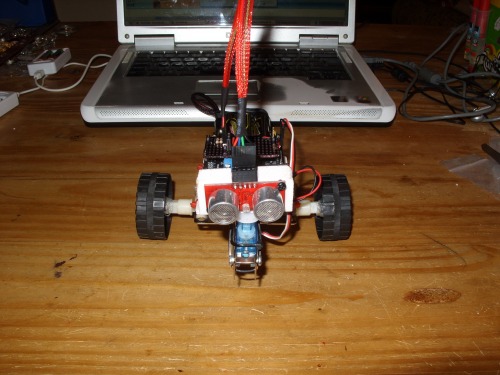
Back 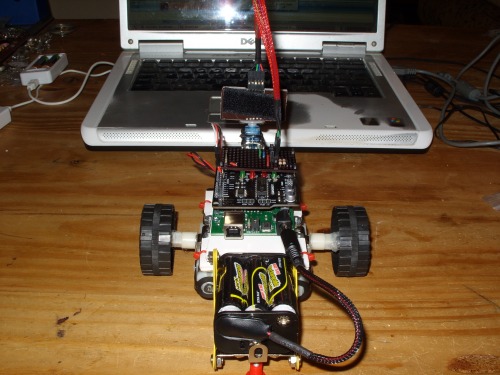
As far as upgrades go, there's only one still planned - the flashy lights, all I need to do is pich up a bundle of blue LEDs.
Test bed & experimental platform for re-discovering the joys of robotics
- Actuators / output devices: 2 x scavenged 12v dc motors/gearboxes, 9g servo
- Control method: IR remote and full auto
- CPU: Freeduino 328
- Power source: 9v battery
- Sensors / input devices: SRF10 Ultra Sound, 38Khz IR receiver
- Target environment: indoors
This is a companion discussion topic for the original entry at https://community.robotshop.com/robots/show/serenit-e

