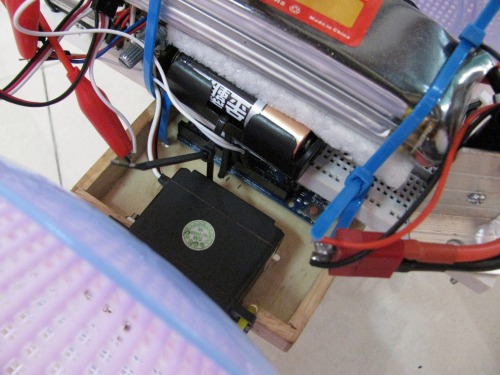
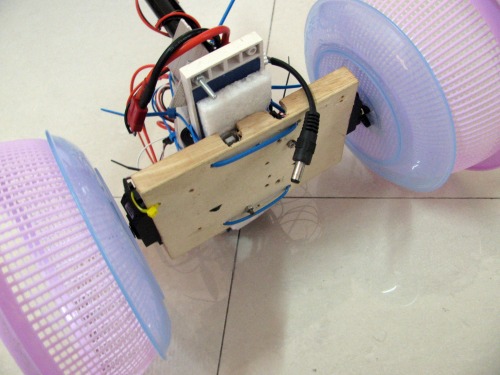
Self Balancing Robot (vers 2) Bang Bang control - no proportional - Mini Segway

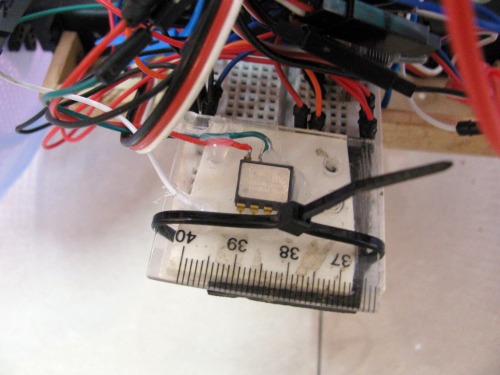
This is a bang bang (love that term) control machine with motors going full on in one direction or the other - no proportional control (though I have done that too now but my servo motors are just too slow (60rpm) to make nice with PID but I will post another video showing that too. Using only the single VTI SCA610 accelerometer chip as a simple tilt meter. 

Version 2:

Still using orginal program which is essentially two if statements that turn both wheels on full speed in one direction or the other depending on  which way it is leaning. Note that motors keep spinning in forward or reverse direction if you hold the pole down - just like a segway. You could carry a two day old kitten on this thing. Scale it up and ride it on the Bonneville salt flats - when you want to change direction just stop, get off, point it in the right direction and ride on.
a


Version 1:

Made this little barely balancing robot using two continuous servos, plastic baskets for wheels, a VTI SCA610 accelerometer "inclinometer" chip. The arduino is just a couple of IF statements - no PID. Maybe thats my next step. Mostly I just wanted to test the chip for another project. Maybe I will mount the arduino on the robot chassis and try a little more seriously.
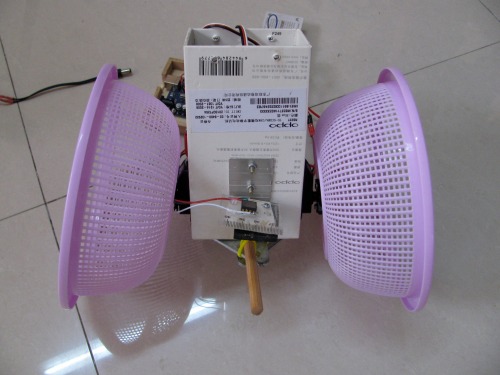
balances on two wheels - shakes like a Model A


This is a companion discussion topic for the original entry at https://community.robotshop.com/robots/show/self-balancing-robot-vers-2-bang-bang-control-no-proportional-mini-segway

Good job - the baskets look

Good job - the baskets look like kitchen colanders,

next, a robot made entirely out of kitchen utensils ? hehe


I have some basic arduino PID code for continuous servos from my robot posted here:

https://www.robotshop.com/letsmakerobots/balancing-bot-with-ultrasonic-sensor-no-gyros

feel free to grab/use.


Yeah, actually I already saw

Yeah, actually I already saw your code today and left a comment on your balancing bot page that I was going to use it. It will plug right in. Thanks.

Oh right, just saw that now.

Oh right, just saw that now. Good luck !

BTW its a good idea to post your code (even if its hackish) as it helps others get started.


Here is my code, yes I am

Here is my code, yes I am the world’s worst programmer. PS: used initial program by Michal Rinott to setup servos - but the ugly loop is all mine.


// Controlling a servo position using a potentiometer (variable resistor) 

// by Michal Rinott <http://people.interaction-ivrea.it/m.rinott


#include <Servo.h> 


Servo myservo1;  // create servo object to control a servo 

Servo myservo2; 


int potpin = 0;  // analog pin used to connect the potentiometer

int val;    // variable to read the value from the analog pin 

int gyroPin = 1;

int gyroVal = 0;

int gyroAvg = 0;

void setup() 

  myservo1.attach(11);  // attaches the servo on pin 11 to the servo object 

  myservo2.attach(9); // other wheel

  myservo1.writeMicroseconds(1500);

  delay(15);

  myservo2.writeMicroseconds(1500);

  delay(15);

  Serial.begin(9600);

Serial.println(“Program begin…”);


void loop() 

  val = analogRead(potpin);            // reads the value of the potentiometer (value between 0 and 1023) 

  val = map(val, 0, 1023, 0, 1000);     // scale it to use it with the servo (value between 0 and 100) 

  gyroVal = analogRead(gyroPin);

  //gyroVal = map(gyroVal, 0, 1023, 0, 179);     // scale it to use it with the servo (value between 0 and 180)

  gyroAvg = analogRead(gyroPin) + analogRead(gyroPin) + analogRead(gyroPin) ;

  gyroVal = gyroAvg / 3;


  //if (gyroVal > (val - 10) and gyroVal < (val + 10))   { myservo1.writeMicroseconds(1500);  myservo2.writeMicroseconds(1500);  }


  //else if (gyroVal > (val -15) and gyroVal <= (val - 10))         {       myservo1.write(110); myservo2.write(0);   }

  if (gyroVal > (0) and gyroVal < (val ))               {       myservo1.write(180); myservo2.write(0);   } 


  //else if (gyroVal > (  val + 10) and gyroVal <=(val + 15)) { myservo1.write(0);   myservo2.write(110); }

  else if (gyroVal > (  val ) and (gyroVal < 800))      { myservo1.write(0);   myservo2.write(180); }


  Serial.print(" pot: “);Serial.print(val);Serial.print(” angle: ");Serial.println(gyroVal);

  //myservo.write(val);                  // sets the servo position according to the scaled value 

  delay(10);                           //  


Awesome! I like the use of

Awesome! I like the use of material very much, as I have never seen a robot made with kitchen baskets/colanders and a smartphone box. What also surprises me is that simple code. 

And a chopstick! Haha. Yes I

And a chopstick! Haha. Yes I was surprised a bang-bang routine would work. I have since remounted everything on a lower chassis and am testing mikerr’s PID routine which is working - just tuning now. Also will glue some coasters to the wheels to straighten/strengthen them up. The reason I used the baskets (didnt know what colanders were till now) is that the 60rpm servos were too slow so needed bigger wheels. I dont have the resources and background of you professional guys but really appreciate your looking in and positive support you give everyone. xiexie.

Well, I also had to

Well, I also had to translate colander as i am not native English, but I still would go with kitchen baskets… :slight_smile:

Professional, who claims to be professional here :smiley: It’s not the use of profesional gear it’s the idea what counts. Most of the times I am looking more to that simple projects coz they really make it work. It’s like the private space enterprises, much cheaper, less trouble with tousands of departments to sign up some documents, assign engineers etc… It’s just the pure pleaseure of making something.