

mDrawBot.zip (7797Bytes)
Introduction
Makeblock is hosting a new Kickstarter project, the mDrawBot kit. I got the chance to test a pre production robot kit.
Here is my review. What I got, is a kit including all mechanic and electronic parts to build 4 different kind of drawing robots.I have used Makeblockparts before for the Makeblock XY-Plotter V2, the Makeblock Robot Starter-Kit and some other projects like a camera slider and a macro focus stacker. I can't confess that I love the stuff from Makeblock. You can easily build up mechanic constructions without special tools like a lathe or a milling cutter.
mScara a drawing robot hand
mSpider can draw pictures on a wall
mEggBot is a drawing machine for eggs or table tennis balls
mCar a mobile drawing robot.
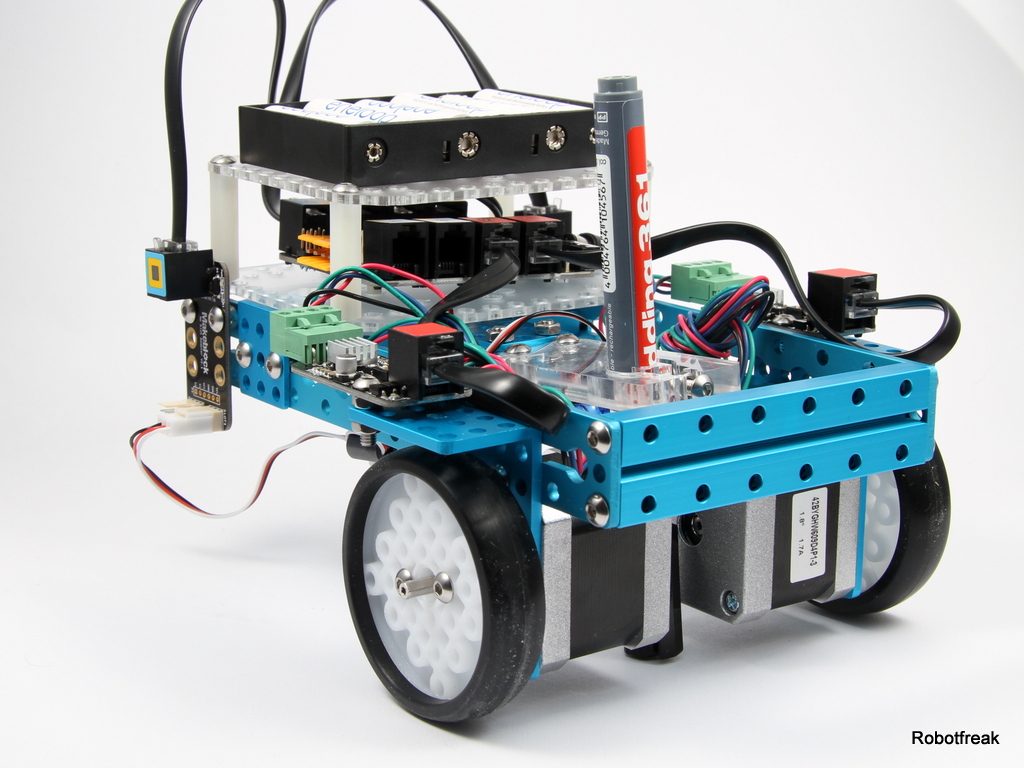
mCar drawing robot
The project I'm most interested in is the mCar, so I will show this project as an example. I planned to make a stepper driven drawing robot long time before. After some not very successful projects with DC motors and wheel encoders, like MURtle or the Dagu Doodle art bot competition, I am sure that Stepper motors are the way to go. The mCar is a good chance for me to see how a stepper motor powered robot works.
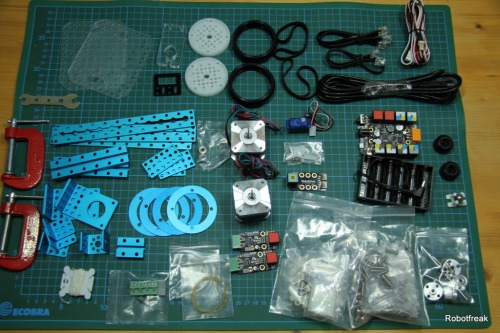
Mechanics:
As usual most of the Makeblock mechanic parts are made out of blue anodized aluminium. Strong, durable and leightweight. All parts can be assembled without special tools. A screw driver and hex keys are included in this kit.
Because I got a pre production kit, I don't except everything is working. But to my surprise, I only detect some minor issues, no show stoppers.
- There are no screws to attach the micro servos. I found some M2 screws and nuts that will fit.
- The square nut for the pen holder did not fit. It has a UNC or other non-metric thread. A normal M4 nut works perfectly.
- There are no mounting holes for the acrylic housing. The work-around is using cable ties instead.
Electronics:
The electronic parts can be easily assembled. No solder iron needed. All electronic modules has a 6pin RJ25 connector. Just plug in the cable and connect it with the main controller board.All modules are marked with color sticker, as the main controller board to make it easier to find the correct connector.
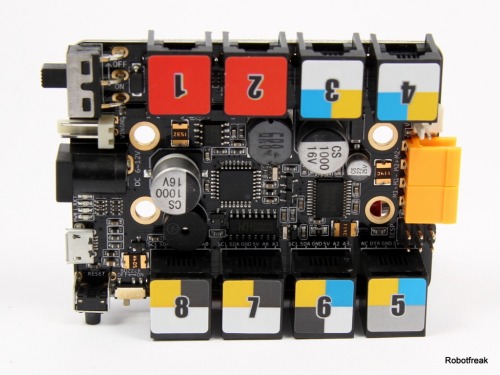
Orion main board
An Arduino compatible board the Makeblock Orion is the brain for the mDrawBot projects. 8 Makeblock modules can be attached with RJ11 cables. On board is a dual DC motor H-Bridge and a buzzer. Unfortunately the USB driver did not install automatically on Windows at start up, as the documentation says. It needs to be installed separately. You will need to download the driver here.
Makeblock modules
Included in the mDrawBot kit are 2 Me Stepper motor driver and a Me RJ25 adapter module to connect the servo motor for the pen holder.
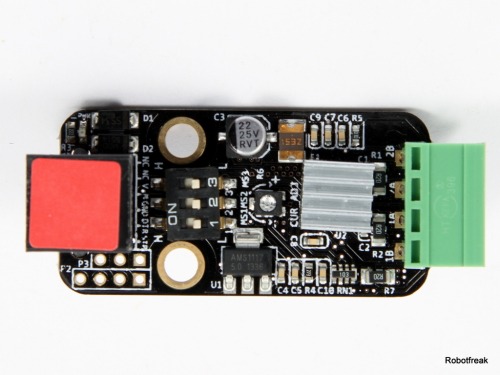
Me Stepper driver
All projects uses 2 stepper motors for movement and a pen holder driven by a micro servo. Two Me Stepper Drivers are included, using A4988 stepper driver chips.
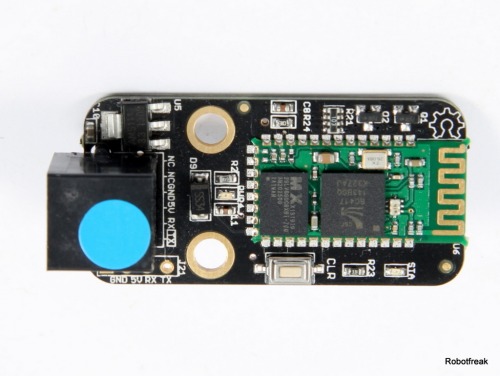
Optional Bluetooth module
Not included in the kit, but highly recommended is the Me Bluetooth module.It make things easier to upload images to the robot without a cable. The cable would make it impossible, to move the robot further after a few turns.
Calibration
Before you can use the mCar robot it needs to be calibrated. The pen holder needs to be adjusted: the pen must be exact on the middle of the wheel axis. This can be done by trial and error. Adjust the pen, draw a 360°circle.The result should be a single point, not a circle. Repeat until success. Remember the servo position and put the value in your program for the PEN_DOWN_POS define. Be careful: when the servo gets stuck at the open holder, it will break easily. This way I break one servo by myself.
The good thing for the mCar hardware is: The pen holder will keep the pen in place over the time. No jitter, The bad thing. When you change the pen, you will need to recalibrate everything.
mDraw Software
The software included in the kit, available at Github includes:
- Arduino sketches for all projects. To get the sketches running the Makeblock library is needed
- mDraw is a GUI for Windows/Mac OSX to load Bitmap or SVG files and upload it into the model.
So far I’ve got no luck using the software. Even simple SVG files, like a rectangle where not drawn correct.
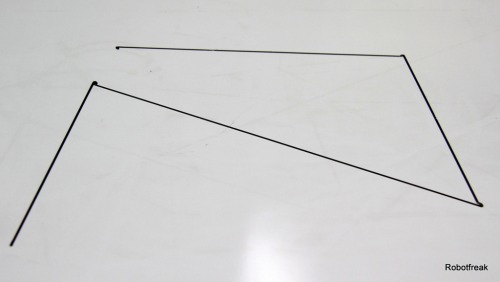
The same result for 'LMR':
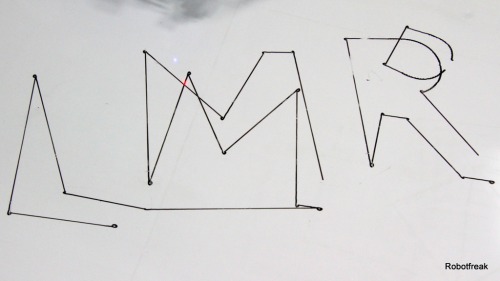
I'm not going to strictly rate the software at the moment. Most important fact is: the hardware is good, the software is in a Beta state right now. This should be fixed in the final version.
Logo Turtle Software
I gave up and convert my existing program from MURtle to the mCar. This works better, than the original software and even better than the MURtle robot. The Logo dialect supports 6 commands so far. Here is the list of commands:
- FW <distance> (Go forward distance in mm)
- BK <distance> (Go backward distance in mm)
- TR <angle> (Turn right angle in degree)
- TL <angle) (TUrn left angle in degree)
- PU (Pen Up)
- PD ( Pen down)
More complex drawing can be done in functions. All commands can be send by Bluetooth or Serial connection.
Drawing a Square:
Here is the simple function for drawing a square:
void Square(int len, int turn)
{
  PD();
  for(int i=0; i<4; i++)
  {
    FW(len);
    TR(turn);
  }
  PU();
}
This is the result of drawing 4 squares over another:
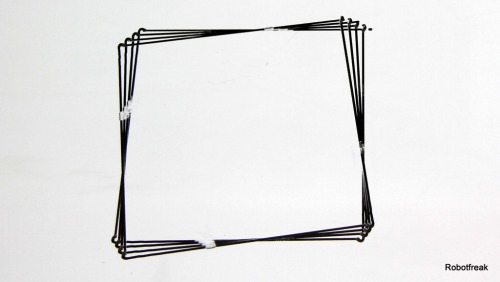
As you can see, the turns are not perfect at the moment. You can see a small circle at the edges of the square. The cause is a misaligned pen holder.
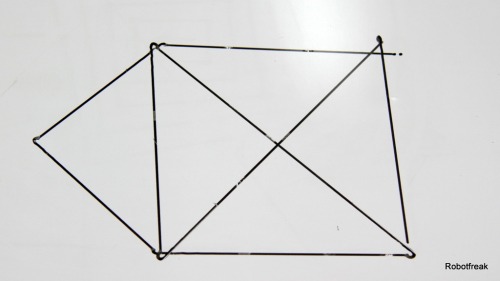
A little more complex drawing is the 'Haus des Nikolaus' (Sorry don't find an engish explanation):
void Nikolaus(int len) { int diagonale = int((float)len*1.41F); int roof = int((float)len*0.707F);PD();
FW(len);
TR(45);
FW(roof);
TR(90);
FW(roof);
TR(45);
FW(len);
TR(135);
FW(diagonale);
TR(135);
FW(len);
TR(135);
FW(diagonale);
TL(135);
FW(len);
PU();
}
Here is the result:
Some mathematics
The math behind the drawing robot is simple.You will need to know the step angle of the stepper (1.8°), the wheel diameter (64mm) and the distance between the wheels (132mm). The 1/16 micro step mode will be usefull here
The STEPS_PER_MM will result in:
STEPS_PER_MM = 360 / STEP_ANGLE * MICRO_STEPS / PI / WHEEL_DIAMETER = 15.916
The STEPS_PER_DEGREE will be:
STEPS_PER_DEGREE = STEPS_PER_MM * PI * WHEEL_DISTANCE / 360 = 18.333
Conclusion
The mDrawBot kit is a great robotics kit if you interested in one of the 4 projects. The kickstarter campaign is a great success so far. Makeblock is on a good way to get established in the maker and robotics scene. The mechanic and electronic parts are well desdigned and worth the money. The kit is inexpensive, compared to other kits like Lego Mindstorm or FIscher robotics. And you can use Lego or Lego mindstorm parts anr reuse it with Makeblock parts.
The software is not 100% error free at the moment. But for the beginning it is great to start with something existing than start from scratch.
- Electronics and Mechanics will get 9 out of 10 points.
- Software will get 5 out of 10 points. It is not usable at the moment.
- For the idea and creativity of the kit I will give 9 out of 10 points.
Future work
Later on I will assemble the mEggBot. Because you can only build one project at the same time and need to reassemble it, when building another project.
https://www.youtube.com/watch?v=dfQshruSDdw