

ROBOTIX 5 PROJECT
(Sorry, the video are in french because I don't speak english very well and my robot understand only vocal instructions in french. If there are people whose speak a little french they can see on the video that the robot listen for instructions and can speak whith me.)
First, let me introduce the project Robotix 5:
Since my childhood, I dreamed of building a robot but there was one big problem: how to develop an artificial intelligence that would control the robot. After that I scheduled my first micro-controller I realized I could do many things with it.
When I was 17, I decided to build an autonomous robot with the following constraints:
1) The robot must be able to move autonomously in its environment
2) The robot must be able to act on its environment
3) The robot must understand its environment using different sensors.
4) The robot will be a reasonable size (about 1.5 meter)
5) The robot must be able to speak
6) The robot must be able to understand some commands (speech recognition)
I had the idea of a name for the robot: NEO (for "New Elecronic Operator")
After so many good resolutions, it remained for me to attack me the hardest: the construction of the robot
STEP 1: start of construction of the robot:
This step was essential to me, to ensure proper operation the robot, I had to leave on good foundations.
For reasons of convenience and budget, I chose to make a robot on wheels.
I chose wood as main material for obvious reasons:
- Low production cost
- Ease of construction
- Strength
I made the drive part with four engines and recovery wheel stroller. I made the choice to only use DC motors for convenience. I made an electronic circuit based on relays and transistors in order to control the motors 24 v with the micro-controller.
I also provided the basis of proximity sensors infrared in order to detect objects in order to avoid them.
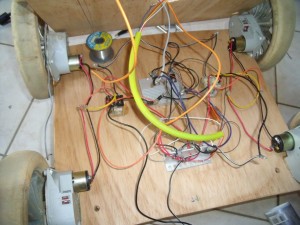
At this stage, the robot is still very limited, its program is solely to make it move in a room while avoiding obstacles with its infrared sensors:
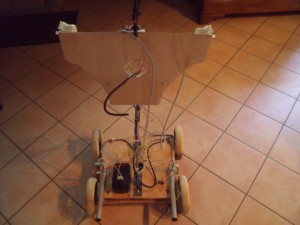
STEP 2: Building the body of the robot:
Once the first part done, I had to build a robot body with a semi-human appearance and capabilities of bones
Again, I used as the main wood materials. I chose not exactly give the appearance of a human because my goal was not to emulate the human (too ambitious for me :)) but seek to make the machine that would bring in the more.
I found damage build a robot that is a perfect replica of the human body so that he could never equal this marvelous machine. I preferred to repeat what I found essential in humans, while adapting to the needs of my robot.
I carry the body of fifférents sensors:
-Infra-red distance sensors
-Temperature sensors
-Light sensors
-Vibration sensor
......
STEP 3: Development of speech recognition:
The most exciting part was the voice recognition. Who has not dreamed of controlling a robot with his voice? I do not know you, but me, this idea I immediately liked.
I looked for the easiest and most affordable way to equip the robot with this technology. My choice was the use of an electronic board dedicated to speech recognition.
I bought a module named "VRbot" I programmed to recognize some orders. I then connected this module with my micro-controller via an RS232 link.
STEP 4: Manufacturing of the robot head:
The head of one robot was not essential to an electronic point of view but seemed mandatory to build a robot capable of simulating emotions with his eyes.
Because the engines that I used for the automation of the head, I was limited by weight, so I chose to make the head in a material both stronger and lighter than wood: plastic.
The casing is made entirely from plastic school workbook.
Is it not a good way to use his school binders? :)
STEP 5: Development of speech:
After speech recognition, the most interesting was to give the robot the ability to speak. Indeed, for me, a real robot must be able to communicate with people around him.
I initially purchased and configured a module that can play sound tracks in MP3 format coming from an SD card to be driven by the micro-controller.
This fact, I recorded a multitude of words and phrases needed by the robot. It seemed important that the robot is able to tell the same information in several different ways, so I saved a lot of different terms to mean the same thing.
STEP 6: Manufacture of arms for the robot:
This step was for me more than necessary since it was his arm that would allow the robot to interact with objects.
I tried to give the arm more freedom possible to move in space. In the end, each arm have 3 degrees of freedom.
I needed to control quite precisely the position of the robot arm but I also need strength. Prices servo motor capable of putting into motion the arms of my robot beings exorbitant, I decided to make my own servo motors with the same engines used in the robot base, (recovered so free) and with potentiometers to determine the position of each joint.

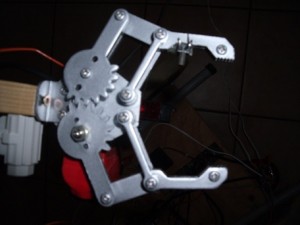
STEP 7: Making the robot hands:
I chose to equip the robot arm of pliers because they seemed more effective than a robot hand with five fingers.
Requiring precision, I chose to motorize these clips using small servo-motors.
I also fitted the pliers of infrared sensors to detect the presence of object (s).
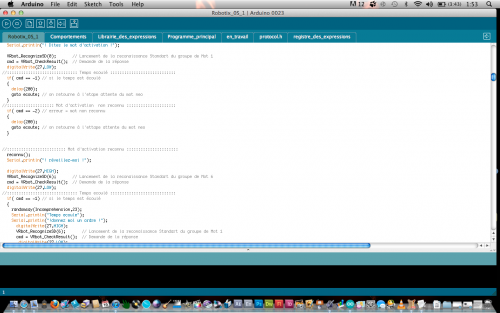
STEP 8: Development of an operating system for the robot: "Robotix OS 1"
Once completed the electronic part, I had to develop the software part, responsible for steering the machine.
The problem was that basically the microcontroller can not do anything and do not understand simple directions (forward, catching, greet).
So I had to program the card to recognize what kinds of instructions because I could not imagine writing a thousand times "digitalWrite (27, HIGH)" to drive a single motor;
So I started programming an operating system that links simple instructions and the electronic part. My goal was to facilitate the programing of the robot. This was the birth of "a ROBOTIX OS"
STEP 9: Development of a program running in "Robotix OS 1"
Once the operating system is finished, the robot was able to understand instructions but could not do anything, that's why I created a program running on "Robotix OS 1" which is the true intelligence of the robot .
(This program is still far from complete, it is constantly improving)
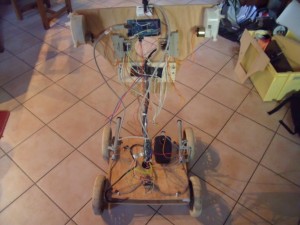
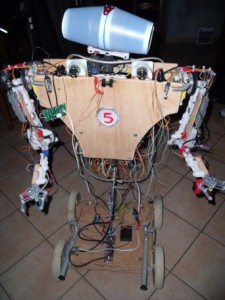
Picture of the robot as a whole:
Thank you for watching and sorry for my English, I am of French origin and does not speak the language very well :)
This robot is an autonomous robot capable of interacting with its environment, it may Understand oral orders and can speak. It can move and reach for objects.
- Actuators / output devices: DC Motors, servo-motors
- Control method: speech control and autonomous
- CPU: Arduino mega 2500
- Operating system: Robotix OS 1
- Power source: 24 v DC
- Programming language: C
- Sensors / input devices: ultrasound, infrared, distance sensor, contact, luminosity, temperature
- Target environment: indoor
This is a companion discussion topic for the original entry at https://community.robotshop.com/robots/show/project-robotix-5
