

NEMA17_Polymorph01.jpg (210316Bytes)
NEMA17_Polymorph03.jpg (70820Bytes)
NEMA17_Polymorph04.jpg (245242Bytes)
NEMA17_Polymorph02.jpg (189551Bytes)
NEMA17_Polymorph05.jpg (65950Bytes)
NEMA17_Polymorph07.jpg (133726Bytes)
NEMA17_Polymorph08.jpg (59387Bytes)
NEMA17_Polymorph09.jpg (209967Bytes)
NEMA17_Polymorph10.jpg (52774Bytes)
NEMA17_Polymorph06.jpg (232797Bytes)
NEMA17_Polymorph11.jpg (173501Bytes)
NEMA17_Polymorph12.jpg (222263Bytes)
NEMA17_Polymorph13.jpg (173653Bytes)
NEMA17_Polymorph14.jpg (197287Bytes)
NEMA17_Polymorph15.jpg (253437Bytes)
NEMA17_Polymorph16.jpg (222893Bytes)
NEMA17_Polymorph17.jpg (197797Bytes)
NEMA17_Polymorph18.jpg (142610Bytes)
NEMA17_Polymorph19.jpg (195976Bytes)
jcd_inline_skate_boot_joint.JPG (20107Bytes)
Introduction
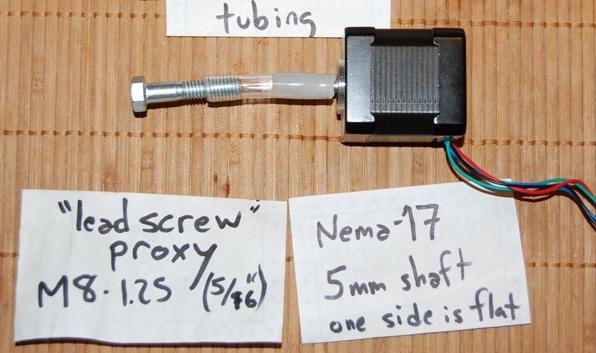
Couplings are expensive, but tubing and Shapelock (Polymorph) is cheap. This is a cheap way to build a coupling between a 5mm stepper and an M8 screw. When I tried this I did not expect the Polymorph to stick to the tubing. It does stick, which makes this a pretty good coupling.
Materials

Figure 1: You'll need Polymorph (<5 grams) and tubing that will fit tightly over your lead screw. I used tube with 6mm inner diameter for an M8 (8mm) screw. You'll also need one of your motors to mold the plastic.
Procedure

Figure 2: Drop the Shapelock in the water and wait for it to become tranparent.
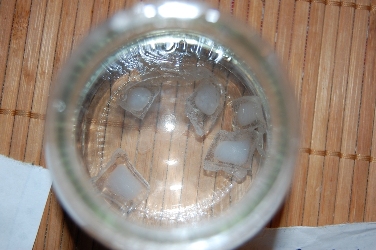

Figure 4: Remove the plastic from the water when it is transparent (see-through)
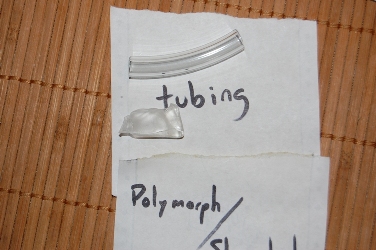
Figure 5: Pull off a small piece of Polymorph

Figure 6: Roll the polymorph into a cylinder slightly smaller than the tubing, and insert the Polymorph into the tubing.

Figure 7: Do not insert the Polymorph too far into the tube -- just a centimeter or two. Use your fingers to pinch the tube, and then push the Polymorph into the tube until it is full.
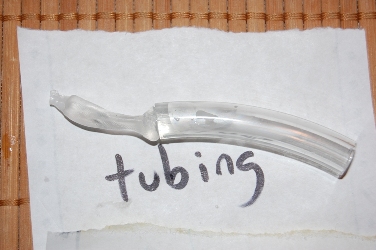

Figure 9: Pinch off the extra Polymorph.
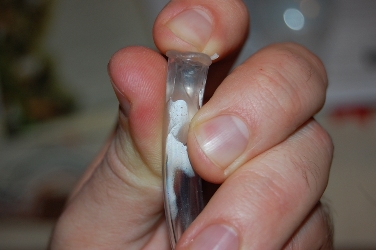

Figure 11: The tube is ready to go on the motor, but it has cooled down. We'll want it as soft as possible so it makes a good strong coupler, so we'll put it back in the water.


Figure 14: It's ready to go on the motor.

Figure 15: Center the motor shaft in the tube as best you can and push it in a little.

Figure 16: Pinch the tube to keep the Polymorph from sliding too easily into the tube, and push the motor shaft into the tube. The coupling tube may get a little bigger where the polymorph and motor were forced in, and that is okay.

Figure 17: It is done! The Polymorph is still hot and needs to harden, so leave it on the motor until it turns white.

Figure 18: When the Polymorph hardens and turns white, you can pull the motor from the new coupling. In this figure you can see the impression of the motor shaft. The top side is flat.

Figure 19: Now you can put the coupling on the motor and lead screw and use it on your CNC machine.