

Normally robot grippers are designed to be used with specific robot arms or specific robots construction systems. What would it take to make a really inexpensive, but versatile / functional gripper? We decided to give it a try.
Actuator
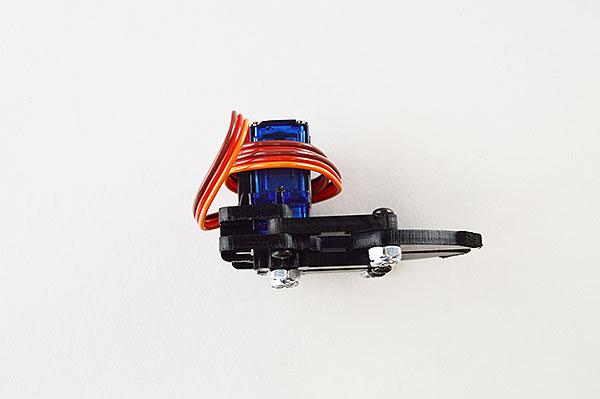
The actuator normally accounts for most of the price of the gripper, so aside from using a really inexpensive solenoid (simple open/close perhaps), one of the least expensive actuators with feedback is a 9g RC servo. ServoCity / Actobotics has a cute and inexpensive gripper made for Hitec RC’s HS-55 or HS-5055 RC servo. The simplicity is great - only three 2D cut parts. The integrated spur gears on either “finger” means the open and close equally in opposite directions at the same time with only one input.
https://www.robotshop.com/en/micro-gripper-kit-no-servo.html
https://www.robotshop.com/en/hitec-hs55-servo-motor.html
The issue with 9g servos is there’s no second shaft on which to mount the second finger, so Actobotics had to create a third part which doubles as a mounting point. The thickness of the material was perfect for the Hitec servo and only a small washer was needed to get the two fingers at the same height. The gripper is really made for holding small objects, and having an autonomous robot grasp something easily (given the smooth surface) wasn’t proving easy if that object is in a random orientation.
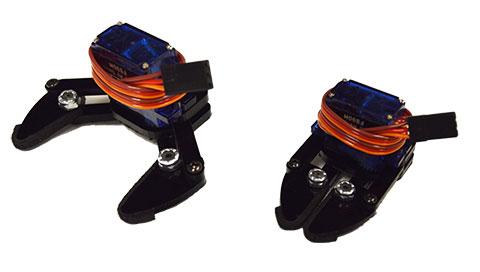
How to (potentially) improve the design then? At $3.50 USD, the least expensive 9g servos we carry are the Feetech 4.8V micro servo and DFRobot’s Micro servo. Although we could have gone with DFRobot’s, Feetech has an identical 7.4V servo (albeit more expensive), so designing for one makes the gripper automatically compatible with the other.
DFRobot Micro Servo Motor ($3.5)
https://www.robotshop.com/en/dfrobot-micro-servo-motor.html
Feetech 4.8V Micro Servo Motor ($3.5)
https://www.robotshop.com/en/9g-micro-servo-motor-4-8v.html
Feetech 7.4V Micro Servo Motor ($6)
https://www.robotshop.com/en/9g-micro-servo-motor.html
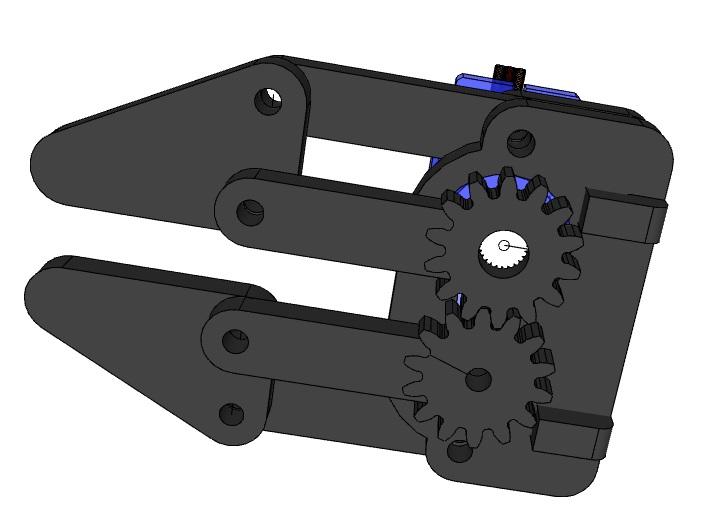
Mechanical Design
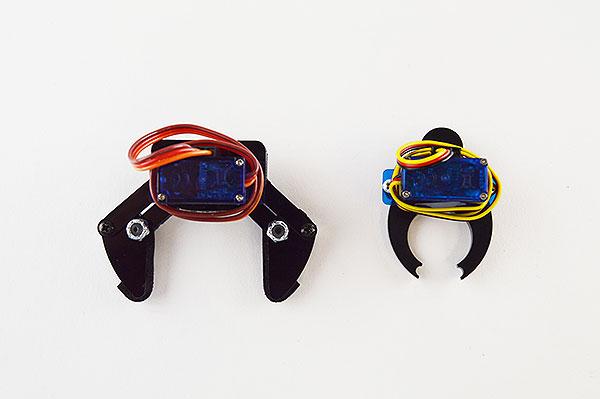
Rather than a V-style opening / configuration, why not try parallel, but use the same concept of spur gearing, but keeping with a minimalist approach. Inspired by the ServoCity gripper’s use of 2D cut ~3mm thick acrylic sheets, creating a 2D mockup (using Sketchup) and using a laser cutter to cut it out. Nothing in particular dictated the lengths of each segment, but the design included space for foam, which greatly helps when picking up objects.
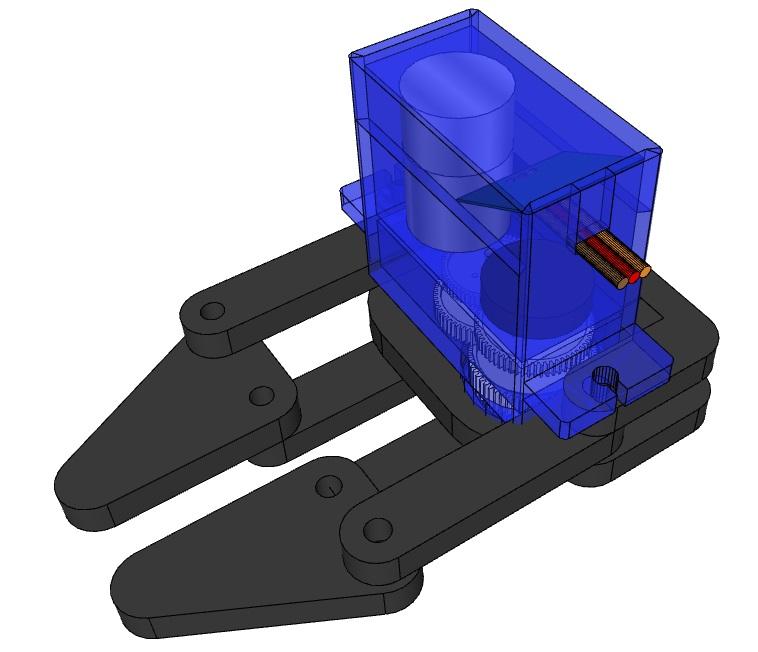
2-56 screws and 2-56 lock nuts were used (normal nuts would unscrew themselves with the rotational motion), and the servo’s side mounting holes were threaded into directly.

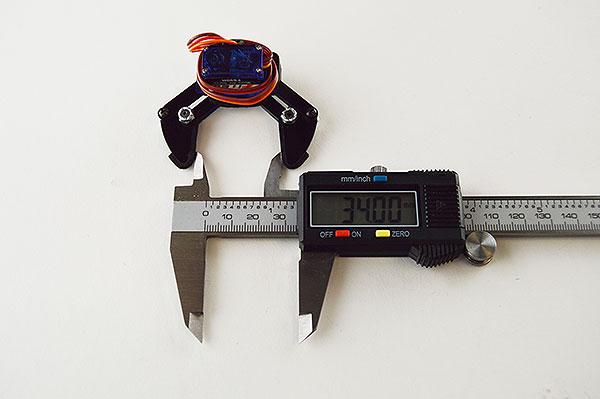
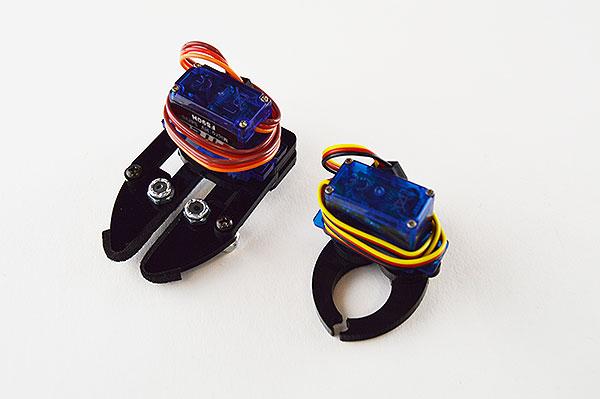
The maximum width of the opening was not designed but rather the gripper needs to stop when the lock nut touches the arms. A recessed screw would prevent this, but also require additional parts / complexity. The overall dimensions seem proportional to the servo and the objects to be grasped.
The laser cutter is accurate enough to create an internal spline, so one of the arms could be pressed onto the output shaft of the Feetech servo. This took a bit of trial and error since the laser itself has a thickness - the fit needed to be tight but not too much.
How does it compare to other mini grippers? There are not many. The closest seems to be ServoCity / Actobotics’ mini gripper kit.
So how does it compare to other grippers? Here it is in the bottom left compared to a few other commercial grippers.
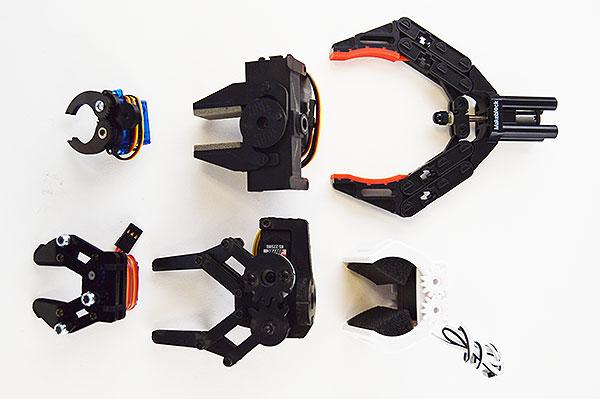
Micro Gripper Kit
https://www.robotshop.com/en/micro-gripper-kit-no-servo.html
EZ-Robot Servo Gripper (white and blends in quite well with the background)
https://www.robotshop.com/en/ez-robot-servo-gripper.html
MakeBlock Robot Gripper
https://www.robotshop.com/en/makeblock-robot-gripper.html
Lynxmotion A-Style Gripper
https://www.robotshop.com/en/lynxmotion-a-style-gripper-kit.html
https://www.robotshop.com/en/lynxmotion-a-style-gripper-kit-servo.html
Little Grip Kit
https://www.robotshop.com/en/lynxmotion-little-grip-kit-no-servos.html
https://www.robotshop.com/en/lynxmotion-little-grip-kit.html
What’s next?
The gripper design doesn’t have any particular way to mount it to anything, so perhaps for increased versatility, a rear mount for an additional rotation servo could be added (like the Lynxmotion Little Grip and A-style grippers). If there’s a way to design it to be adaptive that would be great as well.
This is a companion discussion topic for the original entry at https://community.robotshop.com/robots/show/parallel-mini-gripper-project