

Materials needed
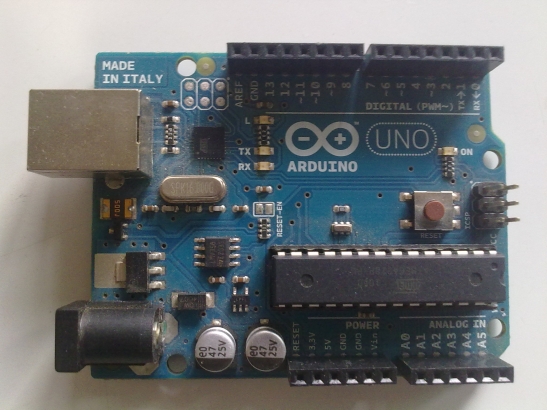
1 x Arduino uno/duemilanove.
The Arduino Uno is a microcontroller board based on the ATmega328.You can read more detailshere.
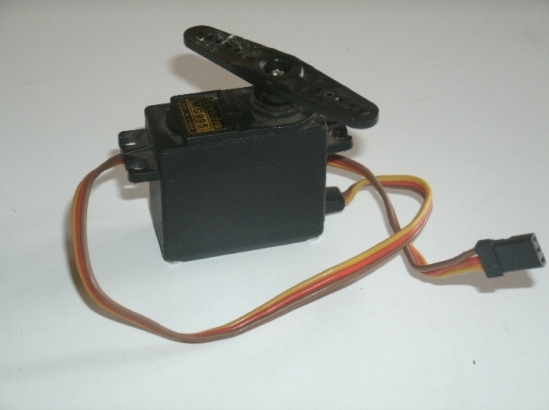
1 x Standard servo
Servos are basically Dc motors with position feedback that means you can tell the microcontroller through your code to move the servo to the desired position.In arduino a standard servo can be moved between 0 to 180 degree and 90 is the servo center(makes sense).Most of the hobby servos run happily between 4.8V to 6V.Supplying more than 6V may damage your servo.
Servo has three wires i.e.Brown,Red,Yellow or the color maybe Black,Red,White.
Brown or black wire is to be connected to ground of the microcontroller.
Red wire is to be connected to Vcc(4.8V to 6V).
Yellow or white wire is to be connected to the digital output of the microcontroller and is called signal wire.
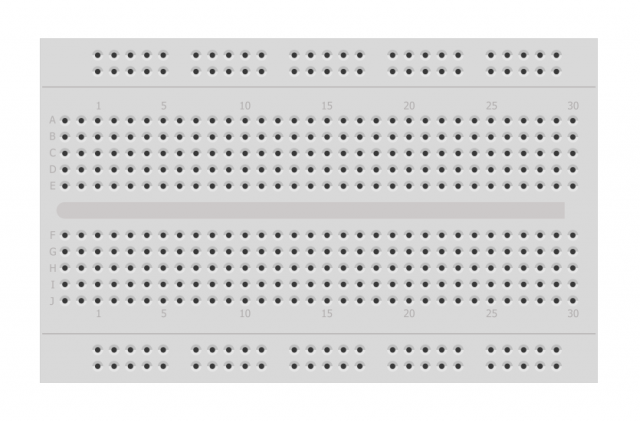
1 x Breadboard
Half sized breadboard is enough for this robot
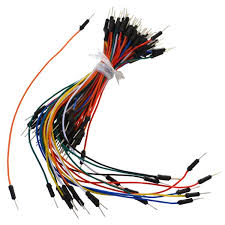
Gauge wires or male to male jumper wires
For making connections on the breadboard you will need either gauge wire or male to male jumper wires.
Your best deal would be gauge wire as it is available in local electronics/hobby shop.Male to male jumper wires are sometimes hard to find.
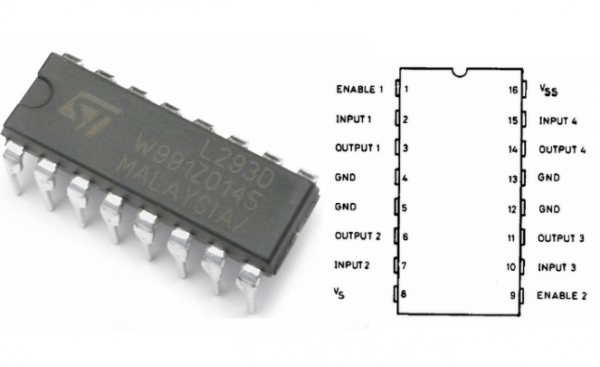
1 x L293D motor driver
L293D is a 16 pin chip and is a popular motor driver which can be used for small motors that have low output current.
2 X Plastic gear motors
Plastic gear motors are very lightweight,small in size and easy to mount.The motors are available in many RPM(revolutions per minute).You can buy the motor between 60 to 100 RPM for this robot.The lower the RPM ,the greater will be the torque(doesn't matter much for this robot).
2 x Wheels compatible with plastic gear motors
You will get two screws with these wheels.Those two screws are used for attaching the wheels to the plastic gear motors.
1 x Castor wheel
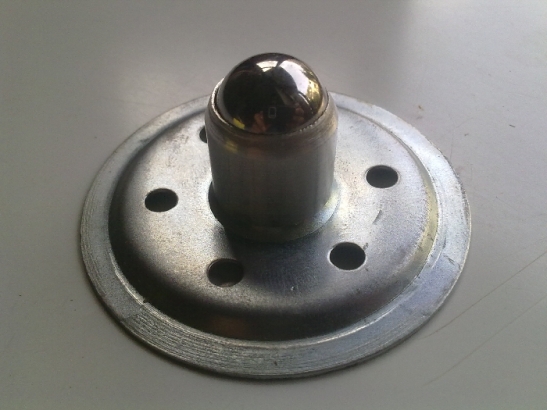
and
2x
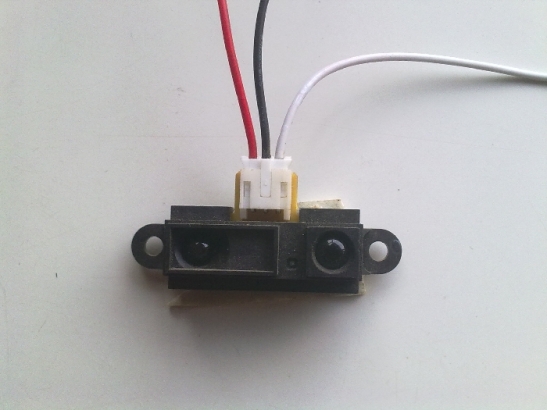
1 X Sharp GP2D12 analog distance sensor.
The sensor consists of two eyes.One eye sends the infrared light and the other eye sees the reflection of that infrared light and measures the distance which is then sent to the microcontroller through analog input to perform further operations based on the distance(the operations should be defined in the code).
There are three wires coming from the sensor.i.e.Red,Black adn White or it can be Red,Brown and Yellow.
Red is connected to 5V of arduino.
Black or brown to Ground of arduino.
White or yellow to analog input pin of arduino i.e. in this case to analog pin 0.
Batteries
Arduino itself needs 9V(recommended).So it is better to use two different battery packs.
2 9v batteries.
And here is a simple code for avoiding obtacles.Just copy and paste this code in the arduino IDE and click on upload and your robot is ALIVE !!
#include <Servo.h> //includes the servo library
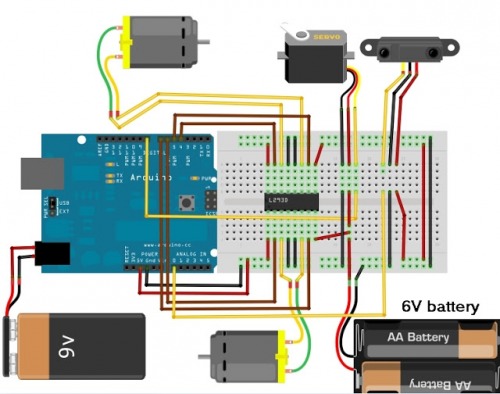
int motor_pin1 = 4;
int motor_pin2 = 5;
int motor_pin3 = 6;
int motor_pin4 = 7;
int servopin = 8;
int sensorpin = 0;
int dist = 0;
int leftdist = 0;
int rightdist = 0;
int object = 500; //distance at which the robot should look for another route
Servo myservo;
void setup ()
{
pinMode(motor_pin1,OUTPUT);
pinMode(motor_pin2,OUTPUT);
pinMode(motor_pin3,OUTPUT);
pinMode(motor_pin4,OUTPUT);
myservo.attach(servopin);
myservo.write(90);
delay(700);
}
void loop()
{
dist = analogRead(sensorpin); //reads the sensor
if(dist < object) { //if distance is less than 550
forward(); //then move forward
}
if(dist >= object) { //if distance is greater than or equal to 550
findroute();
}
}
void forward() { // use combination which works for you
digitalWrite(motor_pin1,HIGH);
digitalWrite(motor_pin2,LOW);
digitalWrite(motor_pin3,HIGH);
digitalWrite(motor_pin4,LOW);
return;
}
void findroute() {
halt(); // stop
backward(); //go backwards
lookleft(); //go to subroutine lookleft
lookright(); //go to subroutine lookright
if ( leftdist < rightdist )
{
turnleft();
}
else
{
turnright ();
}
}
void backward() {
digitalWrite(motor_pin1,LOW);
digitalWrite(motor_pin2,HIGH);
digitalWrite(motor_pin3,LOW);
digitalWrite(motor_pin4,HIGH);
delay(500);
halt();
return;
}
void halt () {
digitalWrite(motor_pin1,LOW);
digitalWrite(motor_pin2,LOW);
digitalWrite(motor_pin3,LOW);
digitalWrite(motor_pin4,LOW);
delay(500); //wait after stopping
return;
}
void lookleft() {
myservo.write(150);
delay(700); //wait for the servo to get there
leftdist = analogRead(sensorpin);
myservo.write(90);
delay(700); //wait for the servo to get there
return;
}
void lookright () {
myservo.write(30);
delay(700); //wait for the servo to get there
rightdist = analogRead(sensorpin);
myservo.write(90);
delay(700); //wait for the servo to get there
return;
}
void turnleft () {
digitalWrite(motor_pin1,HIGH); //use the combination which works for you
digitalWrite(motor_pin2,LOW); //right motor rotates forward and left motor backward
digitalWrite(motor_pin3,LOW);
digitalWrite(motor_pin4,HIGH);
delay(1000); // wait for the robot to make the turn
halt();
return;
}
void turnright () {
digitalWrite(motor_pin1,LOW); //use the combination which works for you
digitalWrite(motor_pin2,HIGH); //left motor rotates forward and right motor backward
digitalWrite(motor_pin3,HIGH);
digitalWrite(motor_pin4,LOW);
delay(1000); // wait for the robot to make the turn
halt();
return;
}
Heres what this code will do.
The robot will move forward if the sensor has reading less than 500.It means that the robot will consider that it has no object infront of it if sensor reading is less than 500.You can set this as per your needs.
If the sensor gets reading greater than or equal to 500 then it will look for another way in the following steps.
First the robot will stop completely,move little backwards,again the robot stops,the servo will move left and sensor will take reading and after that the servo will move right and the sensor will again take reading.The left and right readings are compared.The robot turns towards the direction where the reading is more less(lesser the analog reading greater is the distance) and stops.Now again the same code or cycle repeats till you switch off the power supply.
Congrats you have built your first robot.
Enjoy !!
navigates using sharp IR range finder
- Actuators / output devices: 2 gear motors + 1 servo
- Control method: autonomous
- CPU: arduino uno
- Operating system: Windows
- Power source: 2 9v battery
- Programming language: Arduino C++
- Sensors / input devices: Sharp IR
- Target environment: indoor
This is a companion discussion topic for the original entry at https://community.robotshop.com/robots/show/obstacle-avoider-1