

This was my first project. I started out on a quite ambitious note. but i couldn't complete it the way i expected it to be. The robot, all it does is whenever it faces a black obstacle it steers away. I use ldr led setup for sensor along with bjt. i enjoyed the process.after graduation, I am hoping to invest my time and money in learning and making robots. i am interested in the concepts of AI and automation. i joined this group to meet like minded people and share our experience and knowledge with each other. ABOUT THIS PROJECT. This project has a old school appeal to it. Robot body is salvaged from Chinese toys, coded in assembly language and microcontroller used was at89c2051 of 8051 family my very first robot really simple . The only book i used for its construction was " embedded systems and robotics by subrata ghoshal" if you are a beginner who wants to get started with robotics right away i recommend this book.
ONE HALF OF TOY CAR

JOINING THE TWO HALVES
REINFORCING THE JOINT
BATTERY HOUSING
PLACING ON TOP
SENSOR ( LED IS MISSING IN THIS PIC I DIDNT TAKE THE PIC OF SENSOR WITH LED AT THIS POINT OF TIME)
CONTROLLER CARD ( AT89C2051 WITH 12 MHz EXTERNAL CRYSTAL)
LED INDICATOR ON TOP OF ROBOT
THE PIC BELOW SHOWS MICROCONTROLLER IC AT89C2051 (LEFT) AND MOTOR CONTROLLER IC LD193D (RIGHT)

SESOR IS PLACED IN THE FRONT FACE OF ROBOT( AGAIN LIGHT SOURCE LED IS MISSING)
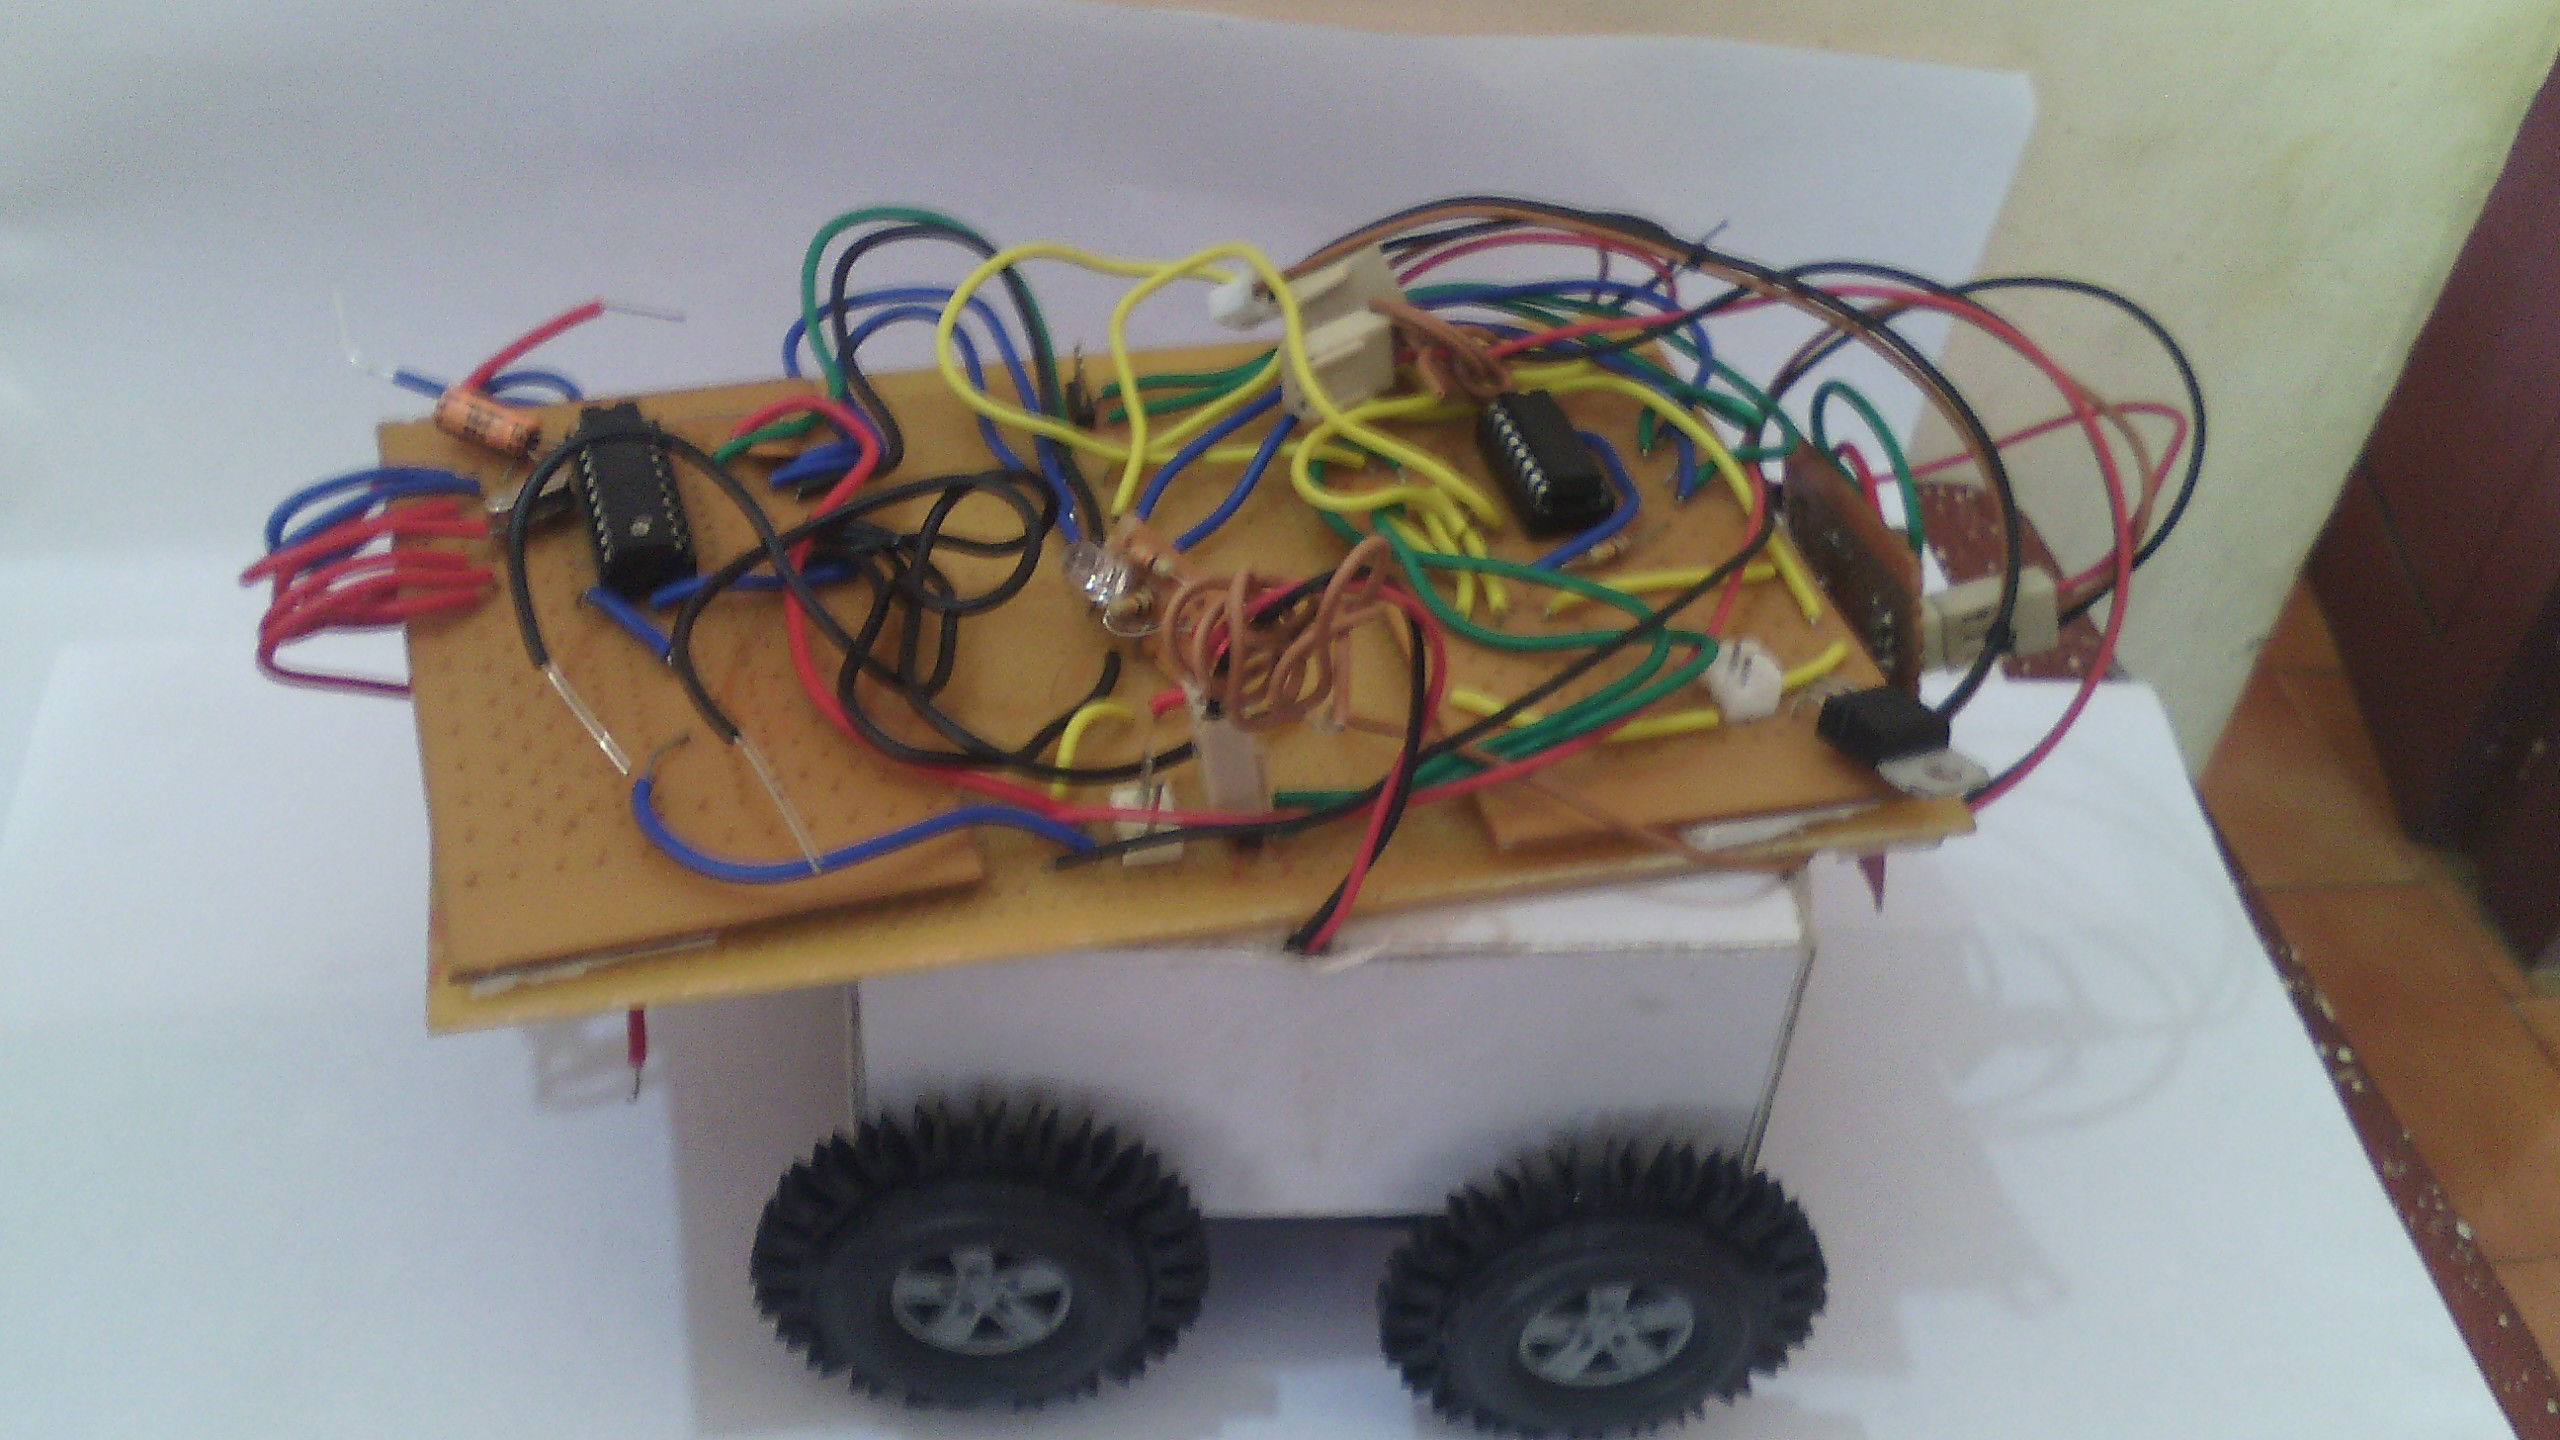
The top view of robot (you might notice to many loose wires, those wires were used to support line sensor at the bottom which i hadn't started at that point of time when this picture was taken. I did eventually add line sensor in the bottom surface of robot but it didn't workout that well this picture were taken during the early stages of development of the robot show in video, you might notice a white led on the front face of robot which is missing in these pics, you might also notice white led light glow below the robot, those lights are from leds fixed at the bottom for line sensor)
Finally a 9v battery for motor driver ic ld293d ( i don't know if using 9v battery for motor driver was a good idea. the would drain out quickly and its voltage would reduce to 5v .Then the motor diriver wont work since the minimum required voltage for motor driver is 6volt)

SOFTWARE DEVELOPEMENT OF OF MOUSET (ASSEMBLY PROGRAMMING)
______________________________________
;program code for obstacle avoidance robot
;the robot uses ldr sensor to detect the presence of obstacle if obstacle is found to present it takes a quick turn and moves forward
;--------------------------------------------MOUSET-------------------------------------------------------------------------
;[[[[[[[[[[[[[[[[[[[[[[[[[[[[[[[[[[[[[[[[[[[[-------]]]]]]]]]]]]]]]]]]]]]]]]]]]]]]]]]]]]]]]]]]]]]]]]]]]]]]]]]]]]]]]]]]]]]]]]
; MOUSET IS A FOUR WHEELED ROBOT WITH OBSTACLE SENSOR IN THE FRONT AND LINE SENSOR AT THE BOTTOM
;----------------------------------------------------------------------------------------------------------------------------------
-----------------------------------------------------------------------------------------------------------------------------------
;MICRO CONTROLLER AT89C2051 WITH 12MHZ CRYSTAL OSCILLATOR
;PIN CONFIGURATION:--_____________________________________________________________________________________________________________
;PORT 1{MOTOR CONTROL AND OBSTACLE SENSOR}
;PORT 3{INDICATOR LED AND LINE SENSOR}
;_________________________________________________________________________________________________________________________________
;MOTOR CONTROL
-------- ------------ -------------- ----------------- -------------------
; P1.7 AND P1.6 CONTROLS RIGHT MOTOR>>>>>>>>>>>>>
; P1.7 = 1 P1.6 = 0 RIGHT MOTOR ROTATES IN FORWARD DIRECTION
; P1.7 = 0 P1.6 = 1 RIGHT MOTOR ROTATES IN BACKWARD DIRECTION
;-------------------------------------------------------------------
; P1.5 AND P1.4 CONTROLS LEFT MOTOR>>>>>>>>>>>
; P1.5 = 1 P1.6 = 0 LEFT MOTOR ROTATES IN FORWARD DIRECTION
; P1.5 = 0 P1.6 = 1 LEFT MOTOR ROTATES IN BACKWARD DIRECTION
;____________________________________________________________________________________
;OBSTACLE SENSOR
;-------------------------- ------------------------ -------------------
;P1.0 IS CONNECTED TO OBSTACLE SENSOR
;THE SENSITIVITY OF THE SENSOR CAN BE ADJUSTED BY ADJUSTING THE 20K POTENTIOMETER
;SENSOR INPUT TOGGLES BETWEEN 0 AND 1 DEPENDING ON THE PRESENCE OR ABSENCE OBSTACLE
;______________________________________________________________________________________
;INDICATOR LED
;------------------- ---------------------- --------------------- ----------------
; P3.7 IS CONNECTED TO INDICATOR LED
; INDICATOR LED IS TURNED ON WHEN P3.7 = 0
;INDICATOR LED IS TURNED OFF WHEN P3.7 = 1
;_________________________________________________________________________________________
;LINE SENSOR
;-------------------- ------------------------ ---------------------- ------------------
;P 3.2 CENTRAL LDR LINE SENSOR (LIGHT RED WIRE)
;P 3.3 RIGHT LDR LINE SENSOR (DARK RED WIRE)
;P 3.4 LEFT LDR LINE SENSOR (BLACK WITE)
;____________________________________________________________________________________________________________________________________________________
;____________________________________________________________________________________________________________________________________________________
;____________________________________________________________________________________________________________________________________________________
fwdhex equ 0a1h ; hex code for moving forward when mov port1
trnhex equ 091h ; hex code for turning right when mov port1
linsenhex equ 09ch ;hex code for activating line sensor without turning on the indicator led
trntim equ 10h ;time duration for turning
stpsnshex equ 01h ; stop motor but sense when mov to port 3
onpwm equ 0ffh ;+ve pulse width for pwm
offpwm equ 0ffh ;0 level pulse width for pwm
;booting led indicator blink program
;------------------------------------
mov r1,#02h; ;blink counter
mov p1,#00h ;sensor off motor off
blink: clr p3.7 ; led indicator turned on
lcall delay
setb p3.7 ;led indicator turned off
lcall delay
djnz r1,blink ; blink twice
ljmp main
DELAY: MOV R5,#08H
DELAY1: MOV R6,#0FFH
DELAY2: MOV R7,#0FFH
DELAY3: DJNZ R7,DELAY3
DJNZ R6,DELAY2
DJNZ R5,DELAY1
RET
;-----------------------------------
;program for copying status of sensor to indicator
;-------------------------------------------
;SENSOR MODULE
;IF SENSOR RECEIVES LIGHT LED IS TURNED ON
;NOTE ADJUST 20K POTENTIOMETER FOR PROPER SENSITIVITY
;out put is sensor status "c"
sense:setb p3.7
MOV C,P1.7 ;READ SENSOR
MOV P3.7,C ;ECHO IT TO LED
nop
nop
nop
ret
;------------------------------------------------
;main module
;-----------------------------------------------
main:acall sense
jc steer
MOV P1,#0A0H; MOTOR1 & MOTOR2 ROTATE IN ONE DIRECTION
lcall pulse; pulse width for speed adjustment
mov p1,#01h; sensor on motor off for fraction of second
sjmp main
steer:mov p1,#91h; motor1 motor2 rotating in opposite direction
lcall pulse2; steering time for robot
ljmp main
;----------------------------------------------------
;pulse and pulse2
;--------------------------------------------------------
pulse:mov r5,#0ffh
repeat:djnz r5,repeat
ret
pulse2: MOV R5,#steertime
sub1: MOV R6,#0FFH
sub2: MOV R7,#0FFH
sub3: DJNZ R7,sub3
DJNZ R6,sub2
DJNZ R5,sub1
RET
----------------------------------------------------------------------------------------------------------------------------------------------------------------------------------------------
you may notice a lot of discrepancies in the program like some of the identifiers defined on top not being used in the program . its because i made several versions of the program and in some i defined the pin configuration and in some i didn't and jumped straight to coding it has been along time since i made this robot (3months), i just compiled the notes by copy pasting the codes i had on my laptop to make the code roughly sensible. A queries about hardware or codes will be acknowledged.
This is a companion discussion topic for the original entry at https://community.robotshop.com/robots/show/my-first-robot-33


