

Early March - GREAT PROGRESS - Giving it a brain, and a problem solved.
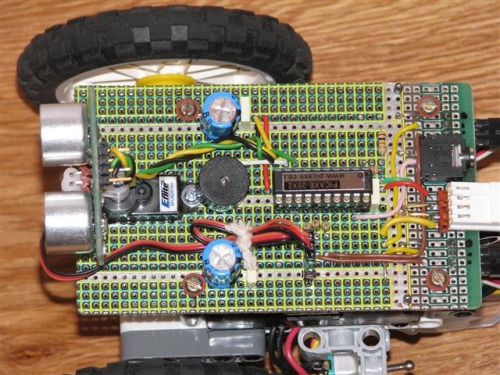
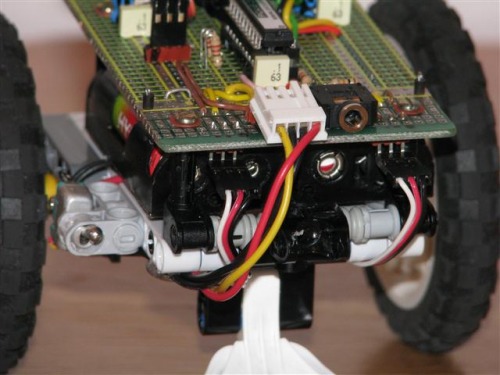
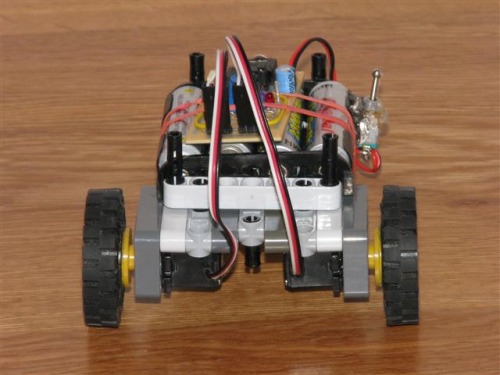
I've built the brain-board with its 20x2, pluggged everything together and IT'S ALIVE! - but the servos were all over the place. I am running the electronics from the same supply as the servos and thought I was going to have to split them (although I was very careful with the decoupling on the build) as the rail was dropping by 2 volts when the servos activated
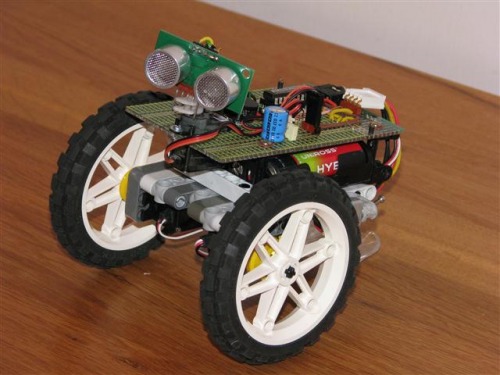
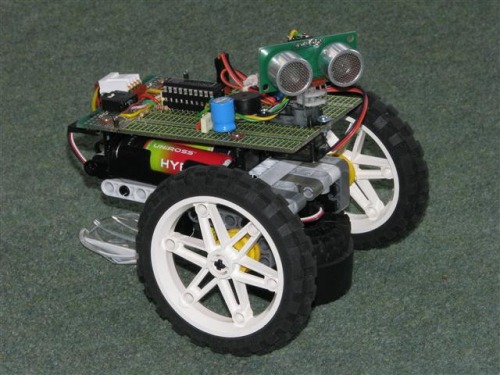
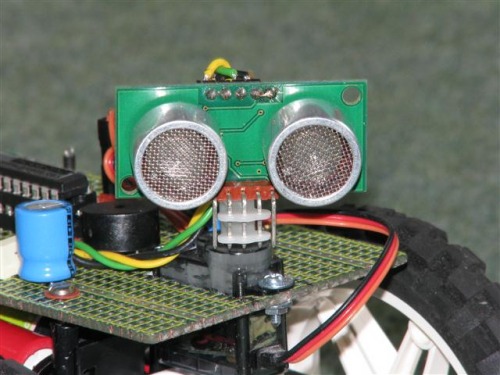
However, I tracked the problem down to a dodgy rechargeable battery. I replaced the batteries and everything was wonderful. Around .25V noise on the rail with motors running and no nasty spikes - I can live with that. Ultrasonic sensor (SRF05) worked a treat mounted on its servo.
NO SPEEKA DA LANGUAGE :- I spent a bit of time planning this as I wanted to control the motors in a flexible way for either manual entry of a command list or by a 'fuzzy logic' type method. I have two motors (L and R) and chose to run them at slow and fast forward, and slow and fast reverse (the reverse speeds being a bit slower then the forward ones). These (along with motor off) give 25 possible combinations of L and R motor activity. I chose 17 of these to be represented as commands, and have come up with a simple control language for the robot, each command represented by a single letter.
The functions are STOP, SLOW FWD, FAST FWD, SLOW REV, FAST REV.
TURN (fwd or back, left ot right) - This is a slow turn with both wheels turning.
PIVOT (fwd or back, left or right) - One wheel stopped.
SPIN (left or right, fast or slow) - Wheels turning opposite directions.
With the control language I can use a simple data statement such as F,2,U,1,B,1,S,2,G,1,X,99. Numbers represent seconds so this string would go fwd for 2 secs, spin slow right for 1, reverse fast for 1, pivot right fwd for 2, fwd slow for 1, then stop. The 99 is the string terminator.
I coded this in such a way that the comands are incremental, i.e. ordered by speed or 'degrees of turniness' so under purely logic control a step increment or decrement for each type of function will increase or decrease that parameter. The first part of the processing (the command parsing) is bypassed.
This sounds a lot more complicated than the final result. The meat of the routine is a PicAxe LOOKDOWN then a LOOKUP command. I will expand this to include other functions as things progress.
Here's a statement for discussion - The difference between a toy robot and a serious robot is wheel encoders! It's all very well going back for 3 seconds or left for 2, but where are you? Once you can determine how far a robot has moved relative to its environment you can start mapping your surroundings and planning ahead. The first major upgrade to this beast will be wheel encoders - Break out the hall sensors and hardware interrupts!
ONWARD AND SIDEWAYS (but mind the hedgehog!) :- I was amazed at how quickly this routine came together with just a handful of conditional statements. I'm taking 3 distance measurements; mid, left and right and using the raw values. The heuristic is this :-
Go FORWARD.
If you are TOO CLOSE to an object ahead, back up for 2 seconds.
If you are CLOSE to an object ahead, PIVOT to the L or R - whichever has the greatest distance to an object.
If you are CLOSE to an object on the L or R, TURN slightly away from it.
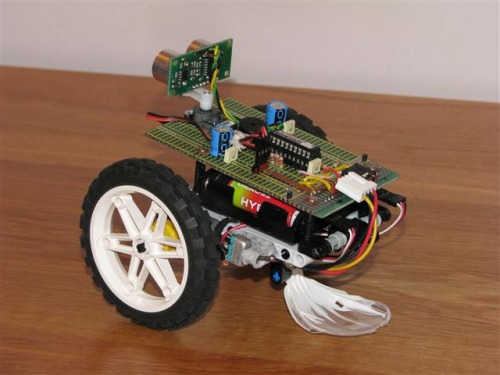
The larger wheels I'm using now give it a decent speed, but it won't win any sprint races. The 'flip and turn' mounting of the PCB to access the batteries was partially an accident due to the Lego parts I used, but it is rather handy.
Problems : Left servo mid position wanders and has to be recalibrated in software. Need to strip it down.
Have visions of running out of pins on the 20x2. Too late to change this.
Give the robot a NAME!
Glue wheel back on - Will use epoxy this time.
Next step : Add sound and fit the LASER!

Late February - THE GENESIS OF MY FIRST ROBOT
Over the past few decades I've made all manner of things ranging from the mundane to the totally tecchie with a few utterly useless but great fun things along the way (some of which can be seen on Instructables), but I have never made a robot before. Now is the time to rectify that omission.
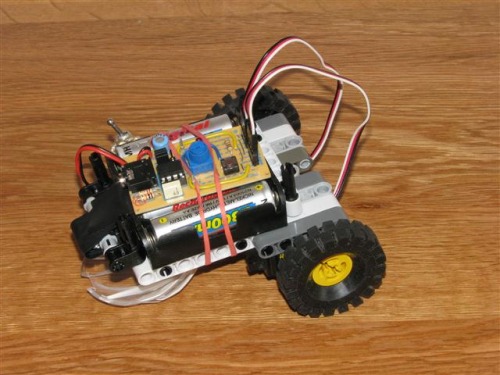
This is a work in progress which I will be updating as I go along. I am currently working on the motor / battery base and the pictures and video show the first iteration of this. In the video it is being controlled by my 08m based servo tester (I'll post details and code of that later) because I just wanted to get the thing moving, but the final product will have a prototyping board mounted above and have a PicAxe 20x2 brain.
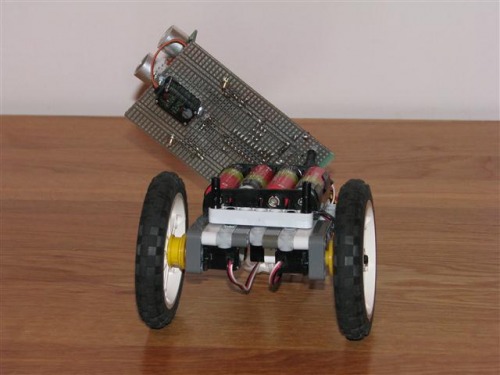
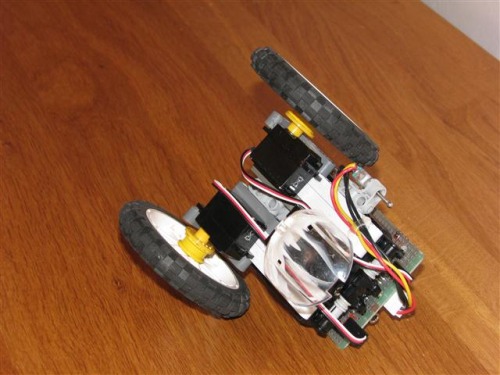
This is the battery and motor chassis. I'm more an electronics guy than a mechanics one, so I raided my sons' various Lego sets. Now I've started the project, I want to get something trundling around the living room as soon as possible, so this approach produced a rugged base (I'll firm it up more with glue later) in an afternoon.
The PicAxe 08m board is doing the driving at the moment, and it is running 'blind''

Here is a top view with the battery pack removed showing the Lego construction. Once I started testing I realised it was far too slow, so the wheels have now been replaced with some 3.5" diameter ones. Speed is a lot better no
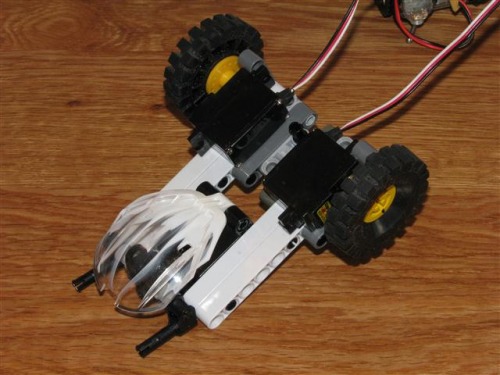
I've used RipMax SD200 servos modified for continuous rotation. I didn't want to spend too much on this so didn't go for metal gears, but the RipMax have a ball-raced output shaft, very chunky final (but nylon) gears, give 2.5 Kg/cm torque and weigh 16 grams.
Next step is to add the controller board - I've already cut and drilled it - and build the 20x2 circuit. Soon after that will come the ultrasonic sensor (SRF05) and laser assembly. I can't wait to give this thing some sensing capability - I think I've got the robotics bug!
Obstacle avoider. Other behaviours planned.
- Actuators / output devices: 2 x RipMax CR200 16g modified for continuous rotation + Eflite 9g micro.
- Control method: Autonomous. Manual infra red control planned.
- CPU: Picaxe 20x2
- Power source: 4 x AA cells
- Programming language: Picaxe basic
- Sensors / input devices: SRF05 - Others to come.
- Target environment: indoors
This is a companion discussion topic for the original entry at https://community.robotshop.com/robots/show/my-first-robot-mind-the-obstacle-avoidance