Hey guys I’m back! Been a long while since my last update but life was busy. I was making progress though when I had time and want to share my latest progression updates.
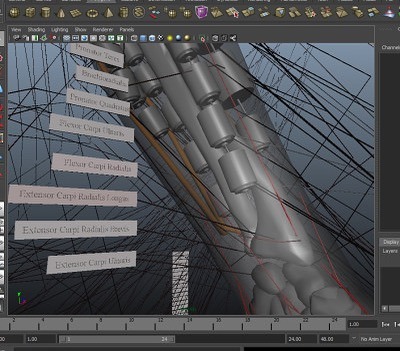
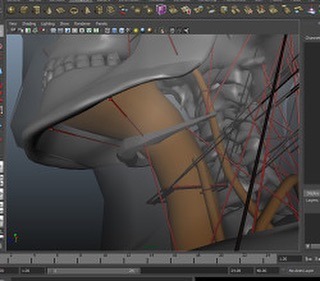
First of all, I ended up caving in and doing a full blown 3d model blueprint of the robot’s entire skeletal structure to scale along with outer shape mesh and then modeled out every muscle and labeled each of them and modeled all of its motors and placed them and modeled various other bits like the main onboard pc and cooling systems (artificial lungs and artificial heart). Also modeled its batteries and placed them. Only had to do half of the body since the other half of body is symmetrical. I realized that with the tight tolerances I’m dealing with, I had to make custom servos and custom pcbs for the servos control and custom pulley systems to “down-gear” the servos. I also realized that with such tight tolerances I needed to 3d model everything to figure out where to fit everything since it will all be a tight fit with little room for error and once I mount a servo, it is a real pain to move it later. The 3d modeling blueprint job was a major project in itself but well worth it in helping me visualize everything better and figure out where to locate everything specifically. I did not blueprint the wiring or pcbs though, so I still plan to fit that all on the fly without precise blueprints of where it all goes. This too could change if I find I need more help in planning this aspect of it.
I also purchased the main brains pc to be mounted in the torso. I even purchased cameras to be the eyes for it. The main brains pc will be a mini itx motherboard gaming pc basically.
actual build I went with:
Intel Core i5-10400 2.9 GHz 6-Core Processor - $165
MSI MPG B560I GAMING EDGE WIFI Mini ITX LGA1200 Motherboard - $170
G.Skill Ripjaws V Series 32 GB (2 x 16 GB) DDR4-3200 CL16 Memory - $140
Western Digital Blue SN550 1 TB M.2-2280 NVME Solid State Drive - $99
DC 12V input 300W high power pico DC-ATX 24Pin mini ITX - $20
GOLF CART DC BUCK CONVERTER 20 AMP 48V 36V VOLT VOLTAGE REDUCER REGULATOR TO 12V - $20
I will use 10 in series lithium batteries to produce 30v-42v input power into the 12v regulator which will feed the 300W atx 24pin mini ITX power supply. Note, however, that as with all power systems, I will have both a wall plug AC to DC converter custom power supply to run off wall power and a battery power supply to run off battery power so that the robot has multiple powering options - ie able to run off wall or its internal batteries. It will have a retractable plug that comes out of its lower back to plug itself into wall outlets when it walks into a room and needs to recharge or run for extended periods while its batteries remain topped off for room changes or ventures into outdoors. It will have the ability to strap on a external battery backpack optionally for extended operation without access to AC power. This is useful for operations like sports or mowing the lawn.
For the eye cameras I went with: ELP USB camera 1080p 2 megapixel, wide angle, low light x2 for $98.42
This gaming pc in the chest of the robot will run all the AI and high level planning and movement decisions. This will communicate via USB to a series of Arduino microcontrollers located throughout the robot’s body in order to give movement instructions to the Arduinos and also retrieve sensor feedback from the Arduinos which will be monitoring joint angle positions with mini potentiometers, strain gauges on various pressure points to measure touch sensing, amp current measuring boards (acs712) to measure amount of power being drawn by motors for collision detection and weight of exertion estimation for holding things or w/e other interactions with environment are being detected, etc. So, many inputs will be retrieved by the main gaming pc and its AI systems will make decisions and make course corrections based on all this feedback it gets from sensory systems.
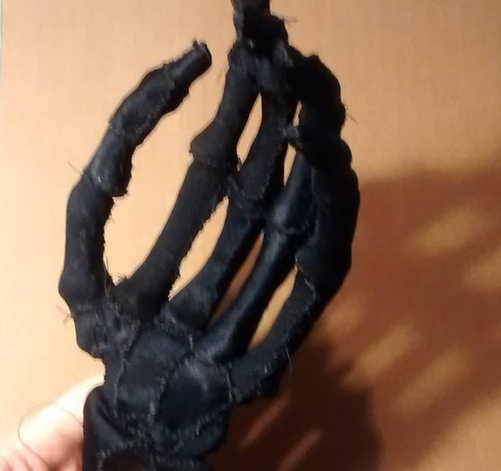
Note: I did at one point begin sewing in MG996r servo motors into the arms of the robot only to realize only like 4 of these can fit in the entire arm due to their very non sleek profile and bulky form factor. The way hobby servos cram the motor control circuits, the gear system, the potentiometer, and the dc motors into a box forms a bulky shape that doesn’t fit into my robot body design well at all. So I am creating custom servos where the control board, dc motor, down-gearing systems, and potentiometer is located throughout the robot anywhere space is available. This makes me able to fit like 25-30 motors into the robot’s arm instead of only 4! Much more efficient use of space this way. Also, by using Archimedes style compact pulley system rather than gears, I lower the sound the robot gives off significantly and save on space and weight. The pulley system I am planning to use was inspired by an episode of Gold Rush where they used a “pulley block” to pull a barge out of a river and this idea was expanded on and explained here: Why Snatch Blocks are AWESOME (How Pulleys Work) - Smarter Every Day 228 - YouTube
Once I eliminated all ideas of using commercial servos and went into building my own, I realized it is WAY WAY WAY cheaper to buy your own servo motor individual components and build your own custom servos than it is to buy commercial servos, ESPECIALLY once you get into really high powered stuff. For finger joints, I bought size 140 brushed dc motors at $0.86/each and L9110s h-bridge chips to drive the motors. Arduinos will control the h-bridge chips. I also bought little volume adjustment wheel potentiometers which I will customize and use to measure joint angles of all the robot’s joints. For mid sized muscles I bought brushless dc motors size 2430 5800kv 24amps 7.4v 200watts $11/each. These will be littered throughout the robot’s body for most smaller muscles and I’ll be making my own controller pcbs for these which will be controlled by Arduinos littered throughout the robot’s body. Also will be using the slightly more powerful 1/16 scale RC brushless dc motors for many muscles in the robot as well which are 300w motors 12.6v 24amps at $11 each. Then for even more substantial muscles I’ll be using size 3650 brushless dc motors 1/10 scale RC at 13v 69amps 900w 3900kv at $15/each (Ebay). For even bigger muscles I’ll use 1/8 scale RC brushless dc motors size 3660 1200w 92a 13v at $19 each. Then for the very biggest muscles I’ll use N5065 brushless dc motors at 36v 80a 2500w 330kv outrunner style typically used for electric skateboard scooters at $29 each . These will handle things like thighs and calves and being so big we will use not many of these only for special monster power muscles in the human body. The brushless dc motors are able to provide the best efficiency, power, low weight, run quietly, and can be precision controlled so they are amazing for this project. They also don’t require down-gearing as they can be stepped like a stepper motor to run at variable speeds. For me to buy commercial servos that can put out power numbers like I just listed, I’d be spending hundreds and hundreds of dollars per servo. But since I’m just buying the motors and doing my own down-gearing, potentiometer installs, and my own control PCB h-bridge systems, I save a fortune and this project is very reasonable to afford all of the sudden!
BTW, I’ll be using Windows 7 as the operating system for the main pc in the robot’s chest. This hopefully will not come back to bite me since it isn’t a real-time operating system and might give me limitations, but it’s what I use on my personal PC and already code on a lot and it will be easiest to avoid having to learn Linux or ROS or w/e. Plus I already have a large amount of code developed for windows operating system that can be reused for this project.
Also, I managed to figure out how to make a robot learn and think and communicate in English in a overarching philosophical way and have began to code this advanced AI system. This coding project will take decades and will all be coded from scratch in C++. I have wrapped my head around it and have already made huge progress on this. It took me some years to figure out where to even start and wrap my head around this monster job.


 /*:m]
/*:m]


