The MTE v1 is a tracked robot that autonomously rolls around looking for new areas. Well as random as can be anyway.
The project originally started out as a BOE-BOT-esque robot because i did not want to pay to buy the expensive kit. Thats right, MTE originally was Basic Stamp 2 controlled, but after researching the Propeller micro and seeing firsthand what it could do, i was hooked.
The MTE is NOT finished, I have ordered a few PCBs to clean it up, but they have not arrived yet. Also, even when they do arrive they will NOT work. I tend to be a little impatient in ordering. A redesign is in order after buying new battery sources and reconfiguring.
Schematics to come!
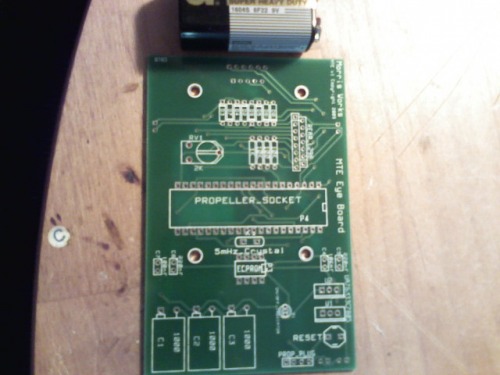
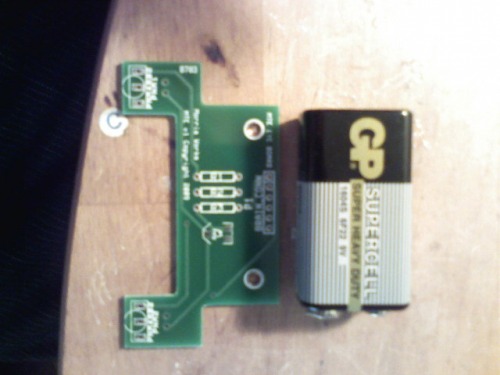
UPDATE 7/25/2009: PCBs that I had ordered arrived yesterday. :) BUT there is, as i had found out before they arrived looking at the Gerbers, a problem with the wiring so they are not fully working. The propeller is turning on, but that is about it. The programming port, for the PROP PLUG is wired incorrectly also so i am using soldered jumper wires to fix it for the time being, until i can order more PCBs. I will be uploading a few photos for you here, but ALL photos can be viewed, along with all of my projects, on my Morris-Works website.
Again sorry for the crude photos.... still have yet to find my camera charger.
Navigate with IR object detection.... thats about it so far.
I just removed the link to the enlarged photo on your FTP site. I replaced it with a link to you photo on letsmakerobots.com. I copied it to your personal file directory here. (Check your profile.)
The reason for this was the password prompt my browser (FireFox) generated every time it loaded the page. That came across as a phishing attempt to some users and as annoying to all.
Oh very sorry, i must have Oh very sorry, i must have used the wrong link. I looked through my images using my FTP client to get the url. I forgot that it would put the ftp link instead of the HTTP link. Sorry all, i’ll go back through it today and fix it.
Back when I was building Lego bots, I did something similar: I put little bits of rubber tubin on the ends of teh treads. Works sweet util the rubber perishes!!!
Would you consider modifying your description to move your "SPECS" section into the Additional Information / Locomotion sections?
Have you put a link somewhere to something restricted? Each time I load this page, I get asked to enter a password for a2484496 in order to use the FTP server at ftp://morris-works.comxa.com.
I tell you what, I had looked all over when i decided to convert to tracks instead of wheels. First i found kits, and boy were they spendy for what you got. Then, having mechanical background i decided to try fabricating up something like bicycle chain and sprocket, only to see that the id of the sprockets are huge, that wouldn’t work, plus it would add alot of weight to the very light chassis. So for $20 (including shipping) off ebay i got a set of 100 (which worked perfect, i needed exactly 50 treads per side) tread links and 4 x T40 (40 tooth) gears.
In my research i found 2 types of LEGO conveyor links, small and large. Mine being small used the standard lego gears, but the large requires a different gear with very few teeth, that to me did not look aggresive enough to actually turn the chain, but i guess i does. The small worked perfect for me though.
As far as mounting, the T40 gears have holes in them that lined up with the 4 mounting holes in the Solorbotics Motor Mount hubs that fit directly on the double-half-moon type shaped shaft. Here is a picture of the mounts:
and here is a shot of how i screwed together the mounts and lego gears
As far as running, they are working out great, i had to play with the tension when mounting the motors to the chassis so that it did not throw the chain. But alot of it could have been that i was not being very presice in making sure the motor gear and idler gear were lined up exactly, but have had no problems now. And yes those are pieces of rubber band super glued to the treads. Being legos they are pretty hard plastic and it would very esily just spin out alot, but now has alot of traction.
Sorry for the bad pictures, can’t find my camera charger.
i have updated what i believe was the only picture still refering back to my domain. for some reason it was asking for a password to view the file i believe. Not sure, but hopefully that fixed it.
Got it The bad link was hidden inside the img tags of the second photo in this comment. I could only detect and remove it by disabling the rich text editor. I repaired the link to the hires photo.
Yes i’ve been looking at a Yes i’ve been looking at a few different ultrasonic sensors, and will be upgrading soon. At the moment, the big todo is a new power source. The bot is so weighted down by batteries, but when i finally buy the new battery packs I will be good to go. Also, like i said above, a redesign of the PCBs is in order. I’ve started designing a different BRAIN Pcb, which will alow me kick the breadboard to the side and use a dedicated PCB. The prop has 30 I/O pins at my disposal and all of them will be usable on the PCB. Sort of like a small proto board for the robot. Of course a few will be dedicated to the motor driver and general purpose LEDs, but the rest will have a small block of headers onboard for them.
Got my PCBs yesterday, Got my PCBs yesterday, having some problems with them, but I am working on it right now. I’ve updated above and full pictures on my project website Morris-Works.
I reconise your face from the Parallax forums early last summer. See you have come a long way. I started shortly before you but just started using H bridges a few months ago and still with the Basic stamp. Got a prop board but haven’t jumped into the programming yet. Simple is best and I always perfer basement engineering to the kit. Curious how can you get more I/O from the prop? I am learning the H bridge eats I/O alot. I may have some questions about using H bridges in the future. I know you are well experienced at those by now. Keep up the good work. I have also been converting servos into continious DC motors. The cheaper chinese ones work fine so far and go pretty fast compaired to the servo circuits. My mini monster boe took me about 3 months to get all the bugs out using an erector set frame and mattrax treads from and old Radio shack RC car.
Well the HBridge i used was a power hungry L293D which only requires 2 pins if i remember right. I’ve started school (which was always my plan) and have been busy on homework, have not built anything since i started. I did however pull apart my MTE and started building a different frame for it tho. Not sure when i’ll have it finished, but i will post as soon as i do.