

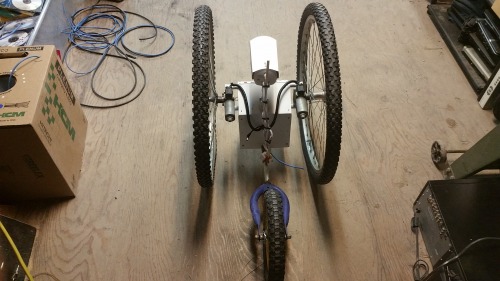
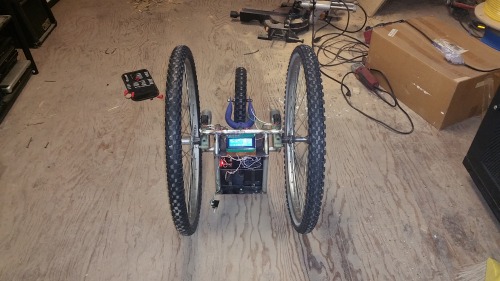
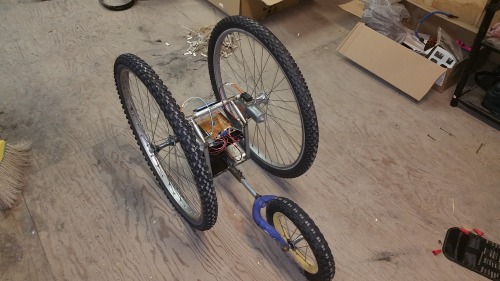
Meet BOB "Bicycle Wheeled Observation Bot" (Nicknamed by my 2 nieces & found a fitting acronym). Bob’s is a surveillance bot with remotely configured “mode” functions allowing RC, Web, or Antonymous functionality. Its rugged design adopted from spare mountain bicycle wheels and large automobile window crank motors allows for surveillance in even the most remote of locations.
***Project Update: 4/6/17***
Sorry for not updating you guys on the progress of this project sooner. Life got really interesting over the past year so have had other things occupying my time. Shortly after my last post my wife and I found out that we were having our second child so I gave up my office for my new son and moved my workshop out to the garage. Actually it was my idea all of my heavy tools were out there anyways. I bought a 3D printer 11 months ago and have been working a lot on that and have made so many wonderful designs in the past several months. Also been spending most of my time with my 2 year daughter and 6 month old son.
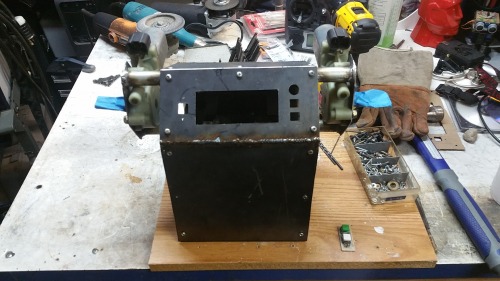
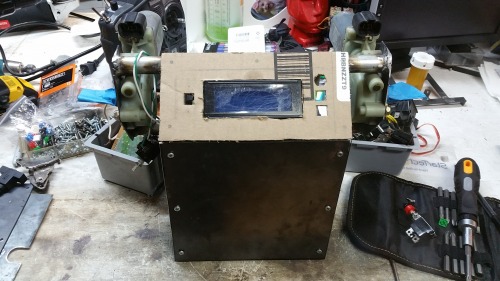
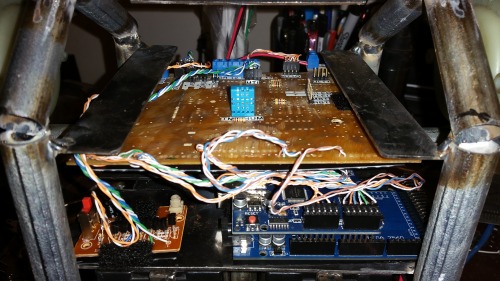
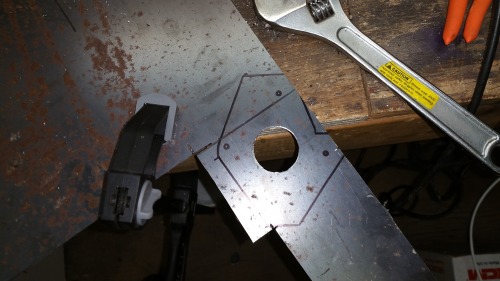
When I last posted (About a year ago) I was awaiting new motor controllers and ended up getting 15amp controllers that handled the motor load great without generating very much heat. Also went through a little upgrade on the custom made interface board and fabricated front and back cover panels out of sheet steel.
I decided to focus my programming into my first goal which was full RC control. Purchased a Turnigy 9X combo trans/rec with 8 channels and programmed proportional controls using the ardunio to interpret the signals from the receiver. I realize I could have just wired the motor controllers directly to the receiver but wanted to keep my original plans of eventually using web control & autonomous mode selections.
I was actually able to perform a full RC operation test in the video I posted. This guy just looks really cool moving around and actually can maneuver very well. But as I found out not the best suited for all Tehran operations. I seem to have forward momentum balance problem while stopping which is mainly due to the worm gear motor lockup. I think I am going to do a ramp down in the motor programming to allow it to slow to a stop based on previous speed. I have already come up with another platform for a rover that I will be working on but did not want to give up on this guy. I really learned a lot from this project and have so much fun showing it off that I have committed to keep developing him for educational use. My 2 year old daughter absolutely loves him and takes every opportunity to follow me into the garage to “Work on the Wobot with Daddy”.


Next Steps
My next goal is to get the side panels fabricated so I can complete the body. I also want to start working on the Web Control and am already pre-wired for that. Just need to finishing configuring my onboard Wi-Fi router and piecing together some of my other web controlled project code.
Last goal will be the autonomous control. Again I have prewired the interface board for audio and ultrasonic sensors. I am even toying with a metal gripper arm on the from chassis and have tested being able to switch operation modes on the RC controller to allow the same set of sticks on the Transmitter to be switched to operate the arm at the flip of the 7th channel switch.
Anyways always lots to do so will try to keep you posted on the upgrades to this guys. Thanks again for all of the support.
The Why:
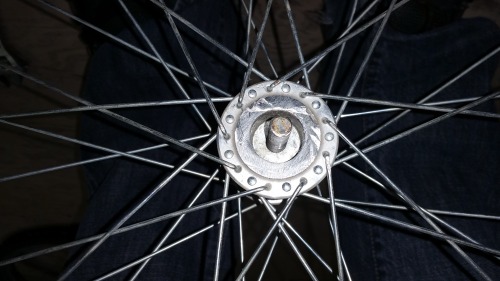
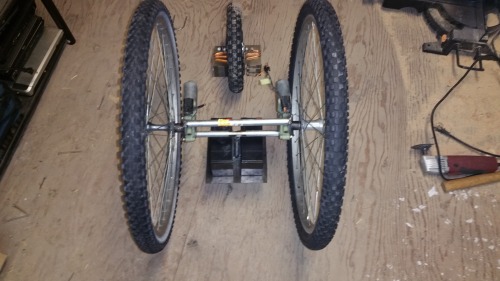
I designed this bot exactly one month ago while lying in bed recovering from some minor surgery. I currently live on acreage in a beautiful mountain valley and have different types of wildlife that wonder around my property. We frequently see deer, turkeys, elk, moose, mountain lions, and bear. I have mounted a couple of IP cameras around some of the outbuildings but no matter where I mounted them I always seemed to be missing the good shots. Also the IR of most of the cameras only allows viewing of short distances at night when the more interesting animals come out. I needed something I could drive around my property to get where the action is. I started coming up with an all-terrain drive system and settled on some old mountain bicycle wheels I had laying around. Also I have been wanting to design a larger robot chassis with completed hardware to use as a testing platform for future upgrades.
How:
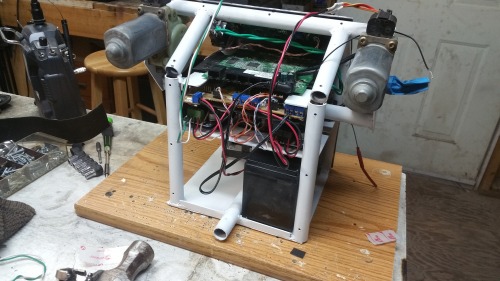
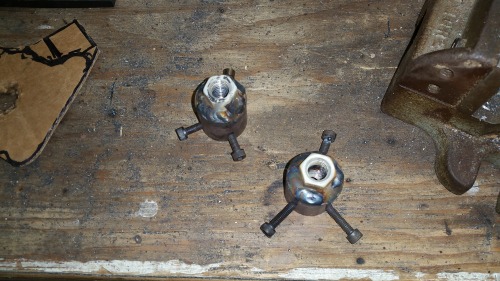
Spent time trying some different motor setups including old 18V cordless drill motors, 24V hobby gear motors, but ended up with some worm gear driven automobile window crank motors. I always find the hardest part of most custom robot designs is adapting the motor output to the drive system. These particular motors have a short length drive gear that spins over a fixed shaft. I did find solutions for this particular motor setup online but I was able to come up with some quick adapters fabricated out of steel tubing, all thread couplers, and a few tapped screws in the right locations. This also added a benefit of making the bot modular. The wheels can be quickly detached from the rest of the chassis with three screws for easy transportation and maintenance. I used some metal conduit for the frame and tacked welded some custom made motor mount setup to start testing the drive system.

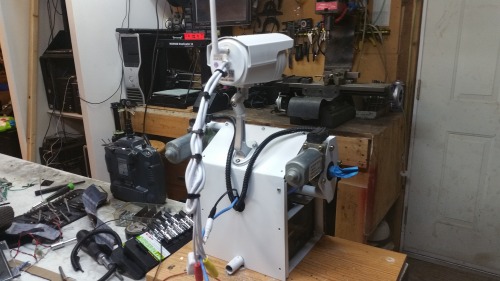
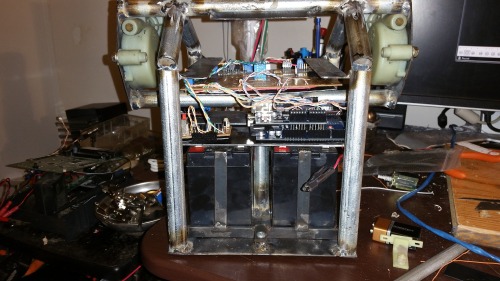
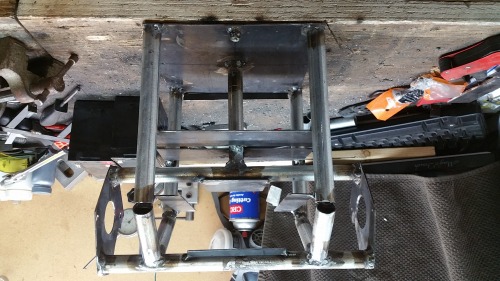
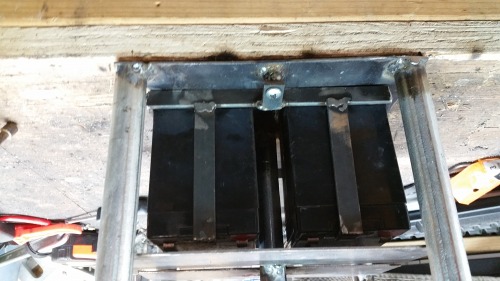
Once I knew the motors, wheels, and battery combinations worked I started fabricating a metal chassis for mounting and securing all of the hardware. The scale of the bot was designed around the wheels and a Foscam IP Camera I had picked out to sort of be the head of the robot while providing HD video back for recording and remote control. An Arduino Mega and Ethernet shield were selected to provide Web Control and extra I/O pins for all sensors and drive systems. I selected some L293N motor controllers to try and match the amperage needed for the motors.
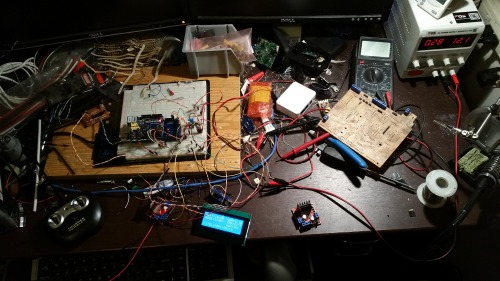
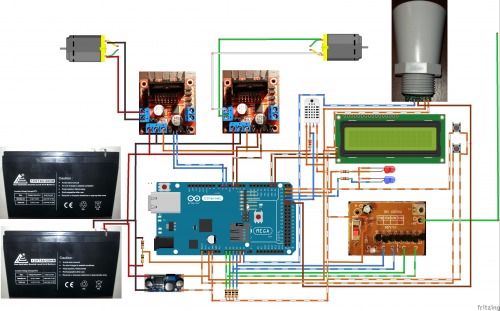
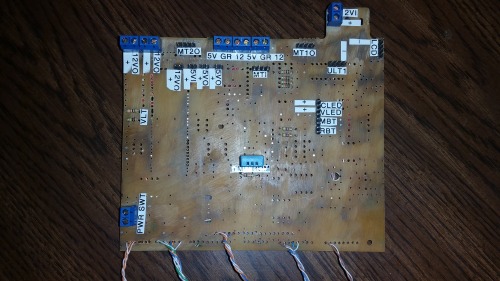
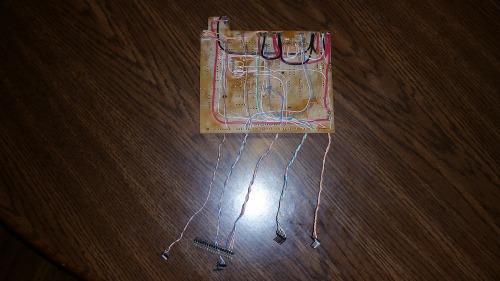
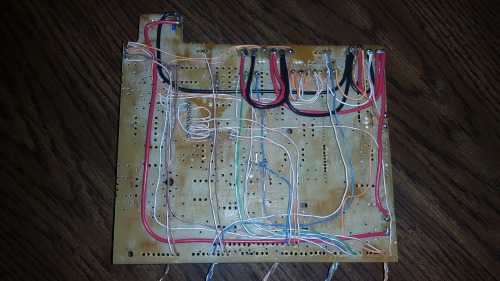

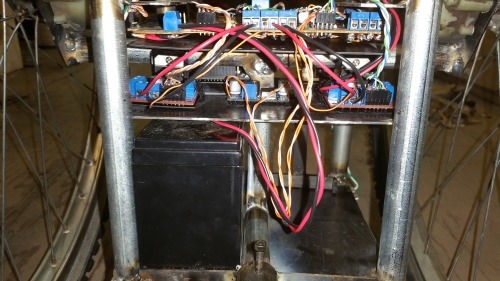
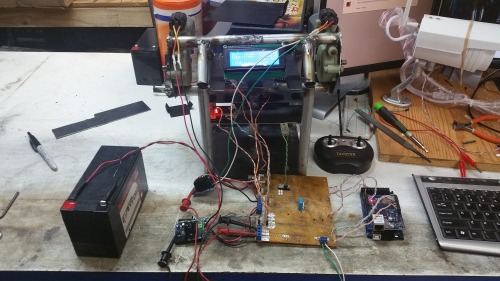
To start off I wanted to RC control the unit but still wanted the bot prewired for all of the other control modes. I created a custom circuit board to provide all of the power distribution while still allowing for easy addition of other hardware. The board uses pin headers and screw terminals which interconnect all sensors and drivers to correct Arduno pins. I used a 27MHZ trans/Rec from an old toy RC car to start playing around with the drive system while I worked on the coding for the other modes. I integrated a board from an old wireless N router to use in the web control and to connect the IP camera to the same network.
Current Progress
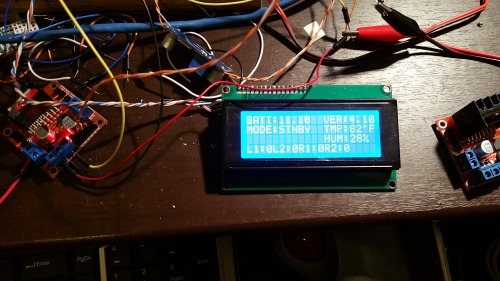
I currently have working code to provide RC control, LCD sensor and mode readouts, mode selection and motor direction functions. I am working on integrating the web control and coding Ultra Sonic sensors for autonomous operation.
I ran into an issue with the motor drivers as they are overheating because the stall current of the motors is too high (I could not test this on the bench because I physically could not keep the motors from turning). I have ordered replacements rated at 10AMP so should clear up the problem. Also working on custom made sheet metal panels to close the frame.
Future Plans:
Upgraded RC Control:
Bob currently uses an old $10.00 RC car tran/rec for RC controlled car (selected because of its tank drive design). I intend to upgrade to a digital Hobby RC system that should give me better range. The control system and code are already setup to read PWM inputs so changing code values should make this an easy integration while allowing for proportional control.
Web Control:
The bot is already prewired for this but will require some heavy code integration from some of my other web controlled vehicle projects. The problem I have always had is the nature of web control in that you seem to be only able to send one control signal at a time via the Ethernet connection. So essentially you cannot press 2 control buttons at the same time. The only way I have gotten around this in the past was to use timed controls for each command. So a command like right turn would trigger a function to turn the steering right while driving forward for a second or two. So I would be trading the proportional control such as with RC for something with multiple remote device support.
Autonomous:
I want this bot to seek out interesting events on my property while avoiding common obstacles. Bob is currently prewired for audio and high end ultra-sonic sensors. 2 audio sensors will be pointed at opposite sides of the head and will compare sound levels from either side. He will then be able to drive towards the area of higher sound. Of course I will have to program some filters for the drive wheel noise which is surprisingly very quiet. I have sourced some high end ultrasonic sensors which have a 10’ narrow sampling range to allow for object detection and avoidance. I am also planning but have not figured out some beacon location to keep him in my yard during his fully automated surveillance missions.
This is a companion discussion topic for the original entry at https://community.robotshop.com/robots/show/meet-b-o-b-bicycle-wheeled-observation-bot