

Introduction:
MASHR is my attempt to build a start here robot for beginners. It is Arduino based, but didn't use a standard Arduino booard. An Romeo all-in-one robot controller (Arduino compatible with motor driver) has been used instead. The chassis is selfmade from a sheet of polystyrol (PS). Pololu wheels and motors give a good traction and the option to add wheel encoders later.
Controller:
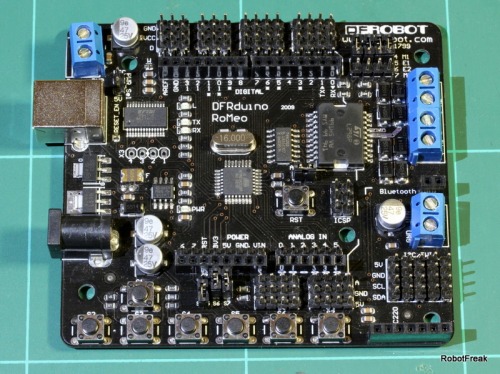
A long research has been done to find the right controller board. It ended up with the decision for the Romeo all-in-one robot controller from DFRobot. It has everything onboard what a cool robot needs:
- Motor controller. The L298 is the big brother of the L293, but more powerfull
- 3 pin Headers for all IO Pins. Each IO has it's own VCC and GND
- extra Motor Power connector
- extra Servo Power connector. With a Jumper you can can select between servo power and internal VCC for the digital IOs.
- Full Arduino compatible, ATmega328 processor with Arduino bootloader
- extra Wireless/BT connector
- 8 analog IOs instead of 6 of the original Arduino board
- extra I2C connectors
- 7 user buttons. 5 buttons can be controlled from 1 A/D input
- All in one board, no extra shields required
- Arduino compatible shield expander ports
- pre assembled, no need to solder
- available around the world from many distributors
Before I checked different combinations of boards and motor shields for the Arduino. But I didn't find a suitable motor controller shield.
Partlist:
The parts for the robot should cost around 110$. Here is the part list:
- DFRobot Romeo controller
- DFRobot Ultrasonic sensor URM 37
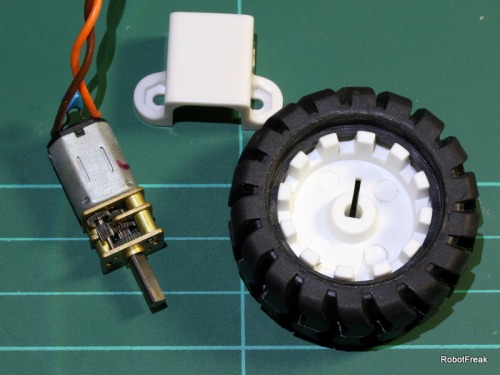
- 2 x Pololu 1:100 micro metal gearmotors
- 2 x Polou Wheels 42mm with wheel encoder option
- 2 x Pololu motor mount
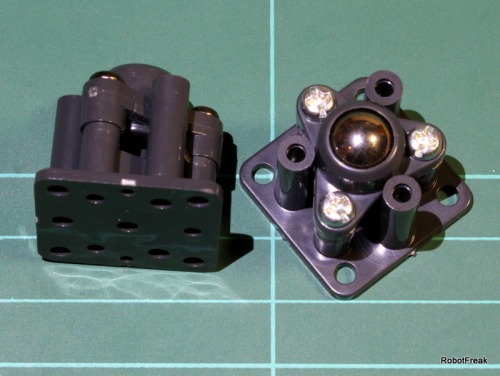
- 2 x supporting wheels, Tamiya 70144
- 1 sheet polystyrol (PS) DinA4, 3mm thick
- 1 L shape polystyrol profile for the sensor mount
- 1 x battery holder for 6 AA cells
- a lot of M3 nuts and bolts
Chassis:
A robot should have a chassis. Instead of a prebuild chassis a selfmade chassis is my favorite choice. Ok, you will need more tools to build your own chassis, on the other side you have the freedom to build it for your needs. For this beginner robot a 2-wheel differential drive is the best choice. The chassis should be a round platform or almost round, the wheels should be placed in the center of the robot. So the robot can turn in place, without bumping into obstacles. Because 2 wheels are not stable at least a 3rd supporting wheel / ball caster on the backside is needed. I added also a 4rd supporting wheel on the front, so the robot don't fall over on a sharp break.
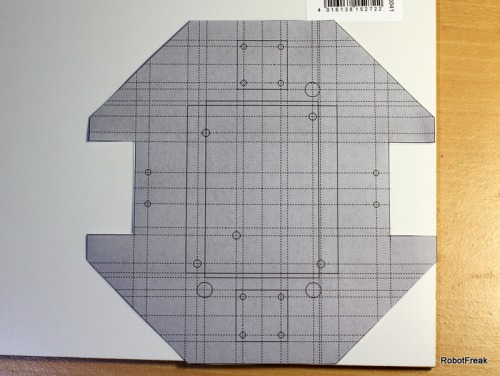
The chassis is build from polystyrol (PS) and designed with Google SketchUp. A great free tool for 3D CAD. For later use it's important to draw the chassis in a 1:1 scale. So you can print out your design as drill and cut form. The first video shows the chassis building process.
The wheels are mounted inside the chassis, so the robot shouldn't hang on an obstacle.
Sensors:
Only one sensor has been used. An ultrasonic range sensor from DFrobot, the URM37 has been used. It has different modes of operation. At the moment the sensor is running in serial mode. 2 processor pin and the Arduino software serial lib is used.
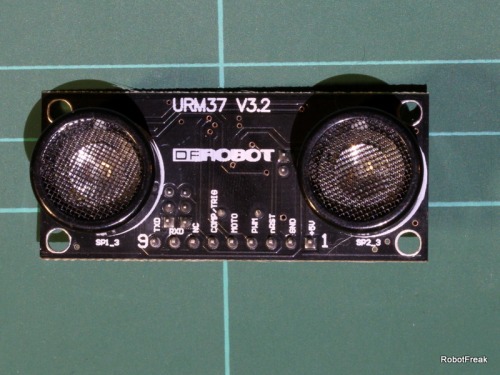
A piece of L shape polystyrol profile has been used as sensor mount.

Power supply:
Board and motors where powered by a single 6xAA battery pack, to keep the total weight of the robot low. To power servos from the same power supply a little trick helps. The battery pack gets an second supply output after the 4th cell. This gives 4xAA (4.8V) for servos and 6xAA (7.2V) for the motors.

Update 2012-12-29
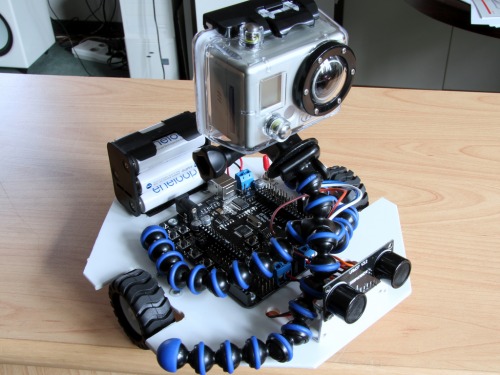
On-Board Cam:
A GoPro Hero HD has been used to shoot the OnBoard video. This camera can shoot HD-Video. It’s not a wireless device, instead the video is stored on a SD-Card.
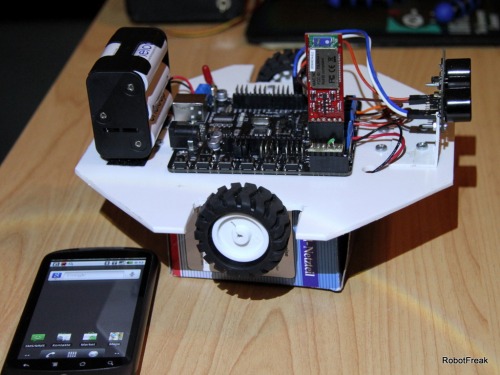
Bluetooth Remote Control:
A Sparkfun Bluetooth Mate has been used to remote control the robot from an Android phone, as shown in the 3rd video. The Cellbot application can be used without any modification.
Navigate around via ultrasound
- Actuators / output devices: 2 x 1:100 Pololu micro motors
- Control method: autonomous
- CPU: Arduino
- Operating system: N/A
- Power source: 6xAA
- Programming language: Arduino C++
- Sensors / input devices: URM37
- Target environment: indoor flat surfaces
This is a companion discussion topic for the original entry at https://community.robotshop.com/robots/show/mashr-my-arduino-start-here-robot
