

And so it begins.... My first robot ever :)
It is called MASHeR and is heavily based on Fritzl's excellent Start Here Robot tutorial. I decided from the beginning that I didnt want to follow the tutorial word for word - I wanted to play around and experiment, which is what this is all about right? Unfortunately that led me into some problems of my own devising....
Shopping
Before doing anything else, I needed to get all my components. Sadly LMR doesnt seem to have a deal going with any robotics shops in the UK so I spent many hours trying to identify the components that I needed, and a shop that sold all of them. Eventually I discovered www.technobotsonline.com which had everything I needed and much more. My shopping list is at the bottom of the post incase any other Brits would like to use it for reference. I decided to get an LDR and some LEDs as well as the parts suggested in the SHR tutorial so I could play around with them a bit. Also some ball casters for a 3rd wheel and some foamboard to make a chassis. Whilst I was waiting for my order to arrive I discovered that I was going to need a 10k resistor to get the LDR to work, so I picked one up from Maplins for a couple of pence. I have also since discovered that many of the parts I may need going forward can be picked up very cheap from EBAY, so that will be my first place to check in the future.
Preparation
Once I recieved my components, I spent a couple of evenings playing around making sure I understood how everything worked.....starting with the ubiquitous turning on of an LED! Its amazing how satisfying that can be...LOL. I then moved onto the LDR and the Sharp IR sensor, Servo and Motors. The Piezo element that I got was disappointingly quiet - almost inaudible - until I realised that it just needed something to resonate off(such as the battery box!). My plan for using the LEDs as headlights had also worked perfectly as the 3mm LEDs i got fix exactly into the screw holes in the Sharp
Construction
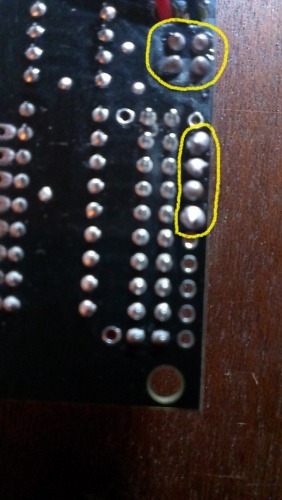
Once I had played around for a while I was ready to start building which is where I encountered my first problem: Lead Free Solder is RUBBISH.I wanted to solder on all the pins I needed to the project board (some extra ground pins next to the ones I would be using as well) and solder up the wires to the motors etc, but I was just unable to get the solder to flow. As it turns out, it was the rubbish lead free solder that came with the soldering iron. Thanks for all the help from you guys on the forums! :) After I got some proper 60/40 rosin core solder it went smoothly and I got some pretty good results for my first time soldering in many many years:
When playing with the servo I discovered that position 150 - "front" is actually facing forward lengthways down the servo, meaning that I couldnt just stick it on sideways to the front of the batterybox as per the SHR tutorial so I needed to have a platform sticking out to the front to mount the servo on.Initially I wanted to build the chassis with the battery box on the bottom, with the batteries facing downwards for easy access, with a peice of foamboard ontop (with the front platform sticking forward),the motors ontop of that and the project board ontop of the motors. Unfortunately, after cutting the foamboard and putting it all together, I discovered this meant that the wheels didnt touch the ground due to the extra height provided by the foamboard. Argh!
This led to a rapid redisign whereby the batterybox sits ontop of the foamboard, the motors are mounted next to this, and another peice of foamboard is placed ontop of the motors for the projectboard. This worked out rather well, although the batteries are somewhat difficult to access....
After a bit of testing I discovered that the front wheel, which was just stuck in place using doublesided foam tape was extremely unstable and kept falling off, so I had to get some foamboard and insert the wheel through it so it is securely held.
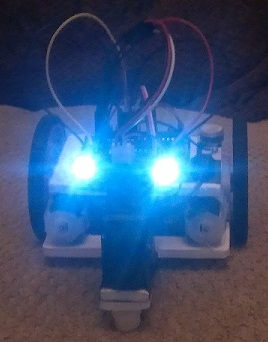
Once the chassis was complete, I put the servo in place, positioned the projectboard and wired everything up, positioning the LEDs in the screw holes of the sharp, the LDR on the back left corner, and tucked the piezo under the battery box to produce maximum volume.
Programming
I started off with the code from the SHR tutorial, which worked pretty much straight away after changing a few variables! I was so happy! However, the robots movement was very stop-start and also kept getting stuck which I wasnt happy with. I started rewriting the code and came up with what I think is some quite good navigation code (after MUCH testing) which I am a bit happier with Its still not right though..... This is attached. Once the navigation was sorted I did the bells and whistles - LEDs, sound, and wrote some code to enable me to use the LDR as a switch to turn the robot on and off.
What next?
The navigation code is still a bit buggy and the robot seems to like turning twice when only one turn is necessary and often turns L/R/L/R a few times before finding a good way to drive....this needs work.... HOWEVER I wish I had got an SRF05 instead of the sharp now, as its measurements arent very reliable and the range is quite poor. I already have one ordered off of EBAY (£2.10!) and I will be replacing the Sharp with it. This will also enable me to write some even better navigation code as per fritzls clean navigation code. I expect I will then mount the sharp on the back.
The robot does not drive straight. From my research this is a common problem due to one motor turning faster than the other. Ned to learn what this PWM stuff is all about to try and fix it
I would like to get another LDR to mount on the opposite side of the robot so that I can make it seek light, whilst still avoiding obstacles. This will be quite a challenge for me to code....
I may get some more LEDs so that when it gets REALLY dark (lights turned off) the robot will do a dance and flash like disco lights...LOL
Appendix - Shopping list from www.technobotsonline.com
JST PH 2mm 3-Pin Female Cable 30cm
Part No.: 1064-103 £0.97 1 £0.97
Jumper Wires Premium 6" F/F Pack of 10
Part No.: 1133-016 £3.11 1 £3.11
Part No.: 1451-006 £4.27 2 £8.54
Part No.: 2004-553 £0.44 1 £0.44
Part No.: 2110-303 £0.16 2 £0.32
NORPS12 Light Dependent Resistor ORP12
Part No.: 2110-601 £0.87 1 £0.87
Pololu Distance Sensor Sharp GP2Y0A21YK0F
Part No.: 2110-642 £9.86 1 £9.86
Part No.: 2251-010 £2.59 1 £2.59
Piezo Transducer Bare 20x0.42mm
Part No.: 2400-106 £0.29 1 £0.29
Part No.: 2700-070 £0.06 3 £0.18
Gold Plated PCB Header 2.54mm 10-way
Part No.: 2700-084 £0.07 1 £0.07
Part No.: 3221-030 £4.89 1 £4.89
Part No.: 3803-002 £17.10 1 £17.10
Part No.: 3803-150 £2.70 1 £2.70
Part No.: 4262-100 £1.57 1 £1.57
Part No.: 4442-001 £0.87 1 £0.87
Solarbotics GMPW Plastic Red Wheel
Part No.: 4611-001 £2.81 2 £5.62
+ 1 x 10k resistor for use with the LDR
Navigate around via IR, avoids obstacles, communicates with the world with LEDs and Piezo speaker
- Actuators / output devices: one servo, led's, 2 GM9 (143:1 90 Degree Shaft), Piezo
- Control method: Autonomous.
- CPU: Picaxe 28x1
- Operating system: N/A
- Power source: 3 AA Batteries
- Programming language: Picaxe basic
- Sensors / input devices: Sharp GP2Y0A21YK0F IR sensor, LDR
- Target environment: Indoors - Carpet / tiles
This is a companion discussion topic for the original entry at https://community.robotshop.com/robots/show/masher-my-attempt-at-start-here-robot