Mad Mech (Mad Max's Peacemaker inspired tracked vehicle)


     Movies can be a great source of inspiration for our projects.

     As a post-apocalyptic movies fan, I've waited anxiously for Mad Max: Fury Road. The movie is simply awesome!

     I was intrigued by so many mad things and thought how I could use some ideas on some project.

     I really enjoy tracked vehicles, then the Peacemaker stayed on my mind.

     And as I was also very tempted to practice a bit with fiberglass for a large future project [some mystery here :) ], I have rapidly decided start working on Mad Mech!


     The inspiration.


     The body of Peacemaker is a 70's Chrysler Valiant Charger, placed over treads [1].

     For my project I'm using a body of Mustang. I've found a Papercraft/Pepakura file [2] on the web that helped guide me.

     Before starting the practical work, I spent a few hours designing and deciding some details. Besides the yellow body of muscle car, I finally decided on some "key similarities" that Mad Mech should have in relation to the Peacemaker, like the cut in the side of the body, the lateral shields and the headlight on the ceiling.


     For this last one I ended up in doubt...

     I was initially intended to put a servo motor with a MaxSonar LV-EZ01 for autonomous run. Then I thought about putting some leds...

     I ended up deciding that got better with nothing! :)


     Construction of the body

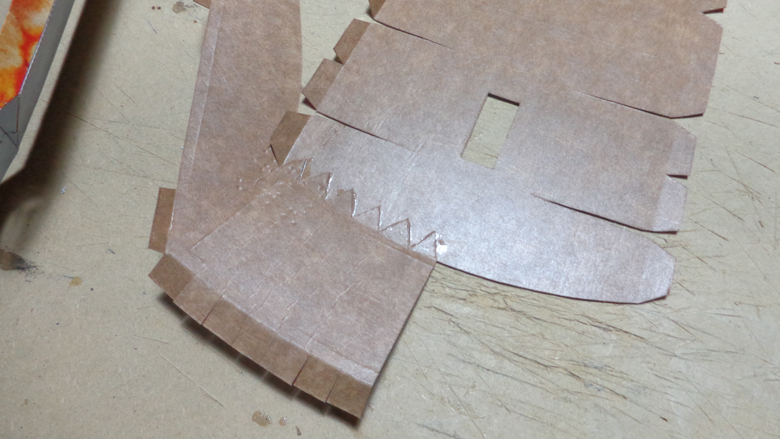
     With the designs done, I started printing the templates in A4 paper and putting them over thin cardboard (obtained from pizza boxes ... lol).

     Work with Pepakura is a lot of fun. Rapidly you see the project growing!


     With the paper model done, it's time of fiberglass.

     Before continue I would like to call the attention of anyone who is interested in replicate this project or work with fiberglass!

     myblack60impala have already called the attention (thanks for the tip!), but I guess be careful never hurts!

     So, if you don't have appropriate PPE (Personal Protective Equipment), it is better not start working!


     ... continued ... It's time of fiberglass!

     It should initially be applied a layer of resin for lamination. Then is placed the fiberglass and another layer of resin.

     This is how it looks when the resin dries.


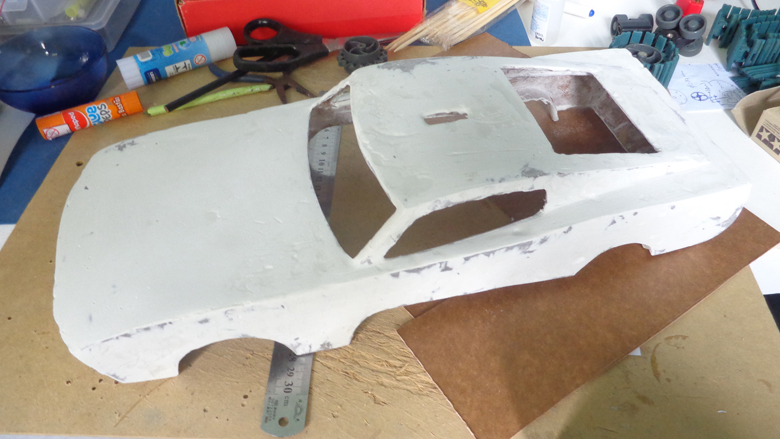
     To give it a nice finish, body filler was used. I have applied a layer... then much sanding... and applied one more thin layer. And more sanding work. The image below shows how it was after the first layer of body filler and first session of sanding.


     I do not have much skill with paint, but tested a few things.

     I applied the primer, some blots with matte black and finally the yellow spray paint. After, some splashes with matte black and silver spray paint. To finish, sanded with very thin sandpaper.

     I was very tempted to do this "cat scratch thing". I ended up in doubt if it looks good. lol


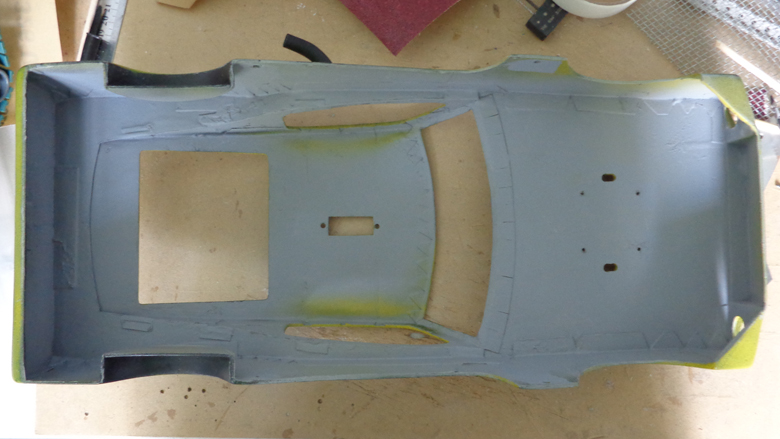
     Below you see the inside's view of the body after the painting work.


     To give it a more post-apocalyptic look I have made some ornaments with chopsticks.


     Construction of the chassis

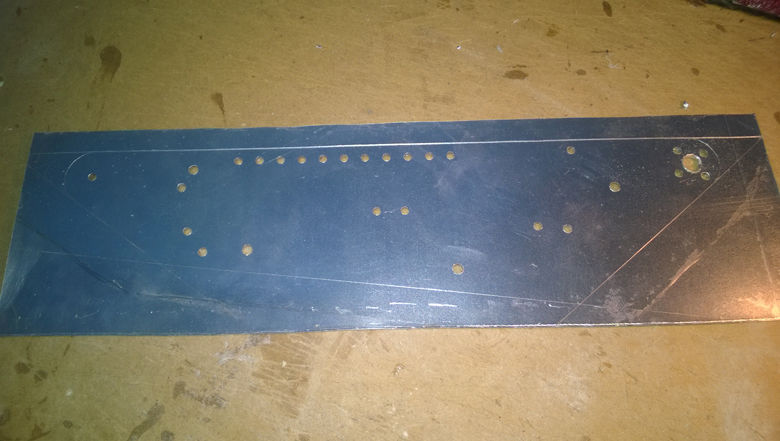
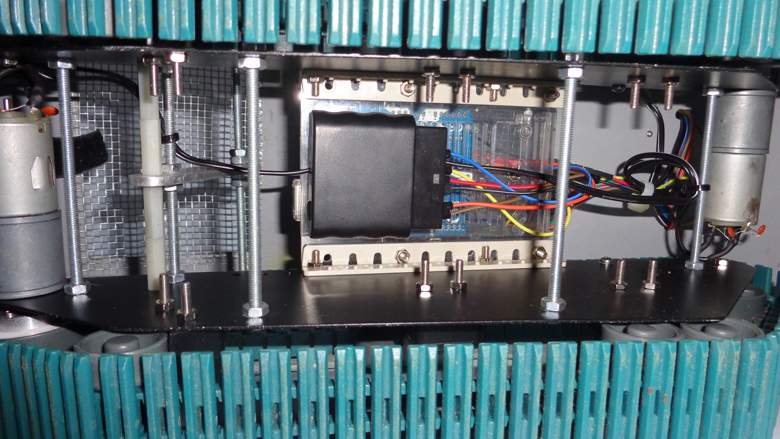
     The chassis is made out with a 2 mm sheet of aluminum, with 4 mm threaded bars to attach the sides.


     The treads are from the VEX Tank Tread Kit.


     Electronics

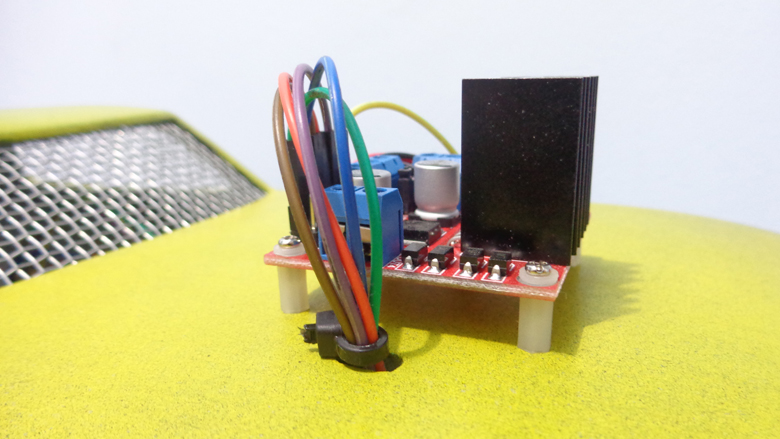
     Mad Mech is controlled with an Arduino UNO and a L298N for the DC motors. Commands are sent remotely with a PlayStation 2 controller [3].

     The power is provided by three 2000mAh LiPo batteries in series.


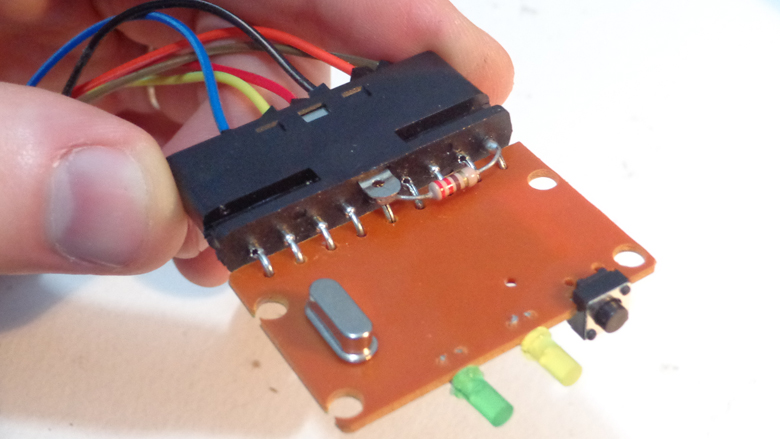
     Eventually may be necessary a pull-up resistor between the POWER and DATA wires of the PlayStation 2 controller (in this case, the wireless receiver). I'm not sure if the resistor should vary according to the brand of the controller/receiver. As I use it only for my Arduino projects, I have soldered definitely a resistor.


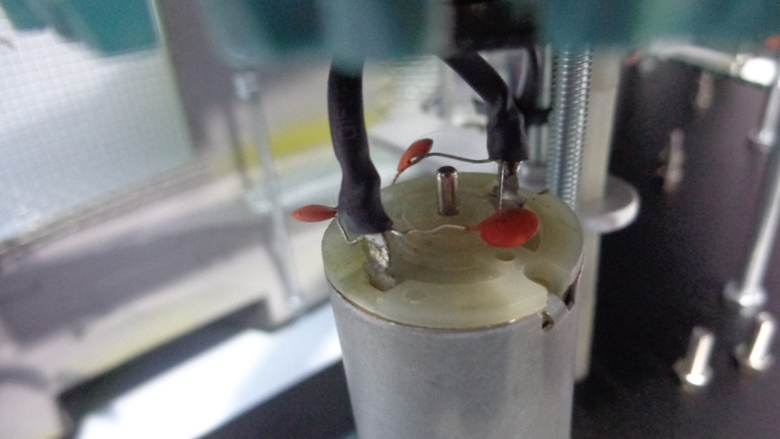
     To prevent interference/noise [4], three 0.1uF ceramic capacitors was soldered in each DC motor.


     Additional pictures and info


     References

     1. http://madmax.wikia.com/wiki/Howe_and_Howe_Ripsaw_EV1_%22The_Peacemaker%22 - Howe and Howe Ripsaw EV1 "The Peacemaker" - The Mad Max Wiki - Much info about the Peacemaker.

     2. https://www.bluespringsfordparts.com/68-shelby-gt500-model.html - 1968 Mustang GT500 KR Paper Model - BlueSpringsFordParts.com

     3. http://www.billporter.info/2010/06/05/playstation-2-controller-arduino-library-v1-0/ - The Mind of Bill Porter - PlayStation 2 Controller Arduino Library.

     4. http://www.rideaunautical.ca/articles.php?article=rfi - ~RNM~Articles - Radio Frequency Interference (RFI) Supression.


@ September 27, 2015: I made an Instructable for this project http://www.instructables.com/id/Mad-Maxs-Peacemaker-like-tracked-vehicle/


@ March 3, 2018 - WHAT A LOVELY DAY: Hi guys! Just a short update here... Mad Mech got new motors... since the previous had broken gears.

And now I'm controlling it with the DIY controller (Arduino + NRF24L01) I made for MDi #4.

Please take a look on the two new videos on the top.


Some older videos:

https://www.youtube.com/watch?v=2zzIDmQB784

https://www.youtube.com/watch?v=rrWFvgXE0so


WITNESS ME!


This is a companion discussion topic for the original entry at https://community.robotshop.com/robots/show/mad-mech-mad-maxs-peacemaker-inspired-tracked-vehicle

Thank you for sharing !I’m

Thank you for sharing !

I’m fan of your skills at handcrafting.

I didn’t know about pepakura.

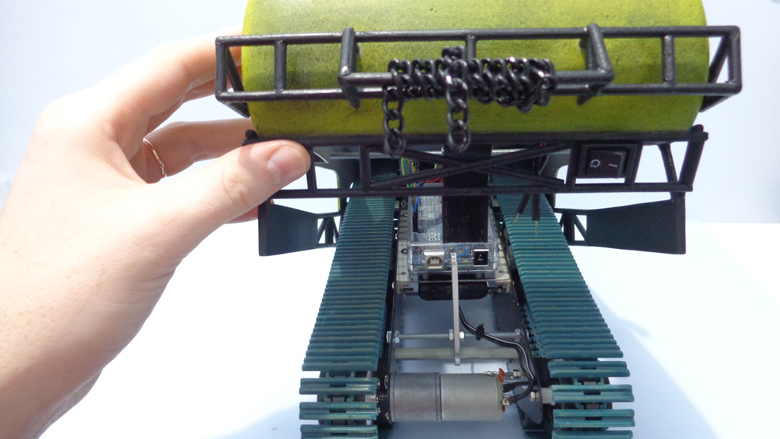
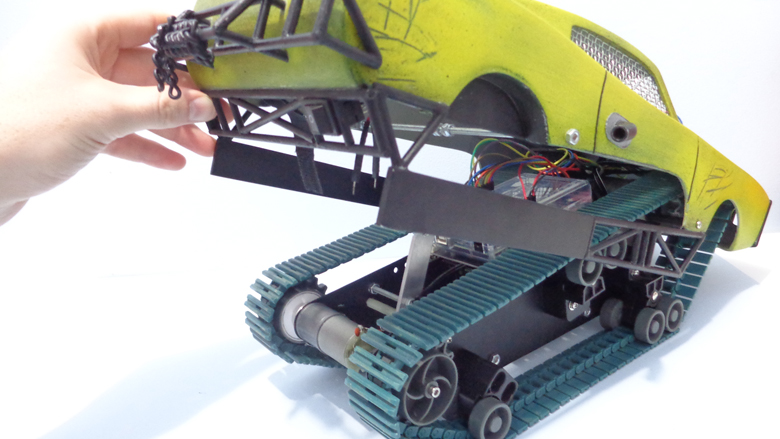
How do you support the Mustang body on the tracked vehicle ?
Is the original card board body still stuck inside the fiber glass resin ?

Thank you very much,

Thank you very much, fpictor!

Well, I simply have to say that pepakura is awesome.

The body is attached to the chassis with some standoffs through the lateral. Later I’ll post some pictures showing it better.

The cardboard body still inside of the car.

UPDATE @ August 22, 2015:

UPDATE @ August 22, 2015: Just added a video of the assembly process. I still have to finish the electronics.

I’m also working on a full walkthrough of this project.

RE

Nice Job!  Its great to see the “ole skool kustom kulture hotrod fabrication” done in the robot form! In the US, this form of 'glass art construction was done extensively throughout the 50’s to 80’s for custom cars. But you don’t see it done very much these days, or to the same magnatude since metal forming has become easier (and healthier) for the builder. I can’t wait to see the finished result!

Thanks!Fiberglass rocks! LOL

Thanks!

Fiberglass rocks! LOL … It’s cheap and simple to handle. It has been widely used today in cosplay suits, along with Pepakura/papercraft.


RE

I need to make a PSA for anyone reading this build -

MAKE SURE TO WEAR PROPER PPE (Personal Protective Equipment) ANYTIME YOU WORK WITH FIBERGLASS!!!

The fumes while wet are bad, and the dust when sanding is worse. Be smart, protect yourself.

Yep, be careful and you will

Yep, be careful and you will just have fun!

I always wear goggles, gloves and facial mask.

Thank you for your time

Thank you for your time showing your technics.

I like the step-by-step pictures of the side ornaments.

Very nice build.

Now, it only needs a black thick smoke going out from the exhaust at start up !

And do agree, no need of leds on such apocaliptic model. brute and bare minimum.

@ cevinius, Orlando_2k,

@ cevinius, Orlando_2k, fpictor: Thank you very much, all you guys!

Awesome build. It’s cool to

Awesome build. It’s cool to see custom work like this. How heavy is the body (just the fiberglass part) and what is the brand of the Arduino case you are using?

Thank you very much,

Thank you very much, wilsorob!

I do not have a scale at home, but I guess it’s about 1 lb.

I can’t remember where I bought the case, I guess from Sparkfun, and don’t have a brand on it. It’s a case for Mega boards, but an Uno fits nicely.

Cool looking ride

Reminiscent of 70’s MOPAR, nice style.

I liked the write up of the fiberglass work in particular, we don’t see that  in the robot community otherwise. There is so much more you can do when you are not restricted to off the shelf products. Readers who wonder what kind  of respirator to get should look for P100 (for vapors), the “P” standing for organic and the 100, standing for 100% (nearly) effective. For sanding, N100. Most respirators let you twist off the N100’s and twist on the P100’s. Silicone ones are more comfortable. It’s a great investment.

Note that the photo about the 10K resistor shows one of a different value, small matter. Good work all around.

oops!!! That’s definitely

oops!!! That’s definitely not a 10k resistor… Thanks for the tip! Here is a “4 Band Resistor Color Code Calculator”: http://www.digikey.com/en/resources/conversion-calculators/conversion-calculator-resistor-color-code-4-band

Also, thanks for the info about respirators.

Thank you very much for the comment!

Incredible!

Congratulations Dickel!

I was amazed for the way you made everything from scratch. It looks not difficult (but we know it requieres both expertise and good hands), so you master the whole thing very well, starting from the chasis, also the fiber glass and the right weight balance (less at the top) so the car runs fine. Thanks for sharing and looking forward to see more of your projects.

Thank you very much,

Thank you very much, Francisco!

Thank YOU

Thank you for sharing your artcraft and technology. It´s impressive and inspiring! :wink:

Tried getting in contact with you
Hi Dickel - I have been trying to get in contact with you :slight_smile: I left you a private message over on the instructables.com website; would appreciate to hear back from you!

best regards

This is such a great

This is such a great project, and the way you explain all the process is remarkable!
Sometimes I ended up thinking that a 3d printer might be handy for this or that, but looking at the way you make your things just makes me wish to have more spare time! Keep it up!!  ;)

Thank you very much,

Thank you very much, guibot!

Yep, I can’t hide that I would like to have a 3D printer and/or a CNC… it could make the work go faster. But I am always very proud to have done this work with my own hands!