


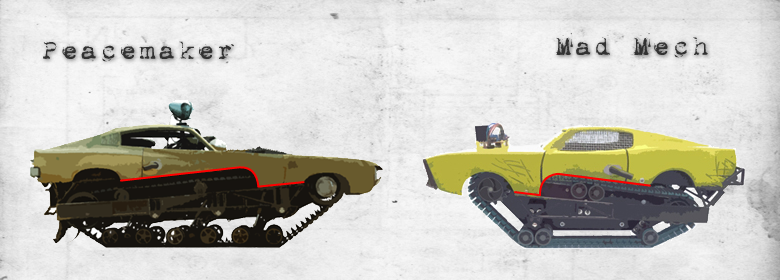
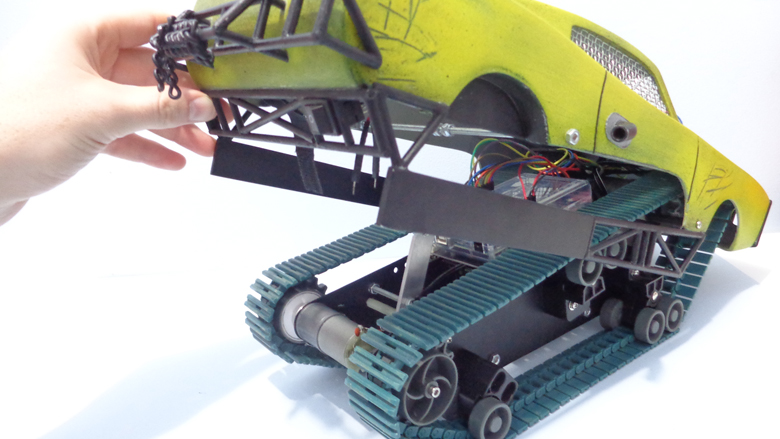
Mad Mech (Mad Max's Peacemaker inspired tracked vehicle)

Movies can be a great source of inspiration for our projects.
As a post-apocalyptic movies fan, I've waited anxiously for Mad Max: Fury Road. The movie is simply awesome!
I was intrigued by so many mad things and thought how I could use some ideas on some project.
I really enjoy tracked vehicles, then the Peacemaker stayed on my mind.
And as I was also very tempted to practice a bit with fiberglass for a large future project [some mystery here :) ], I have rapidly decided start working on Mad Mech!

The inspiration.
The body of Peacemaker is a 70's Chrysler Valiant Charger, placed over treads [1].
For my project I'm using a body of Mustang. I've found a Papercraft/Pepakura file [2] on the web that helped guide me.
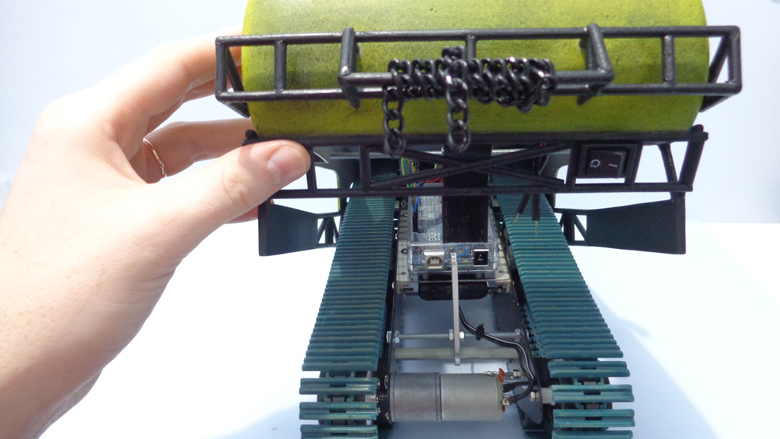
Before starting the practical work, I spent a few hours designing and deciding some details. Besides the yellow body of muscle car, I finally decided on some "key similarities" that Mad Mech should have in relation to the Peacemaker, like the cut in the side of the body, the lateral shields and the headlight on the ceiling.


For this last one I ended up in doubt...
I was initially intended to put a servo motor with a MaxSonar LV-EZ01 for autonomous run. Then I thought about putting some leds...
I ended up deciding that got better with nothing! :)
Construction of the body
With the designs done, I started printing the templates in A4 paper and putting them over thin cardboard (obtained from pizza boxes ... lol).
Work with Pepakura is a lot of fun. Rapidly you see the project growing!


With the paper model done, it's time of fiberglass.
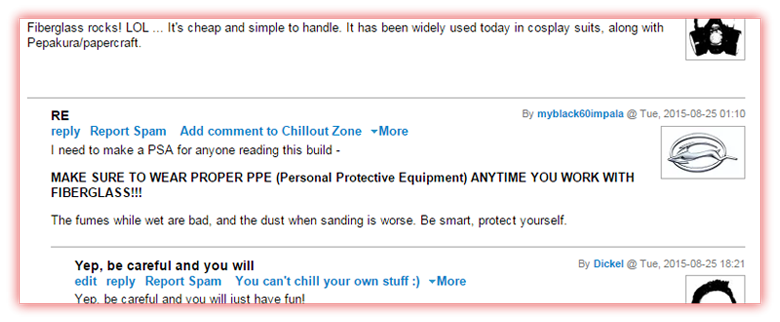
Before continue I would like to call the attention of anyone who is interested in replicate this project or work with fiberglass!
myblack60impala have already called the attention (thanks for the tip!), but I guess be careful never hurts!
So, if you don't have appropriate PPE (Personal Protective Equipment), it is better not start working!
... continued ... It's time of fiberglass!
It should initially be applied a layer of resin for lamination. Then is placed the fiberglass and another layer of resin.
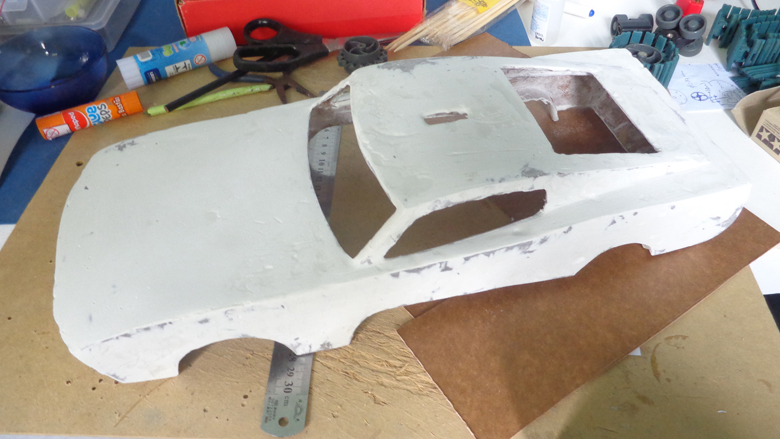
This is how it looks when the resin dries.

To give it a nice finish, body filler was used. I have applied a layer... then much sanding... and applied one more thin layer. And more sanding work. The image below shows how it was after the first layer of body filler and first session of sanding.
I do not have much skill with paint, but tested a few things.
I applied the primer, some blots with matte black and finally the yellow spray paint. After, some splashes with matte black and silver spray paint. To finish, sanded with very thin sandpaper.


I was very tempted to do this "cat scratch thing". I ended up in doubt if it looks good. lol
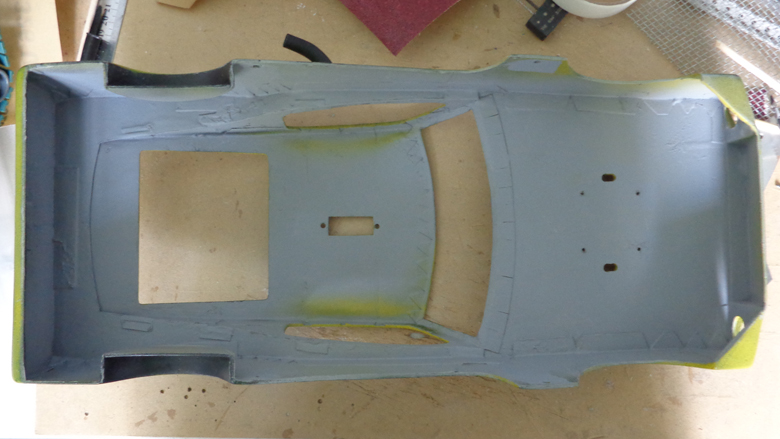
Below you see the inside's view of the body after the painting work.
To give it a more post-apocalyptic look I have made some ornaments with chopsticks.


Construction of the chassis
The chassis is made out with a 2 mm sheet of aluminum, with 4 mm threaded bars to attach the sides.

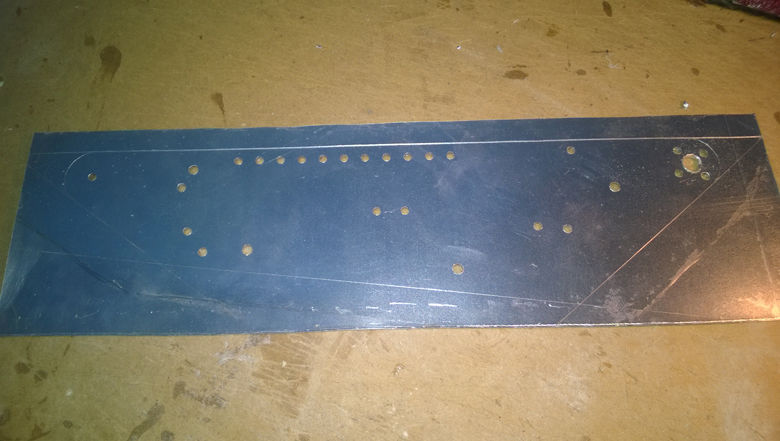

The treads are from the VEX Tank Tread Kit.

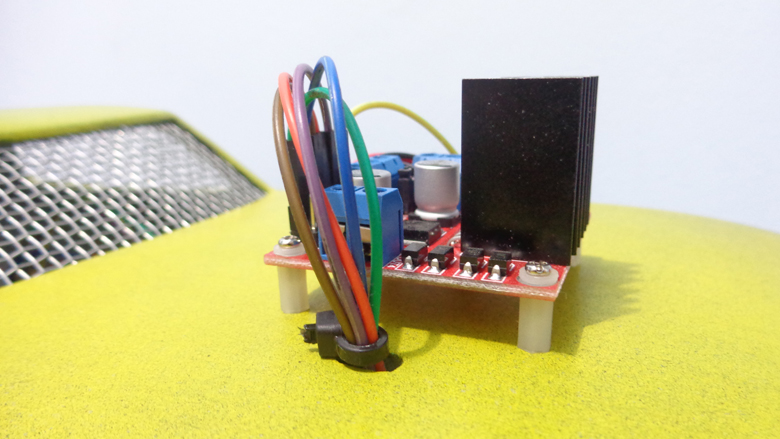
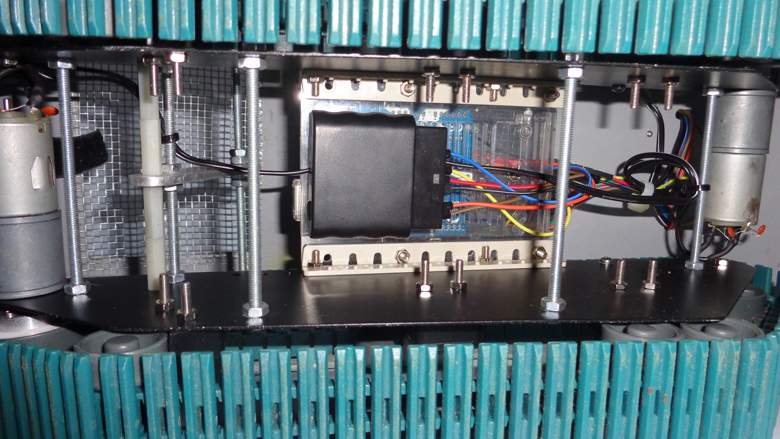
Electronics
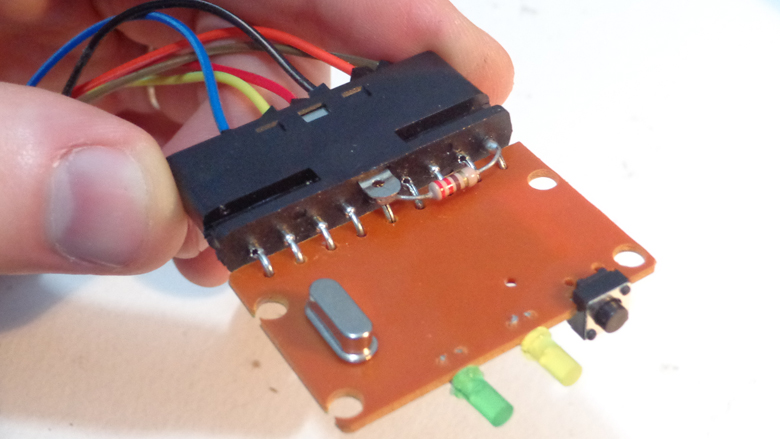
Mad Mech is controlled with an Arduino UNO and a L298N for the DC motors. Commands are sent remotely with a PlayStation 2 controller [3].
The power is provided by three 2000mAh LiPo batteries in series.


Eventually may be necessary a pull-up resistor between the POWER and DATA wires of the PlayStation 2 controller (in this case, the wireless receiver). I'm not sure if the resistor should vary according to the brand of the controller/receiver. As I use it only for my Arduino projects, I have soldered definitely a resistor.
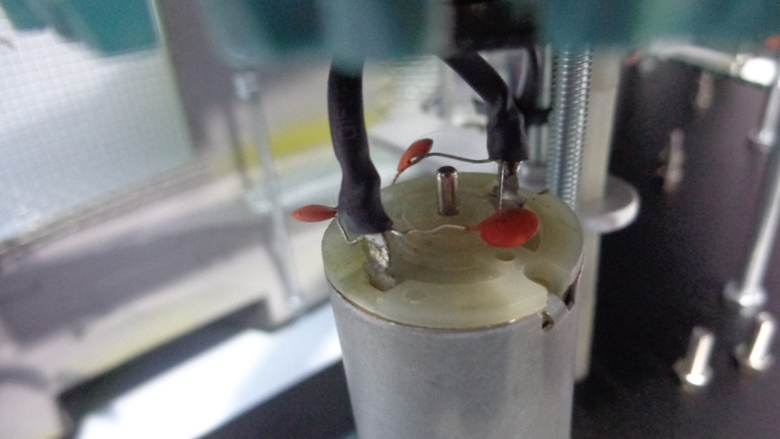
To prevent interference/noise [4], three 0.1uF ceramic capacitors was soldered in each DC motor.
Additional pictures and info


References
1. http://madmax.wikia.com/wiki/Howe_and_Howe_Ripsaw_EV1_%22The_Peacemaker%22 - Howe and Howe Ripsaw EV1 "The Peacemaker" - The Mad Max Wiki - Much info about the Peacemaker.
2. https://www.bluespringsfordparts.com/68-shelby-gt500-model.html - 1968 Mustang GT500 KR Paper Model - BlueSpringsFordParts.com
3. http://www.billporter.info/2010/06/05/playstation-2-controller-arduino-library-v1-0/ - The Mind of Bill Porter - PlayStation 2 Controller Arduino Library.
4. http://www.rideaunautical.ca/articles.php?article=rfi - ~RNM~Articles - Radio Frequency Interference (RFI) Supression.
@ September 27, 2015: I made an Instructable for this project http://www.instructables.com/id/Mad-Maxs-Peacemaker-like-tracked-vehicle/
@ March 3, 2018 - WHAT A LOVELY DAY: Hi guys! Just a short update here... Mad Mech got new motors... since the previous had broken gears.
And now I'm controlling it with the DIY controller (Arduino + NRF24L01) I made for MDi #4.
Please take a look on the two new videos on the top.

Some older videos:
https://www.youtube.com/watch?v=2zzIDmQB784
https://www.youtube.com/watch?v=rrWFvgXE0so
WITNESS ME!