

This will be my first robot with a board. But I have made a RC boat made out of Styrofoam using parts from RC Helicopter.
June 21, 2009 - ordered parts
Brought motors and wheels from: Pololu.com
Brought the Pix 8 motor board, switches, serial cable,7805 Fixed Voltage Regulator at: www.techsupplies.co.uk
Brought the 9 volt connector at radio shack.
Now the wait is on.
June 24,2009- GM10 GM10 81:1 Geared Pager Motors with wheels arrived.
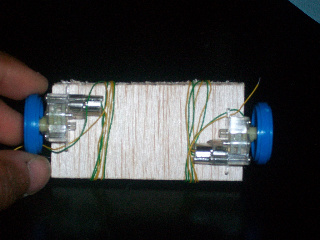
I had to cut off the platic column on the motor to install the wheels. Then I used super glue to mount the motors to the wood. Dimension of phatform is 3 inches long x 1.5 inches wide.
June 26, 2009
All other parts arrived.
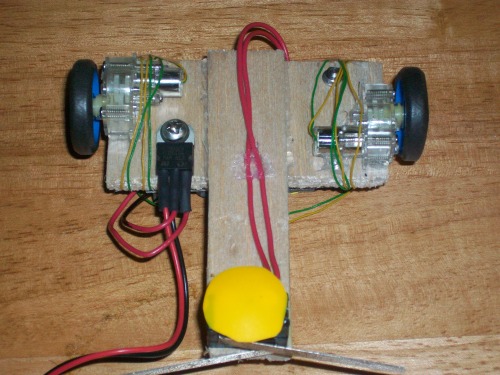
Here, you can see the that i mounted my 5v regulator on the bottom of my robot. (Made phatforms to big)
Hopefully you can see my wiring for the switches.
Since my back phatform was to large to copy the original Little 8, I just my mounted the Picaxe 8 board on the back and used the front as the battey holder. The front phatform dimenions are (3.5 inches long x 1 inch wide)
July 6, 2009
After adjusting the code fritsl posted, I finally got it to work. Now I going to rewrite the code, so when the left switch is activated it will turn left and same for the right but turn right.
.
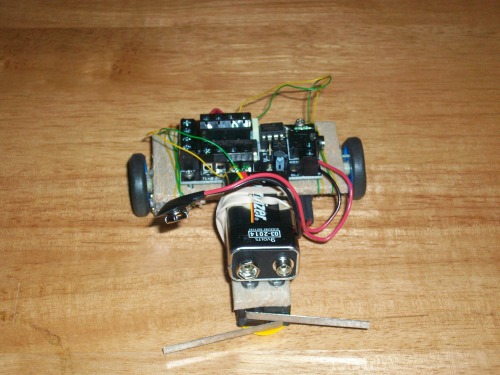
- Actuators / output devices: 2 GM10 81:1 Geared Pager Motors
- CPU: picaxe 8
- Power source: Standard 9 Volt Battery, 5 volt regulator
- Sensors / input devices: bumper sensors
- Target environment: indoors
This is a companion discussion topic for the original entry at https://community.robotshop.com/robots/show/little-8-copy
