KRB1A - Katebot from now on will be refered to as Katebot in thos page.
About KateBot:
KateBot is my first robot that i planned to build and have started to build the other being a college entry into Robot Wars (old uk tv show that pitted robots against each other) that didnt even get onto the drawing board stage. I have got building stages planned for progress i want to make and time i want to of taken i will list this below.
Katebot has been scrapped in the CD chassis form and has been rebuild her software and electronics are full of bugs so she is undergoing a total rethink i will add more as she developes.
hope to have one by the weekend i am just finishing the coding for navigation and the breadboard curcuit is almost done tomorrow i plan to move it to the strip board
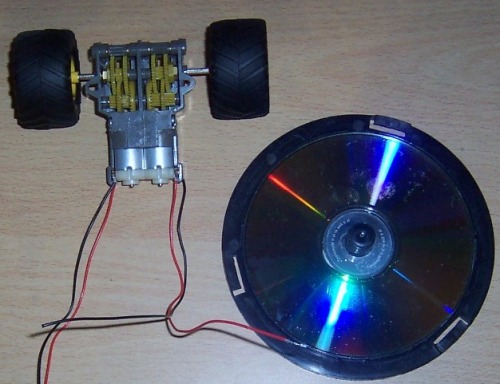
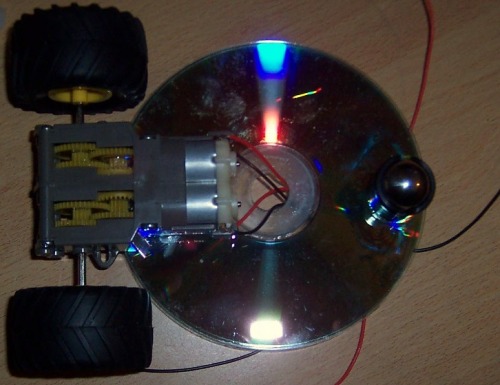
Why are you using a CD for the base? As you pointed out it is brittle and hopeless to work with. So why not spring for a piece of Plexiglas or even some plywood?
As you are beginner, I would recommend using another material for the base as that will give you the room to expand and add other stuff as your skills evolve.
the reason im using a cd is i really wanted something unique not run of the mill for all my faults i make building her so far im still having alot of fun. Too be honnest i will use plastic or wood next time (i have decided i will build a second robot at a later date). As for room to expand i am looking at using spacers to additional platforms for expantion. What i have learnt while building her is the need for patience and the peril of what happens if you apply too much pressure to the CD’s and havent drilled piolet holes. Iwould start again with her if i could afford the cost of a new tamyia gearbox and maybe some plywood as the glue i used was super glue that came without a debonding agent.
I see lot of people her just gluing stuff, instead of taking the time to make brackets or just drill some holes and bolting stuff together. Let’s face it, most of these robots will be ripped apart and used in other projects later. So my advice is to use glue as the absolute last resort.
i think screws and bolts and brackets are a good idea for sure and next robot will maybe take advantage of them my next robot will certainly be based around a tamiya gearbox i like them easy to build and are great runners
I use Aluminium bolted & glued the permanent parts. I buy this in 1 metre lengths as is convenient. Square tube Right angle & sheet which I get from my scrap man.Coming soon a week or 2. “NOOKI” bot by Kiwi. Thid is the 3rd version of a stair/obstsacle climbing bot.
There are a number of kits one can get if they don’t want to build something themselves. I remember having a building kit that had nuts and bolts, plates with holes stamped in them and a lot more. (similar to K’NEX but metal).
Building structurally sound components is key to great projects that will last, and look great.
Sorry it has been awhile since i last updated but been busy, Katebot under went a complete rebuild her cd chassis is no more in its place is a piece of fiberboard and sensors wise i have used the bump kit from tech supplies. I will update this page by the weekend hope to have video footage in the next week or 2 as well.
The erector sets come to mind in what you describe.
Aside from that I think this site was founded on the glue that holds some of these bots together…no it’s not ideal, and not meant for long term, but in the sense of inspiration and ingenuity, sometimes some hot glue and a few piecies of plastic(cds included) will be the start of a future in robotics even if iti is a shakey foundation…