

Last Update: 3-Aug-2011 :
Finished assembly. Updated board photos and added few more.
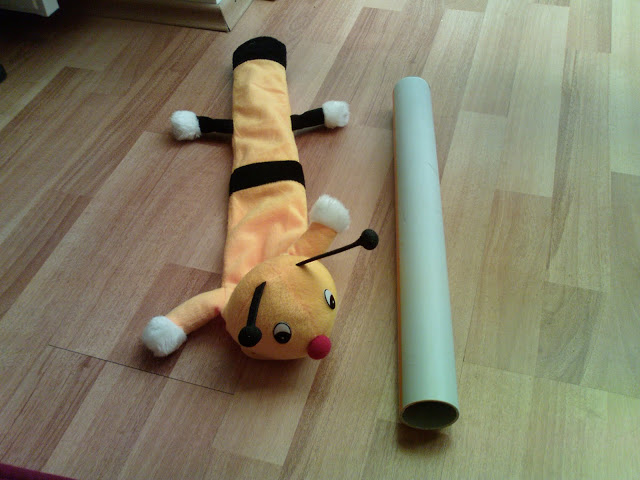
Meet IBS-Wormy! This is a simple bot for my baby-daughter to play with. And I hope she'll like it :)
IBS stands for "Isotope's Baby Series". I'm planning to build more bots under this tag in future.
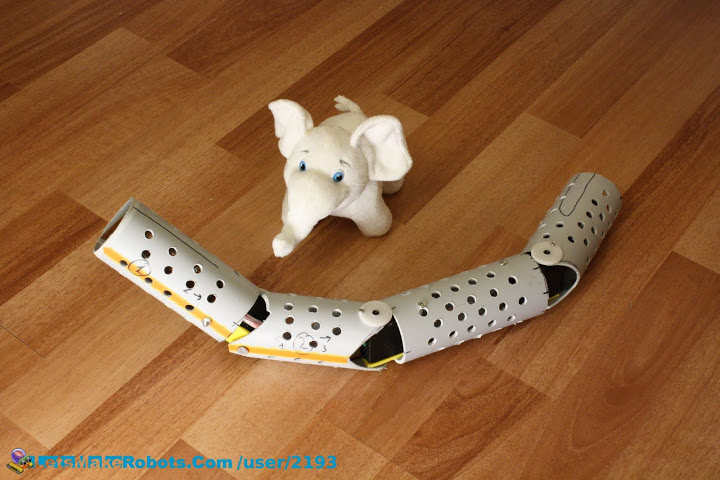
Wormy has only one sensor so far - a tilt switch. By sensing changes in sensor's state bot knows if it is being "played" with, and starts wigling like a worm. The body is four segments of PVC pipe linked togeather with three servos which create wigling motions. It has LED eyes for blinky stuff and a speaker to make some noises. All it is enclosed in funny phonendoscope cover made of soft fabric.
This is what I did start with:
The pipe was cut into segments. This particular PVC pipe was quite heavy, so I did a bunch of perforations to make it lighter.
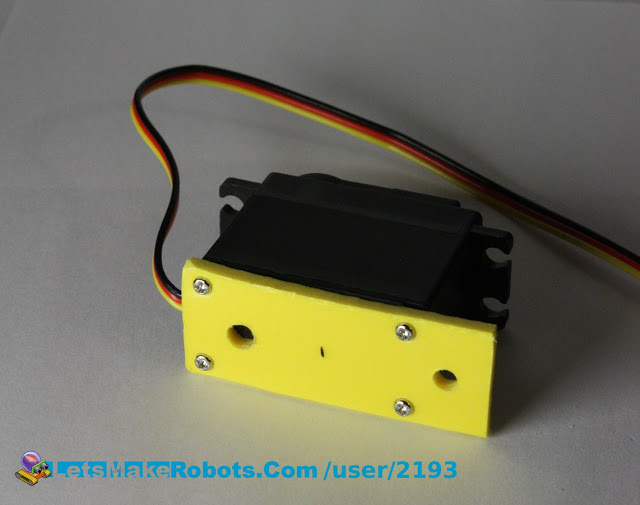
Mounting of servos was a little bit tricky, as I wanted as sturdy link as possible. So, each servo had to be bolted by two bolts at each side. Top connections was somewhat straightforward, but for the bottom ones I had to design a little mounting plate which is bolted to servo bottom by four screws that hold the servo togeather. I have used 3mm thick Sintra. I found this material really handy for construction. It is soft enough to be cut by utility knife or even scissors, but strong enough for most robot parts.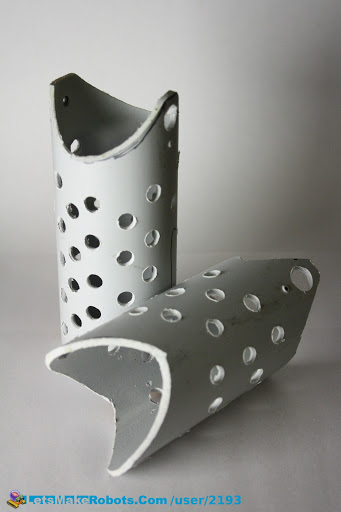
The links turned out even better than I thought!
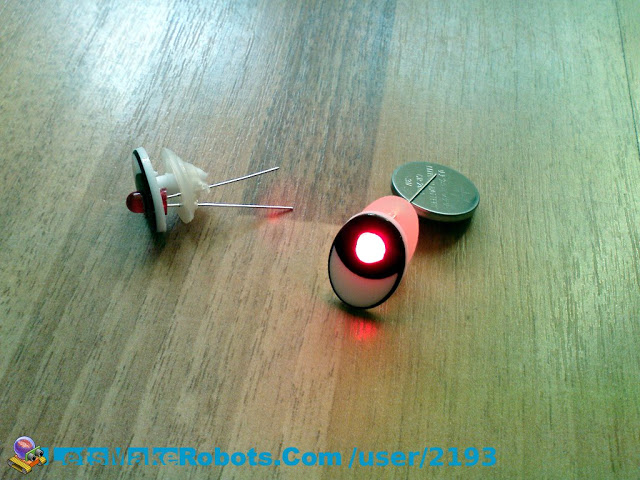
The eyes. Wormy looks like a Terminator now :)
This comprises the hardware part.
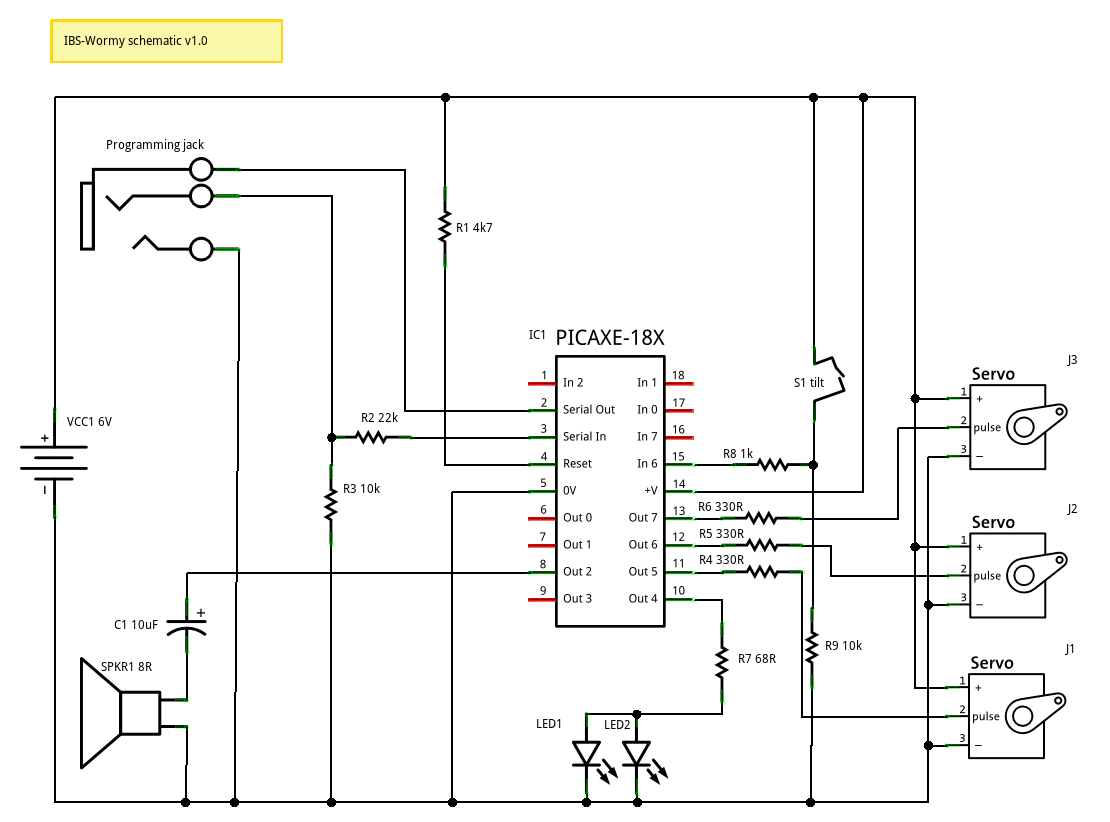
Wormy has a Picaxe 18X as brain. Full electronic parts list:
- C1 10uF Electrolytic Capacitor
- IC1 PICAXE-18X
- J1 Basic Servo
- J2 Basic Servo
- J3 Basic Servo
- LED1 Red LED - 5mm
- LED2 Red LED - 5mm
- Programming jack Stereo Jack (TRS) 3.5mm
- R1 4.7kΩ Resistor
- R2 22kΩ Resistor
- R3 10kΩ Resistor
- R4 330Ω Resistor
- R5 330Ω Resistor
- R6 330Ω Resistor
- R7 68Ω Resistor
- R8 1kΩ Resistor
- R9 10kΩ Resistor
- S1 Mechanical (ball) Tilt Switch
- SPKR1 Loudspeaker 8 Ohm
- VCC1 4AA Battery Holder
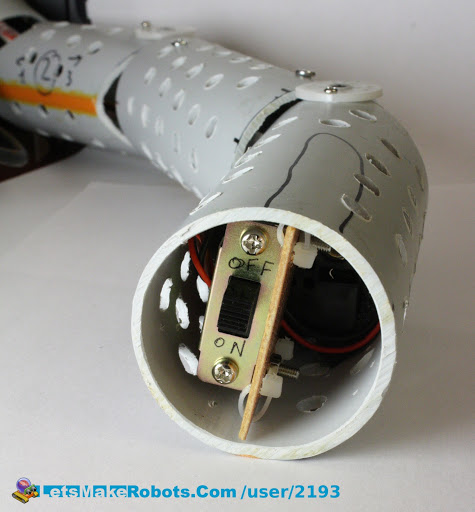
- Power switch (not on schematic) Slide type DPDT
The electronic schematics for Wormy (including LEDs and Speaker to be added in future. Made in Fritzing) is:
And this is how my board looks:
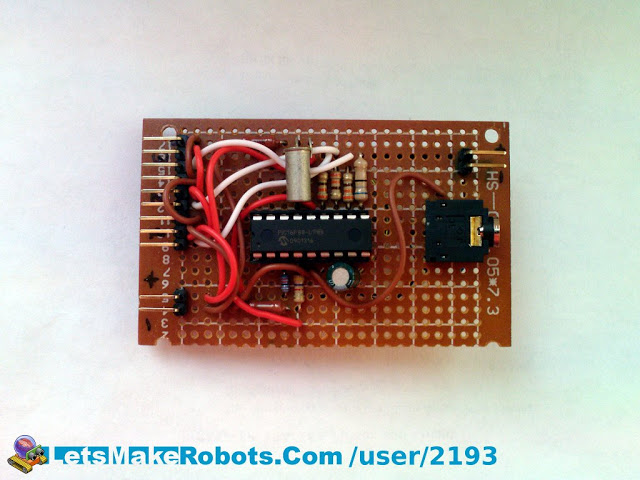
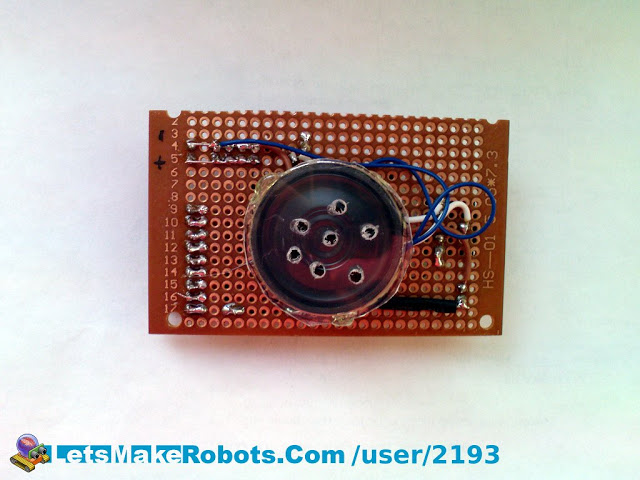
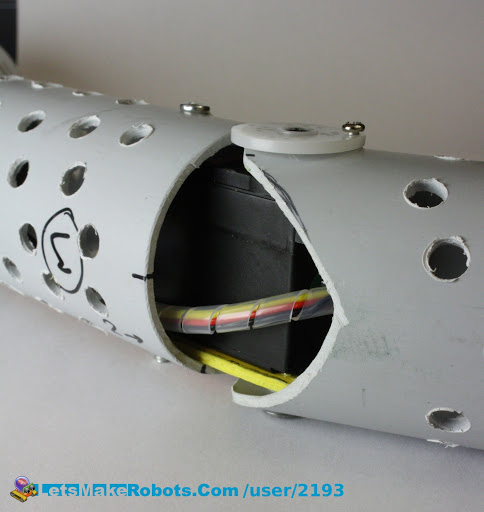
Circuit board is located in the first segment (head). Battery pack and power switch in last one (tail).
Assembled wormy w/o skin:
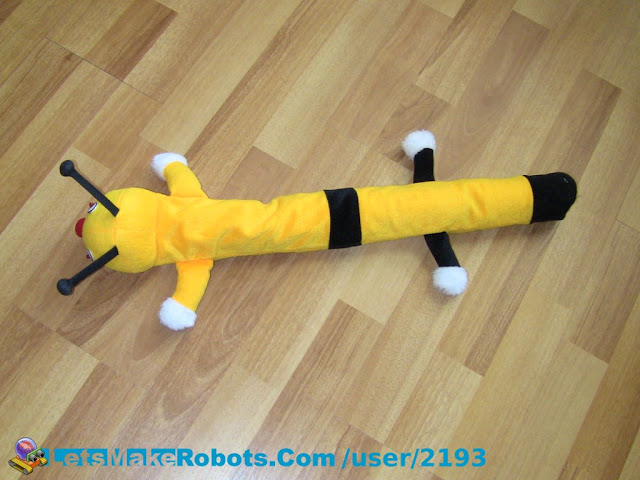
And with skin:
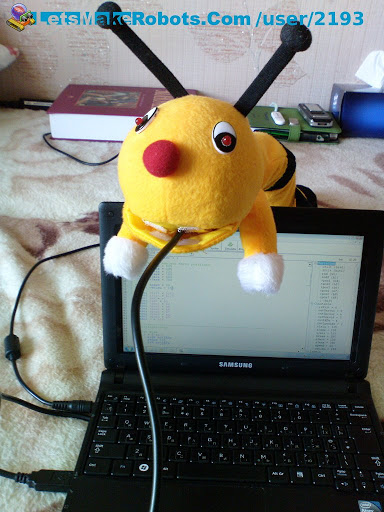
An this is how I program it :D (BTW, The code is attached)
Videos:
- Video shows Wormy on it's first test.
- Wormy is assembled and ready :)
- [coming soon] This video should actually show wormy doing what it was made for: playing with my baby, should she like it :D
This is it. I hope you did like my Wormy! :D
Wigles
- Actuators / output devices: led's, speaker, 3 servos
- Control method: autonomous
- CPU: picaxe 18x
- Power source: 6V
- Sensors / input devices: Tilt sensor
- Target environment: indoor
This is a companion discussion topic for the original entry at https://community.robotshop.com/robots/show/ibs-wormy
 I think I
