How to make your first robot

Typo in the basic navigation code in the PDF

The PDF instructions have ‘readadc 1, …’ instead of ‘readadc 0, …’ And the code in the PDF becomes quite a mess when trying to copy paste it, as you mention; perhaps add a suggestion to copy/paste them from the website or include the code as an attachment.

Sorry for the error in the

Sorry for the error in the PDF - I am taking it down now, as I am working on a completely new version of this page alltogether.

Replacement.

Can I use Arduino to make this and if I can, can you specify which one and also tell me where to conect the servos, DC motors, and Sharp IR Range Finder. I thank you very much for any help.


-Aaronsuper1

Of course you can. But, for

Of course you can. But, for a regular Arduino board you need a shield to be able to connect the motors, the sensor and the servo. One such shield is my Robot Builder’s Shield. To make things easier, I made 2 robot ready controllers, where you have everything on board: the µBotino controller and the Robot Builder’s Arduino. Here is a picture of my Start Here Robot with a RBA on it:

IMG_0470_resize.jpg

Which one?

Ok so what your’e saying is if I use the Robot Builders Shield it would need to be connected to an Arduino, but if I use the  µBotino controller or the Robot Builder’s Arduino i do not need an Arduino which means it is stand-alone. But which would you think is more suitable for a obstacle avoiding robot? This is so that the servo will rotate the rangefinder to scan for obstacles and tell the motors to move out of the way. Your advice is much appriciated.

There are a few differencies

There are a few differencies between the µBotino and the Robot Builder’s Arduino.

First, the size. µBotino is perfect for small robots, RBA is standard Arduino size/shape.

Second, RBA is shield compatible, allows the use of a xBee shield or GPS shield or… whatever shield.

Third, RBA allows the user to chose the motor control method, either a 2 pin control mode (same with the µBotino) and the regular 3 pin control mode (at the loss of 2 servo pins).

Fourth, RBA has a 3A LDO voltage regulator, compared to the 1A LDO of the µBotino, allows you to use a servo (or 2 micro servos) with regulated 5V from a 7.2V or  even 12V battery for motors.

Fifth, RBA allows you to build your own shield from a regular perf board, just plug it in the standard spaced male pins that double the Arduino standard female pins.

Sixth, RBA is only $3 more, with a lot of options.


Take it this way: Arduino Uno is $29, plus a RBS ($16) makes $45 (and you need to pay 2 shipping rates). RBA is $30, plus a USB-serial cable ($8) makes only $38 (plus $3-5 shipping), but you need to assemble the RBA yourself (as a bonus, you practise your soldering skills). I will have USB-serial cables in store in about 2 weeks (I got some crap ones so I had to re-order).

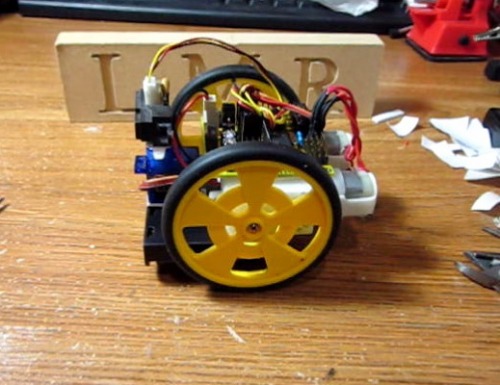
Here is a picture of my SHR with a µBotino on it:

LMR-SHR-uBotino.jpg

I made a video how to make a robot like this, I'll post it as soon as I "glue" the parts together.

Help Plzzz

Dear Fritzl,

             I live in Malaysia so I am not able to buy a PICAXE 28X1 Project Board. Can you get me a schematic of the board. I need to know where does the chip sockets go, the resistors, capasitors, digital/analog output and input pins, everything. You can just trace all the components on the board and tell me where each one goes. If you can’t help me, I will resort to other sources. Any of your help is very appreciated. Thnx!


P.S. Love all of your bots especially YDM!!!

Hey my friend,Every now and

Hey my friend,

Every now and then people write to me “I cannot buy this in my country” - but the thing is; I live in Denmark, and I cannot buy it here either. But what we do, is order stuff over the Internet; Webshops. And then the postman brings it to us :slight_smile: There is a link to where you can order, above this, in the instructions.

I cannot post you schematic over the AXE020 board, sorry.


Here is the video of my SHR

Here is the video of my SHR with the µBotino controller:

http://www.youtube.com/watch?v=j1sojE0jXWI

try this:

going to options - serial port and choosing the one that says PICAXE

getting wires on the eyes

Hi 

In the video the eye comes with the three wires already attached.  My ‘eye’ has three tiny pins but no wires.  The space between the pins is so small that we can’t put female connectors on them.  What should we do now?  All sensible advice gratefully received.


Thanks!

Pretty high price

This robot parts cost some money. Do anyone now how to get them cheaper?

Understand that this gets

Understand that this gets you a microcontroller and base for your first project, but it is also very expandable.

If you are looking for a less expensive project, search this site and elsewhere. There are junkbots made from scrounged parts, many BEAM bots can be done cheaply, etc.

What is going on

My LMR kit came in the mail today, and i got up to the part where we are supposed to put the motor controller in, and my last chip has 18 pins! I Double checked the chips i have inserted, comparing them to the ones on the website, but the chip i have with 18 pins looks nothing like the motor chip it is supposed to have. When i bought it, it had a chip in where the resister one went, but the guide says take it out, and it was an 18 chip as well.

What should i do?

Hmm - it sounds “funny”.If

Hmm - it sounds “funny”.

If you could please take close ups of all your ships, well lit, so we can read the print on them?

Or make us a lits of all the chips you have, with all print on them.

Then we can tell if sometihing is wrong. If not, we can help you what to do, anf if something is wrong, you can of course just go to Solarbotics and let them know what you received, and they will make up for it.

But always: Give us the details, so we can help you, thanks :wink:

Frits, I saw someone else

Frits, I saw someone else post that they had been sent the wrong chip. In this case they had received a 20-pin chip instead of the L293D motor driver.  Sounds like it is worth investigating. 

Incorrect Parts

Hey guys, we’re aware of a small batch of Start Here kits that went out with an incorrect ICs. We’ve already sent out the correct replacement, completely free of charge, so keep an eye on your mail box. Sorry for the hassle!

Thanks :)And sorry for the

Thanks :slight_smile:

And sorry for the trouble everyone!

Parts

Okay just to make sure I’m not going crazy, this is the parts list

PJ23AB
MM74HCT240N
MC74HCT240N


PIC16f886
-1/SP (e3)
1015J4M


4116R LF
1-331
B C1113


ULN2803A
991WE VW
MYS 99 022


Also, Solarbotics should I send you an email about this? I think I sent one earlier but I wasn’t sure what as missing at that point. Thanks for your support everyone!


Thanks - but as Solarbotics

Thanks - but as Solarbotics wrote:

"Hey guys, we’re aware of a small batch of Start Here kits that went out with an incorrect ICs. We’ve already sent out the correct replacement, completely free of charge, so keep an eye on your mail box. Sorry for the hassle!"

You will get the part, free of charge, sorry for the trouble, just wait for the postman :slight_smile: