Lessons Menu:
- Lesson 1 – Getting Started
- Lesson 2 - Choosing a Robotic Platform
- Lesson 3 - Making Sense of Actuators
- Lesson 4 - Understanding Microcontrollers
- Lesson 5 - Choosing a Motor Controller
- Lesson 6 – Controlling your Robot
- Lesson 7 - Using Sensors
- Lesson 8 - Getting the Right Tools
- Lesson 9 - Assembling a Robot
- Lesson 10 - Programming a Robot
Tethered
Direct Wired Control
 The easiest way to control a vehicle is with a handheld controller physically connected to the vehicle using a cable (i.e. a tether). Toggle switches, knobs, levers, joysticks and buttons on this controller allow the user to control the vehicle without the need to incorporate complex electronics. In this situation, the motors and a power source can be connected directly with a switch in order to control its forward/backwards rotation. Such vehicles usually have no intelligence and are considered to be more “remote controlled machines” than “robots”.
Advantages
- The robot is not limited to an operating time since it can be connected directly to the mains
- There is no worry about loss of signal
- Minimal electronics and minimal complexity
- The robot itself can be light weight or have added payload capacity
- The robot can be physically retrieved if something goes wrong (very important for underwater robots)
Disadvantages
- The tether can get caught or snagged (and potentially cut)
- Distance is limited by the length of the tether
- Dragging a long tether adds friction and can slow or even stop the robot from moving
Wired Computer Control
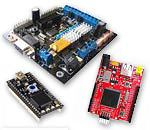
 The next step is to incorporate a microcontroller into the vehicle but continue to use a tether. Connecting the microcontroller to one of your computer’s I/O ports (e.g. a USB port) allows you to control its actions using a keyboard (or keypad), joystick or other peripheral device. Adding a microcontroller to a project also may require you to program how the robot reacts to the input. Instead of using a laptop or desktop computer, netbooks are often a desirable choice because of their low price, small size and low weight.
Advantages
- Same advantages as with direct wired control
- More complex behaviours can be programmed or mapped to single buttons or commands.
- Larger controller choice (mouse, keyboard, joystick, etc.)
- Added onboard intelligence means it can interface with sensors and make certain decisions on its own
Disadvantages
- Cost is higher than a purely tethered robot because of the added electronics
- Same disadvantages as with direct wired control
Ethernet
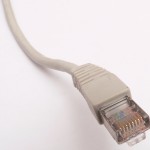
 A variation on computer control would be to use an Ethernet interface. A robot that is physically connected to a router (so it could be controlled via the Internet) is also possible (though not very practical) for mobile robots. Setting-up a robot that can communicate using the internet can be fairly complex, and more often than not, a WiFi (wireless internet) connection is preferable. A wired and wireless combination is also an option, where there is a transceiver (transmit and receive) connected physically to the internet and data received via the internet is then sent wirelessly to the robot.
Advantages
- Robot can be controlled trough the Internet from anywhere in the world
- The robot is not limited to an operating time since it could use Power over Ethernet (PoE).
- Using Internet Protocol (IP) can simplify and improve the communication scheme.
- Same advantages as with direct wired computer control
Disadvantages
- Programming involved is more complex
- The tether can get caught or snagged (and potentially cut)
- Distance is limited by the length of the tether
- Dragging a long tether adds friction and can slow or even stop the robot from moving
Wireless
Infrared
 Infrared transmitters and receivers cut the cables connecting the robot to the operator. This is usually a milestone for beginners. Infrared control requires "line of sight" in order to function; the receiver must be able to “see” the transmitter at all times in order to receive data. Infrared remote controls (such as universal remote controls for televisions) are used to send commands to an infrared receiver connected to a microcontroller which then interprets these signals and controls the robot’s actions.
Advantages
- Low cost
- Simple TV remote controls can be used as controllers
Disadvantages
- Needs to be line of sight
- Distance is limited
- Very low data rate (simple commands only)
Radio Frequency (RF)
 Commercially available Remote Control (R/C) units use small microcontrollers in the transmitter and receiver to send, receive and interpret data sent via radio frequency (RF). The receiver box has a PCB (printed circuit board) which comprises the receiving unit and a small servo motor controller. RF communication requires either a transmitter matched/paired with a receiver, or a transceiver (which can both send and receive data). RF does not require line of sight and can also offer significant range (transmission distance). Standard radio frequency devices can allow for data transfer between devices as far away as several kilometres and there is seemingly no limit to the range for more professional RF units.
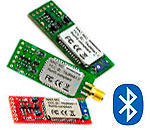
XBee and Zigbee modules use RF for communication, but allow the user to vary many of the communication parameters involved. These modules have a specific footprint (layout) and are only produced by certain companies. Their main advantage is that they provide a very robust easy to set up link and take care of all of the communication protocol details.
Many robot builders choose to make semi-autonomous robots with RF capability since it allows the robot to be as autonomous as possible, provide feedback to a user and still give the user some control over some of its functions should the need arise.
Advantages
- Considerable distances possible
- Setup can be straightforward
- Omni directional (impeded but not entirely blocked by walls and obstructions)
Disadvantages
- Pay attention to the transmission frequencies – they can be shared
Bluetooth
 Bluetooth is a form of RF and follows specific protocols for sending and receiving data. Normal Bluetooth range is often limited to about 10m though it does have the advantage of allowing users to control their robot via Bluetooth-enabled devices such as cell-phones, PDAs and laptops (though custom programming may be required to create an interface). Just like RF, Bluetooth offers two-way communication.
Advantages
- Controllable from any Bluetooth enabled device (usually additional programming is necessary) such as a Smartphone, laptop, desktop etc.
- Higher data rates possible
- Omnidirectional (does not need line of sight and can travel a little through walls)
Disadvantages
- Devices need to be “paired”
- Distance is usually about 10m (without obstructions)
WiFi
 WiFi is now an option for robots; being able to control a robot wirelessly via the internet presents some significant advantages (and some drawbacks) to wireless control. In order to set up a WiFi robot, you need a wireless router connected to the internet and a WiFi unit on the robot itself. For the robot, you can also use a device that is TCP/IP enabled with a wireless router.
Advantages
- Controllable from anywhere in the world so long as it is within range of a wireless router
- High data rates possible
Disadvantages
- Added programming required
- Maximum range is usually determined by the choice of wireless router
GPRS / Cellular
 Another wireless technology that was originally developed for human to human communication, the cell phone, is now being used to control robots. Since cellular frequencies are regulated, incorporating a cellular module on a robot usually requires added patience for programming as well as an understanding of the cellular network system and the regulations.
Advantages
- Robot can be controlled anywhere it has a cellular signal
- Direct satellite connection is possible
Disadvantages
- Setup and configuration can be complex – NOT for beginners
- Each network has its own requirements / restrictions
- Cellular service is not free; usually the more data you transmit/receive the more money you will need to pay.
- System is not (yet) well setup for robotics use
Autonomous
 The next step is to use the microcontroller in your robot to its full potential and program it to react to input from its sensors. Autonomous control can come in various forms: pre-programmed with no feedback from the environment, limited sensor feedback and finally complex sensor feedback. True "autonomous control" involves a variety of sensors and code to allow the robot to determine by itself the best action to be taken in any given situation.
The most complex methods of control currently implemented on autonomous robots are visual and auditory commands. For visual control, a robot looks to a human or an object in order to get its commands. Getting a robot to turn to the left by showing a piece of paper with arrow pointing left is a lot harder to accomplish than one might initially suspect. An auditory command such as “turn left” also requires quite a bit of programming. Programming a variety of complex commands like “get me a drink from the fridge” or “get my shoes, they’re near the front door” is no longer fantasy but requires a very high level of programming, and a lot of time.
Advantages
- This is “real” robotics
- Tasks can be as simple as blinking a light based on one sensor readings to landing a spacecraft on a distant planet.
Disadvantages
- It’s only as good as the programmer; if it’s doing something you don’t want it to do, the only option you have is to check your code, modify it and upload the changes to the robot.
Practical Example
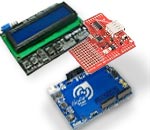
For our project, the goal is to create an autonomous rover capable of making a decision based on external input from sensors. Should the robot “misbehave” it will be physically close and shutting it off will not be an issue. However having the option of semi-autonomous (wireless) control to allow us the option of making a remote-controlled vehicle is also attractive. We will not have the need for tethered control.The microcontroller chosen in the previous lesson uses what are called “shields” which are essentially ad-on boards specific to the Arduino’s pin layout. There are many shields, including ones that allow for Ethernet, Xbee, or Bluetooth communication. There is even a shield that allows for GPRS (i.e. cellular) communications. The basic robot will therefore have no additional modules, though it is important to note that it does have wireless communication capability.
![]() For further information on learning how to make a robot, please visit the RobotShop Learning Center. Visit the RobotShop Community Forum in order to seek assistance in building robots, showcase your projects or simply hang-out with other fellow roboticists.
For further information on learning how to make a robot, please visit the RobotShop Learning Center. Visit the RobotShop Community Forum in order to seek assistance in building robots, showcase your projects or simply hang-out with other fellow roboticists.
This is a companion discussion topic for the original entry at https://community.robotshop.com/tutorials/show/how-to-make-a-robot-lesson-6-controlling-your-robot


