I am trying to get Xbee communication working for a Rover using a Macbook Pro running OSX10.6.8.
I gather now that this is designed more for PC but that it can be done on a MAC. It also seems that I first have to set up the Xbees, and I would be grateful for any help. (the ROver is working fine connected directly to the computer.)
I am trying to use Cool Term, suggested by other websites. The XBee is connected to the XBee version 2 adaptor and the USB directly to the adaptor (is this correct or do I need to have the XBee connected to the UNO board?).
Using Cool Term I tried to connect to the Xbee. Cool Term seems to connect to something “SUBmodemfa141” but I think it should say “serial port…”
WHen I type +++ I get an OK. After that I am not able to further configure the Xbee.
the directions I am following are on this website (I realize this is for OSX10.7 but I was hoping it would work for 10.6)
Coleman,
Please weigh in here if you have some idea about configuring Xbees with a MAC. I’ve gone down several dead ends so far, possibly because the Xbee adaptor or Xbee module is not exactly what other people have used on their websites.
Also, please if you could tell me EXACTLY which Xbee modules I purchased in December, as I can see that many of the applications out there for dealing with Xbee’s are very specific to particular modules. They also seem specific to the particular adaptor being used. I see that the link to the Xbee module purchased with this kit is down on your website.
Coleman
thanks very much for your attention. I really appreciate it.
We did all this as you described, uploading the program in Arduino, then connecting the Xbee (via the wireless shield, see below) and then trying commands through the serial monitor, same as we did when the robot was connected directly through the USB cable (which worked fine), but no response to the commands such as W etc.
We have the Xbee connected via the Xbee wireless shield, not through the headers.
If there are specific settings, switch positions (Xbee 1 or 2) that should be used on either the robot itself and on the Xbee wireless shield (which I believe also has a switch), for using the Xbee connected this way, please let me know.
When you refer to the serial communication method needing to be configured, where is this done. Is this within Arduino or a Mac system preference? I think this may be the problem.
The XBee modules included in the kit are series 1 and are essentially plug and play replacements to a serial cable - no configuration required other than the serial communication method (baud rate, data bits, parity, flow control).
Could you please send a screen shot of where you set this, I think MAC is different than PC unless this is part of Arduino itself?
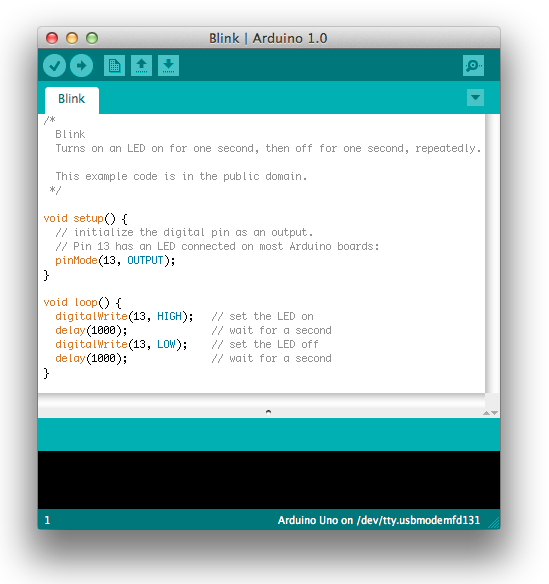
If you have the Arduino software running on your computer, there should be a serial monitor / terminal at the upper right side of the screen which allows you to send and see serial communication via a specific port. Are you able to open this window?
Should the Xbee switch be at 1 or 2 during the upload if using the RB-Ard-30 shield. What about after upload?
Should the small switch on the RB-Ard-30 shield be at USB or micro?
Should the USB serial monitor be the same as during the upload? that is, are you supposed to change anything about the serial monitor between the upload with the USB attached and using the Xbee? My serial monitor says /dev/tty.usbmodemfa141
Does this sound correct or should it say USB serial or something else?
to clarify my last question, what I meant was that the serial PORT reads usbmodem…
should the serial port setting be changed to operate through the Xbee vs, with the USB hard wired to the robot?
Coleman
Thanks, this is very helpful. We do upload sketches with the shield not attached.
How do we know what is the correct baud rate?
about choosing the right com port- the same choices come up when the Xbee is attached as when the robot is connected directly. dev/tty.usbmodemfa141
Should there be a different com port that can be selected for Xbee and if so, where do I find it. I’ve been trying to ask this question all along but no one answers it.
Once I get an answer about the COM selection and baud rate, if it doesn’t work I will send pictures.
If you’re interested in a C library for communicating with the XBee, and some command-line utilities, you might want to check out Digi’s GitHub repository at github.com/digidotcom/xbee_ansic_library. It includes a simple terminal program for testing the connection to the XBee, and other programs for using XBee modules in API mode.
Go into the samples/posix directory and type “make all” to build the sample programs. You may have to install Apple’s Xcode tools on your Mac (should be in the Mac App Store for free) if gcc isn’t already installed.
The XBee modules included in the kit are series 1 and are essentially plug and play replacements to a serial cable - no configuration required other than the serial communication method (baud rate, data bits, parity, flow control). If you have the Arduino software running on your computer, there should be a serial monitor / terminal at the upper right side of the screen which allows you to send and see serial communication via a specific port. Are you able to open this window?
If you are able to access this window, then upload the same W/A/S/D code to the rover, and then disconnect it. Connect the USB to XBee board with the XBee in place. Place the XBee onto the Rover, set the XBee switch to that side, connect the battery and turn the rover ON. Open the serial monitor - you should be able to select the baud rate. type the letter ‘W’ in the window and press enter. The robot should move forward.
If this does not work, please specify the exact step where you could not proceed and what happened.
Do you mean the Arduino XBee Wireless Shield? If yes, the module used is from series 2, which cannot communicate with the other series 1 modules we carry. On top of that, it’s the ONLY product we carry which has a series 2 XBee module (we don’t sell series 2 modules separately either). That could be your problem right there. We agree entirely that it’s highly inconvenient to have modules which look the same but are not compatible, but we’re not the manufacturer…
Since you are using the XBee shield, the XBee switch on the DFRobotShop Rover PCB has no effect.
One approach is to remove the shield when uploading a sketch to the Rover. More information about the shield can be found on the Arduino website. Once the sketch is uploaded, the shield can be put in place with the switch set to “micro”.
It should be to “micro”, but you cannot upload a sketch in this mode - you need to remove the shield when uploading a program.
You should only activate the serial monitor once the upload is complete. Be sure to choose the right COM port associated with the USB to XBee breakout board, and also the right baud rate. Also, ensure you have the XBee modules oriented correctly (on the USB to XBee board and also on the XBee shield).
If you still encounter issues, can you include clear images of your setup?
If you are uploading the w/a/s/d/ code, the baud rate is specified in the code itself (9600):
Serial.begin(9600);
Not too many people in robotics use Macs (which is what you are realizing here), and not many manufacturers support it. If you were to unplug the Rover, one of the COM ports should disappear, and if you plug the USB to XBee adapter, a new port should appear - simply use that one. If it happens to be the same name, then so be it.
Aside, if you are looking to get started in robotics, you might consider purchasing a cheap Windows-based system It does not need to be high-end at all - you can probably get a P4 or even a dual core Pentium for ~$75 - you’ll avoid a lot of headache in the future.


