

After building the "Start Here" bot I wanted to create a walking bot of some kind. I was looking for biped robot ideas on “Youtube” and quickly realized that movement was beyond my skill level and budget.
I considered Quadropod and Hexapod walkers.
There are some awesome walking bots out there, but the complexity and cost put them out of my range. I also wanted more of a human (linear) gait as opposed to the insect like walk. I had an idea about what I wanted but wasn't finding it.
Then I found this video which was exactly what I was looking for but since it didn't walk or was incomplete I still wasn't sure if it was a concept idea or incompleted project.
http://www.youtube.com/watch?v=b6jUc6C6Cz0
I first made a cardboard model (or I should say half side of a model) to see if the idea made sense.
Here is a picture of the cardboard model.
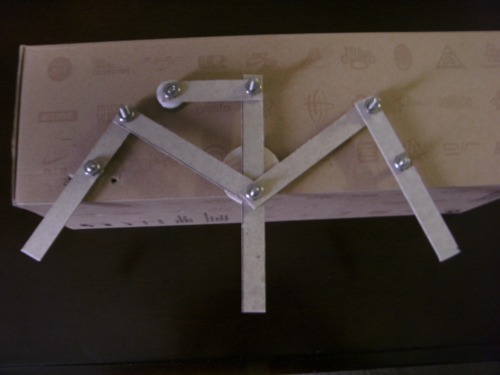
After determining that the idea had merit I purchased an old Erector Set on Ebay. I figured it would be a great way to figure out all the different parts relationships like, leg length, and these lengths in relationship to each other especially the center leg. Also how large the circular path of the center leg could be and still function.
Here is a picture of the erector set model.
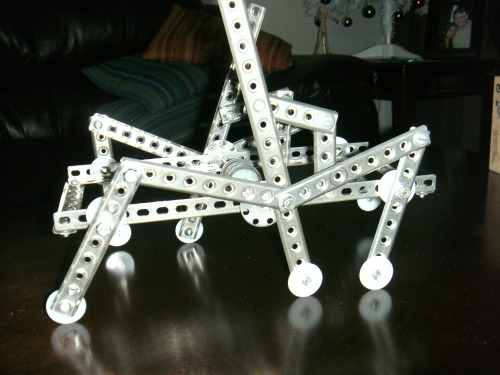
You can see how easy it is to extend or retract various parts to get the best relationship between them. The white nylon washers tightly attached to the legs are only there to protect the coffee table top. I don't have a workshop or area of any kind so all my work is done between the kitchen table, coffee table, and the living room floor, mostly the floor. The only power tools I have ia a hand drill and a dremel. The Erector Set was $20usd.
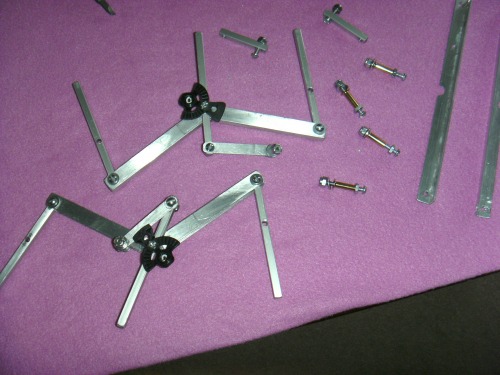
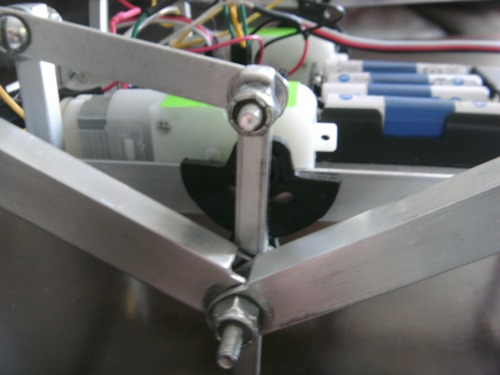
These are all the aluminum (AL) parts laid out after one of the disassemblies. The AL is standard stuff you can get at most hardware stores. Total cost on that was $15usd. The The AL was cut with a hand hacksaw. The black sprocket thingy that drives the center leg and attaches to the gear motor assembly is all that is left of the original "Start Here" kit wheels.
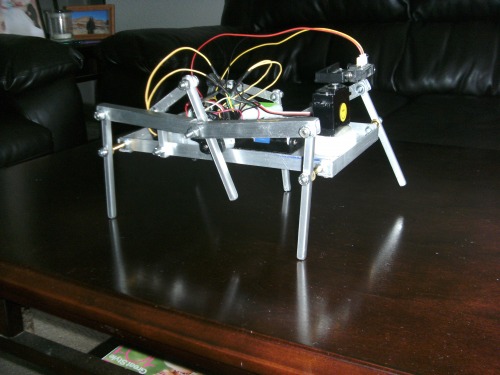
This is the first version, note the AL frame, foursided. I replaced the bottom with some better plastic I picked up out of a scrap box at a local sign making shop, got 4'x1' for $5usd, great deal for cheap plastic.
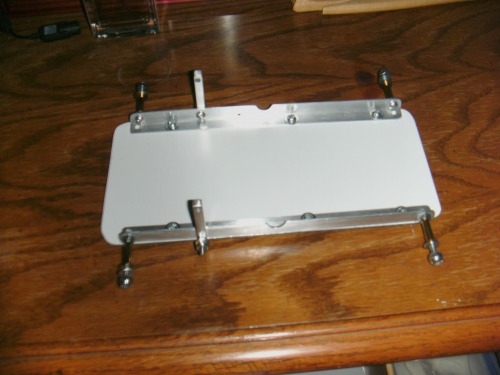
Since this new plastic base/bottom is so much stronger then the old junk stuff I found around the house, I was able to eliminate the front and back sections of the AL frame. The base plastic is a layer of black plastic sandwiched between a thin layer of aluminum on both sides and then a layer of a hard white plastic like counter top material and only an 1/8 inch thick. Awesome stuff, cuts and sands very easily. Also, there are 4 brass spacers, I found these in a junk drawer, but many places carry brass tubing in various sizes.
The Picaxe board, battery box, and gear motors are all screwed into the base or the frame. The servo/sensor and the plastic bottle cap they sit on are hot glued down. As is the on/off switch.
When I drop it from 3' high the servo/sensor assembly is the only thing that falls off, easy to hot glue back in place. Drop test done with all batteries on board.
Hey check this-
Two days ago I found this Hexapod here on LMR: https://www.robotshop.com/letsmakerobots/node/34060
This is the "Start Here Robot on a 6 leg hexapod chassis. Simply, modification of the Fritsl code to allow for turns.
- Control method: autonomous
- CPU: all picaxe
- Sensors / input devices: IR only
- Target environment: indoor, 1st stage, then carpet, then outdoor land terrain detection.
This is a companion discussion topic for the original entry at https://community.robotshop.com/robots/show/hexapod-3