


Before.JPG (1156941Bytes)
After.JPG (1171647Bytes)
SL733122.AVI (2463268Bytes)
Tug_Switch.zip (2971Bytes)
Hi. This is my first project post (but not my first project), so sorry if I've done anything wrong.
I'm not sure if I'm OK to post this, as it is an RC model, but if not then I'll take it down.
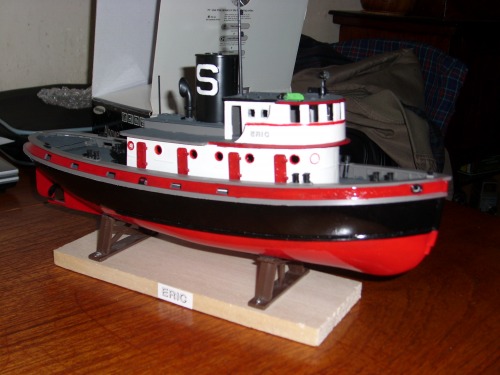
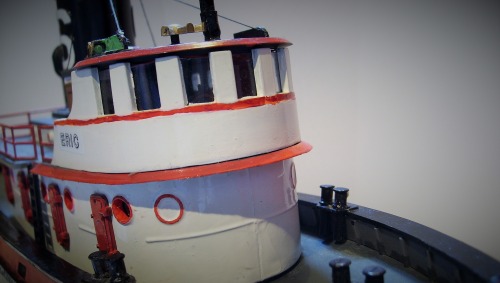
Eric is a converted static model of a new york harbour tug. A few years ago, I was given a load of bits and pieces, including a large fiberglass hull (I remote controlled this, and built a superstructure, but that is another project), some old meccano, and a Lindberg kit for a diesel tug. I left it on the side for a while, and built up the hull, until a couple of years ago I decided to try and remote control it.
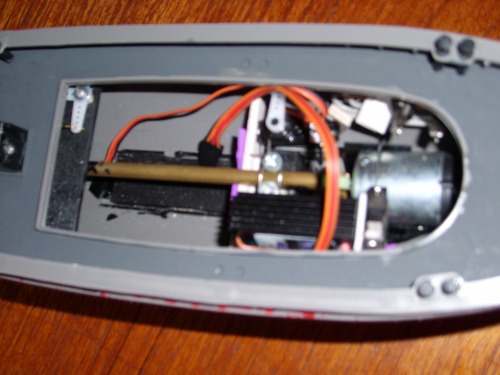
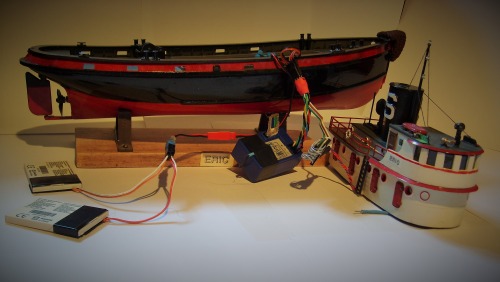
This took about a year, and the layout inside you can see in the first picture. In this form, I was running it off 8 AAA rechargables (AAs would have sunk it), and it was fitted
out with a standard-sized reciver and a micro-servo for steering. For power, I was usinga motor I allready had, which was a bit on the heavy side and had a brass gear fixed to the shaft, geared onto the propshaft using a gear from a microwave oven. The motor was controlled by a large, heavy, 15-amp speed controller, which was total overkill as the motor drew less than an amp as stall current.
The motor and speed controller were mounted upfront, so to balance it I needed weight at the back. To do this, I superglued some large, heavy nuts at the back.
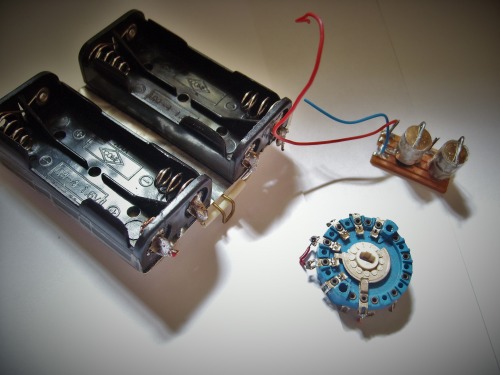
Apart from the drivetrain, Eric has LED lights in the interior, the searchlight, and the two navigation lights, which are powered by some pound-shop watch batteries, and turned on and off using a rotary switch (operated by a screwdriver down the funnel). The aerial is some coil wire wound up the mast, and plugged into the reciver using some pins
from an old cannon plug. The deck was arranged so that it could be removed if need be, using a 3 hidden screws; one at the back, one in the middle through the winch, and one that’s not really a screw in the bollards at the front (I threaded one of the bollards using a die, and it screws into another bit of microwave). The deck was sealed using a bit of insulating tape (this was just for the day, but it stayed that way for probably about two years).
The date I’d planned to get it ready for was that year’s model boat club regatta (I’m a member of the local model boat club). I succeded in this, but most of the bodges needed to get it ready were left as they were until a couple of weeks ago.
As it was, Eric was slow, a bit noisy (due to bad mesh on the gears), low in the water, and cramped inside. It looked good on the water, and the batteries lasted for ever, but it wasn’t ideal. The inside can be seen in the first pic. (please note that this is without the batteries or the reciver)
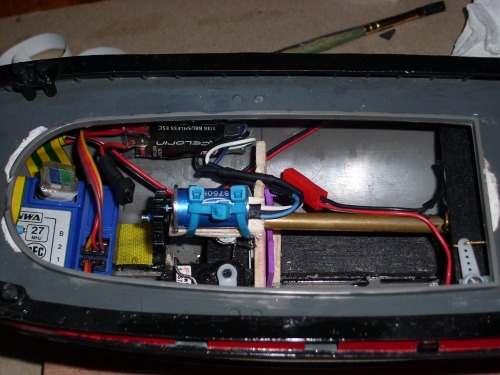
Therefore, I decided to convert it to brushless, on the basis that it would cut the weight, increace the power, and increace the space inside. I ordered a micro brushless motor and ESC before christmas, but they finally arived a two weeks ago. These cost me about £20 from a local hobby shop. I took off the deck, removed the old motor and ESC to use elsewhere, and took the gear off the shaft. I mounted the motor above the stern tube, and geared it down with some gears for a scalextric car scrounged from school. The ESC needed less voltage, so I cut down to 4 AAAs in the back.
The loss of weight at the front meant that I could get rid of the nuts at the back (which had gone rusty), cutting the weight even more.
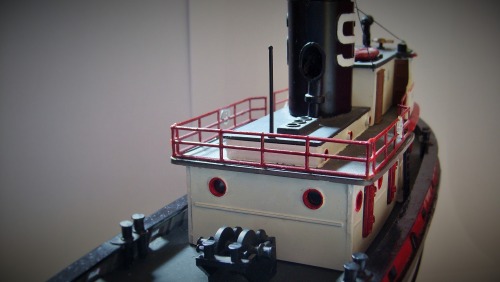
Once I was happy with it's poise in the water, I put the deck back on and sealed it down using some spare self-adhesive craft foam, and that's how it is now. I haven't yet run it on a pond (I have now) , but in the bath it appears to have far more power, and can now tow stuff. The second picture is of it now, with all it's batteries and everything fitted.
Thanks for reading. I might yet replace the radio, make a working winch, remote controlled lights, etc. but it will be staying as it is for a bit. If I've done anything wrong concerning the rules of the site, I apologise.
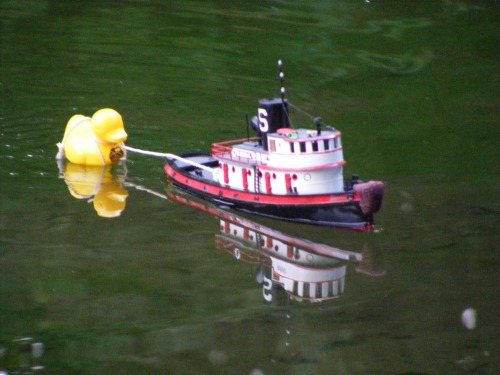
The picture at the top is before the conversion, as is the lpic with the duck.
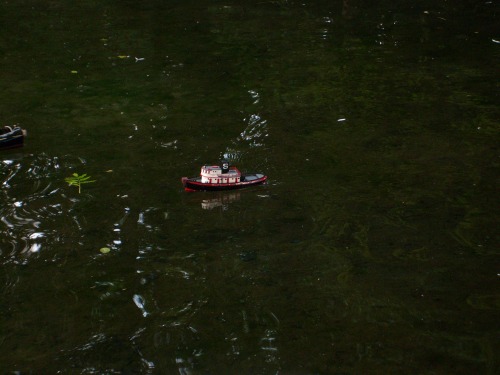
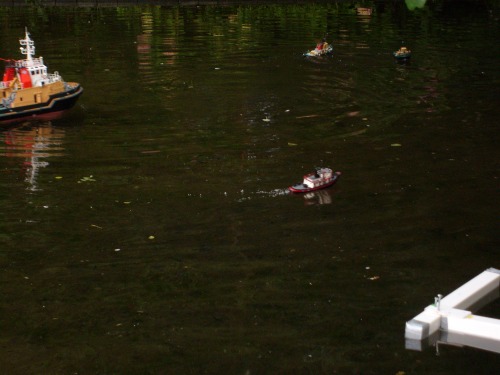
The pics of it on the pond are new (apart from the one with the duck).
Concerning the cost and time: This project was done as and when I had time, so I'm not sure how long it took. I started working on it about 2 years ago, and left it for quite a while after I got it working about a year or so ago. To do the conversion took less than a week of on-and-off work, so it probably adds up to about a day's worth of work.
As for cost, this (like my other projects), was done on the cheap, using mostly stuff I had. The only parts I bought were the speed controllers (the first was about £30, the second (including motor), was £20. The first one I'll use for something else now), The micro-servo (about £10), the stern tube and prop (about £3) and the batteries (about £10). As it is now, including all the batteries, that makes £43. I allready had the RC gear, and the rest either I was given, had already, or stripped out of an old microwave.
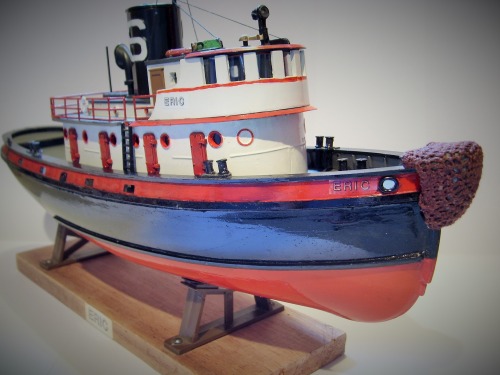
A quick note: I've just noticed that in the top photo eric's missing the rigging and the bow fender. In case anyone's interested, the origeonal bow fender supplied with the kit looked like a false nose, so I politely asked my sister to crotchet a cover for it. She did, so that made it look better (in my opinion).
UPDATE!
I had a chance to run it with it's new setup, and get some video. It seemed to work fine. I was running it for 2 hours, and didn't flatten a set of batteries. It had plenty of speed and power, but was still controllable and manoverable at low speed. The range on 27mhz was perfectly good too. The only slight problems I had were top-heaviness, which I temporarily solved using a pebble, and the fact that it seems to have more power going backwards than forewards.
Video: Although I took a fair bit of video, I've only uploaded one, as the rest exeed the upload limit. I haven't got a youtube account, so I can't embed it (I might get one in a bit, but I currently don't). Also, they don't have the LMR logo in them. I forgot about this when I took the videos. I'll try adding it later.
ANOTHER UPDATE... And a question.
I've just given eric a few new tweaks. No pictures at the moment; I'll sort that in a bit. I've also got a youtube account now, so I'll be putting videos there (at the moment, there's just a video of my A2 electronics project, an analog synth. I might put a page up on here about that too, if anyone's interested). Anyhow, the tweaks:
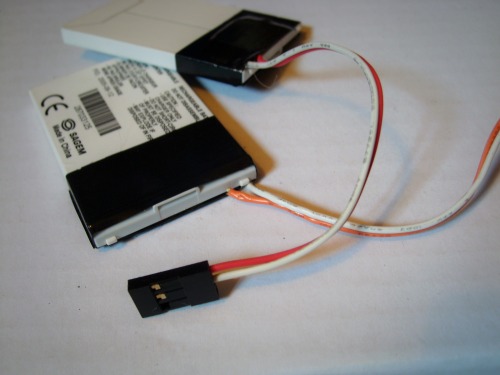
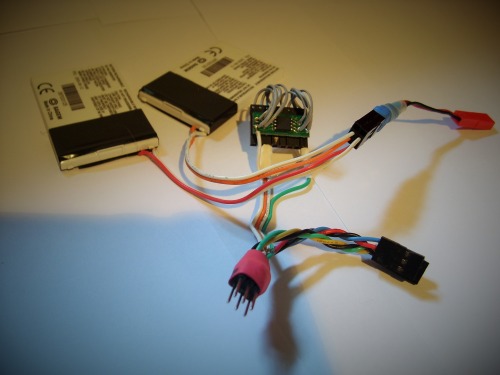
I'd been having problems on the tug with the new ESC; It has a tendency to cut if you try and go flat out. I figured that this was due to the fact that it was running off 4 AAAs, rather than a lipo pack, as recommended, so the input voltage was a bit low, and pushing it flat out was pulling the voltage down below the low voltage cutoff on the ESC. I'd figured this for a bit, but I've only just got round to sorting it, because of A-levels. I've now replaced the AAAs with 2 Li-ion mobile phone batteries, giving a total of ~8.4V, meaning it stays comfortably over the voltage cutoff point, so I now... Still can't hit full power. Such progress! However, it's for a different reason now; the extra voltage gives the motor more punch; so much so, that if I try and go flat out, it'll push the back end underwater, and sink the boat. Tugboat hulls aren't really designed for speed. I debated a while on the best way to connect to the batteries, and experimented with contacts and stuff, but ended up just soldering to them. I dobbed a bit of solder paste on the terminal, tinned the wire, and worked as quick as possible, to keep the battery cool, and it seems to have worked.
The other tweak's also where I need a hand. Up to now, the lights in the superstructure have been running of an entirely separate circuit; there's been 4 watch batteries and a rotary switch stuck in the top for them. The problem with this is that it doesn't exactly help the top heaviness, the batteries go flat, and, to be honest, it seems a bit messy, as I only did it to get it going for a boat club regatta. I also have to bring it in to turn the lights on and off. So, now, as I have time on my hands again, I decided to re-wire it, and connect all the lights to a SMD ATTiny on a little breakout board (there's no need whatsoever for it to have been SMD; DIP would probably have ended up smaller and easier, but I wanted an excuse to try SMD soldering). This board also connects to both channels of the 2ch radio reciever. I've wired it all up with header pins and sockets, as it'll probably change again when I switch to 9ch 2.4ghz, but I've got to build that first, so till then, it's like it is. The basic plan of operation is that, when the boat's stationary (with the throttle neutral), pushing the steering stick to the extremes increments and decrements the lights, which are set to count up in binary. The basic code works, and I've ported it over to the ATTiny from an arduino, however, I need to be able to calibrate the system to different trim setups on the fly, so I wrote a calibration subroutine that can be run, detecting the neutral position on the throttle, and the max/min on steering, and stores the variables to the memory. So far, so good; the code works. The problem comes when I try and save these values to eeprom, so I don't have to re-calibrate everything everytime I turn it on.
The Problem:
On my current code, I can't get any sort of EEPROM action without it stopping working. and I mean anything; Any reference to the EEPROM libary, and it breaks. Even if I put the #include <EEPROM.h> in, then comment it out. It still breaks my code; once it gets past the calibration subroutine, I can no longer get any sort of response. Initially I though this was because of the ATTiny, but I ran the code on an arduino uno and got the same result. Anyone any ideas? I've attached the current version of the code (there's no reference to the EEPROM exept the commented out #include at the moment) for anyone to look at, and try and make sense of (There's a untested, but fully commented version & a less commented, but tested version attached)
Adittionally, there's a value in my code (underlined here: SteerMax = (pulseIn(SteerIn, HIGH, 25000) - 15);) that breaks the programme if set to anything other than 15. I can't figure out why; all it does is offset the max/min values from the calibration routine, to make the switching more reliable.
If anyone can shed any light on what's going on with this, I'd be grateful.
Additional random note:
Next thursday, I'll be finding out my A-level results, and whether or not I can get into uni. If all goes well, I'll be spending the next four years officially building robots and other random stuff on a mechatronics course at the university of leeds! Therefore, you should be seeing more of me on this site...
Additional note about photos:
Sorry about the lack of photos of anything that I've just done. It's dark at the moment, so I'll wait 'till the morning to get some decent light to take pictures in, and post them then. I'll also try and take some more video if it works, and even more video if it sinks, catches fire, or does anything else entertaining like that.
Lots of PHOTOS!
Well, I've taken some photos of the stuff. Quite a few of them. So, here they are:
The new batteries:
The ATTiny board:

a few shots of the whole thing:

What came out:
and what went in:
All wired up:
Lights on (the inside lights are on, they just don't show up all that well):

and in the hull (No proper mounting yet; just slotted in):

Aditional random thing;
Although it doesn't show in any of the pictures, I finally got tired of using blu-tack to hold the superstructure on, so the lid's now held down by 8 fairly strong magnets, salvaged off a gas fire surround. Holds it down nicely.


